/// FIELD NOTES FROM A SELF-AWARE GAME SITE
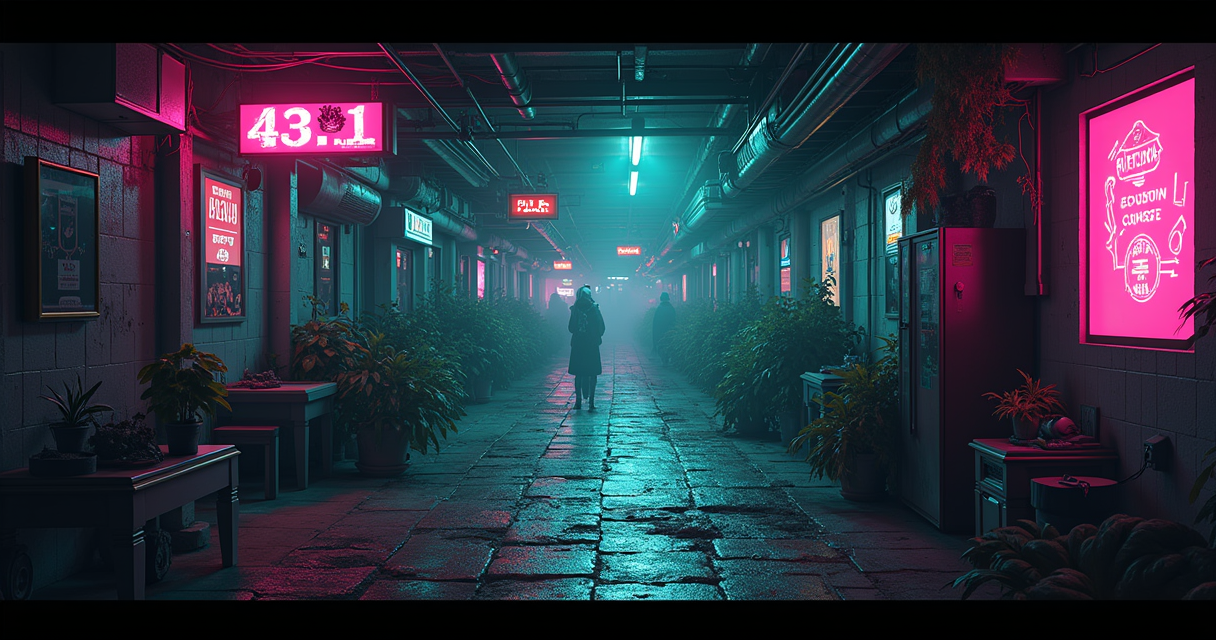
Batocera 43.1 Download 2026: 12 Steps to USB, 30 Min
Type batocera download into any search engine and you will be handed a buffet of half-truths: outdated version numbers, sketchy mirrors promising “faster speeds,” and video tutorials filmed in 2021 that still tell you to flash version 5.something. This is the corrective. As of this writing, the current stable release is Batocera 43.1, published on 30 May 2026, and the only download URL you should be typing into your address bar is batocera.org/download. Everything else is optional, and most of it is a trap.
Batocera is a free, open-source, immutable Linux distribution built for one job: turning a PC, a Raspberry Pi, a Steam Deck, or a small pile of e-waste into a console that boots straight into RetroArch and EmulationStation. It costs nothing. It asks for nothing. There is no license key, no account, no “pro tier.” The entire source tree lives on GitHub, which means the thing you are about to download is auditable by anyone who can read C and shell. That is rarer than it should be.
This tutorial covers the whole pipeline — picking the correct image, downloading it without getting fleeced, verifying it actually arrived intact, writing it to a USB stick or SD card, surviving the first boot, and ending with a complete, working configuration file you can paste in and forget. Twelve numbered steps, roughly thirty minutes of wall-clock time, most of which is spent watching a progress bar. Let us get the pedantry started.
What Batocera 43.1 Actually Is
It Is Free, Open-Source, and Immutable
Let us dispose of the marketing question first, because there is not any marketing. Batocera is a completely free, completely open-source retro-gaming distribution. The whole codebase lives in the open at github.com/batocera-linux/batocera.linux, maintained by the Batocera Linux team as an open collective. There is no upsell. If you want to support the project, you can donate or sponsor it on GitHub, but the software does not hold a gun to your wallet — there is no mandatory dollar amount, no nag screen, no crippled free version. This is the part that confuses people who have spent too long in the app-store economy: the price is genuinely zero, and the reason it is zero is that the code is yours to read.
The other architectural fact worth internalizing is that Batocera is immutable. The operating system lives on a read-only partition; your games, saves, scrapes, and configuration live on a separate writable area called userdata. You do not “install software” onto Batocera the way you do on a desktop. You flash an image, and the system either is that image or it is a clean upgrade to a newer image. This is why it is nearly unbrickable and why a botched ROM folder cannot take down the OS. It is also why the download step matters so much: the image is the operating system, in its entirety.
The Version Numbers, Decoded
Batocera uses a flat, sequential version scheme now, and a little chronology keeps you from downloading something a year stale. Batocera 41 shipped on 6 January 2025, opening the 2025 cadence and bundling a Libretro Fceumm core from the 12 September 2025 build. Batocera 42 followed on 12 October 2025 with Genesis Plus GX updated to the 21 December 2025 build. Batocera 43 arrived on 8 May 2026, refreshing Libretro cores including MAME2003-Plus (build dated 16 January 2026). And the one you want, Batocera 43.1, landed on 30 May 2026 specifically to fix emulation issues that had crept into EmulationStation in the 43 release. A point release that exists to un-break the front-end is exactly the release you want to be running.
If you ever stumble across references to “Batocera 5.26” or similar, you have found a fossil from the project's older versioning era, back when it tracked a 5.x line. The changelog at batocera.org/changelog is the authoritative record of what changed and when; consult it rather than a forum post from three years ago. For the curious, version 43.1 also bumped some of the heavy hitters: Xenia, the Xbox 360 emulator, to build 1d7973a (10 June 2025), and Xemu, the original-Xbox emulator, to v0.8.96.
What It Deliberately Leaves Out (the Law)
Here is the part the breathless tutorials skip. Batocera contains no games. It contains no console BIOS files. This is not an oversight; it is the entire legal basis on which the project can be distributed at all. The emulators are clean-room or open-source software and are perfectly legal to ship. The copyrighted firmware and the cartridges are not, and Batocera does not touch them. When you download Batocera, you are downloading a front-end, a set of emulator cores, and a Linux userland — and nothing that belongs to Nintendo, Sony, Sega, or Microsoft.
What you do with the userdata partition afterward is between you and the law of your jurisdiction. The defensible position — and the only one this site will describe — is dumping BIOS and games from hardware and media you own. If you would rather buy a device with this work already done in a legally grey factory somewhere, that is a different article; our Retroid Pocket 6 verdict covers the handheld end of that spectrum. Batocera's job is to provide the engine. The fuel is your responsibility.
Prerequisites: Hardware and Software
Hardware: What You Can Flash It Onto
Batocera is not one image; it is a family of images, one per supported architecture. The big three you will actually choose between are x86_64 (any 64-bit Intel or AMD PC, including mini-PCs, old laptops, and the Steam Deck, whose APU is x86_64), the Raspberry Pi line (Pi 5, Pi 4, Pi 400, Pi 3, Pi Zero 2 W, and various Compute Modules, all aarch64), and a long tail of single-board computers and handhelds that the official download page enumerates precisely. For a desktop or living-room build, x86_64 is the path of least resistance and the most horsepower; for a Pi, match the exact image to the exact board.
Minimum sane specs for the x86_64 build: a 64-bit CPU (anything from the last decade), 2 GB of RAM as a hard floor with 4 GB or more recommended, and a GPU that the kernel can drive — Intel and AMD graphics work out of the box, while NVIDIA cards need a one-line boot flag we will cover later. If you are eyeing a dedicated FPGA route instead of software emulation, that is a genuinely different philosophy; see our MiSTer Multisystem 2 breakdown for where the hardware-accuracy crowd lives. Batocera and MiSTer are not competitors so much as different religions.
Storage: The Part People Cheap Out On
This is where most first-time installs go wrong, so read it twice. You need two things conceptually, even if they live on one physical device: a place to write the boot image, and a place to keep games. The documented version 38 image was about 3 GB compressed and roughly 8 GB uncompressed, and 43.1 is in the same neighborhood, so 8 GB is the absolute floor for the OS alone. In practice, buy a 16 GB drive at minimum and a 32 GB or larger drive if you want any meaningful game library. On x86_64, a USB 3.0 flash drive or, better, a small SATA or NVMe SSD is ideal. On a Raspberry Pi, use an A2-rated microSD card — the A2 spec is about random I/O, which is what a front-end loading thousands of game entries actually stresses, and a counterfeit “256 GB” card from a marketplace you have never heard of will corrupt itself within a week.
One more storage truth: on first boot, Batocera expands its writable partition to fill the drive. Flash it to a 256 GB SSD and you get a 256 GB games partition; flash it to an 8 GB stick and you get almost nothing left over. Size the target to the library you intend to keep, not the image you are about to write.
Software: Tools and Versions
You need three pieces of software and one of them you almost certainly already have. The image writer is the headline tool: use balenaEtcher 1.18 or newer, Raspberry Pi Imager 1.8 or newer, or — if you are comfortable in a terminal and value not bricking the wrong disk — the venerable dd. All three can write a .img.gz directly; Etcher and Imager decompress on the fly, and we will pipe through zcat for dd. Second, you need a SHA-256 utility to verify the download: sha256sum on Linux, shasum -a 256 on macOS, and CertUtil -hashfile on Windows, all of which ship with the OS. Third, optionally, 7-Zip 22 or newer on Windows if you ever want to decompress the image by hand.
And the most important “version” of all: the payload itself, Batocera 43.1, dated 30 May 2026. If your downloaded filename carries an older sequence number or an earlier datestamp, you have the wrong file. Everything downstream assumes 43.1. If you specifically need the older 38 image for legacy hardware reasons, we documented that path separately in our v38-to-USB walkthrough, but for a fresh install in 2026 there is no good reason to start there.
Steps 1–2: Pick the Right Image
Step 1 — Identify Your Architecture
Step 1: determine exactly what you are flashing onto, and write down its architecture before you download anything. The rationale is brutal and simple: a Raspberry Pi image will not boot on a PC, and a PC image will not boot on a Pi, and the download page offers both within two clicks of each other. For a PC, a mini-PC, an old laptop, or a Steam Deck, you want x86_64. For a Raspberry Pi, you want the image named for your exact board — “Raspberry Pi 5” and “Raspberry Pi 4” are different downloads, and picking the wrong one yields a rainbow screen and a wasted half hour. If you are installing onto a handheld, confirm whether its SoC is supported at all before you get attached to the idea; not every cheap Android handheld has a Batocera target, and some that do are second-class citizens.
If you are torn between a Pi build and a cheap dedicated handheld that already runs a curated front-end, that is a real fork in the road. Our Miyoo Mini Plus versus RG35XX comparison lays out the trade-offs for the pocket-sized end, where battery life and HDMI-out matter more than raw emulation ceiling.
Step 2 — Stable 43.1 vs Nightly
Step 2: choose the stable 43.1 release, not a nightly build, unless you have a specific reason and a tolerance for breakage. The download page surfaces stable images by default; nightlies are a separate, clearly labeled channel. The rationale: stable releases are versioned, checksummed, and — in the case of 43.1 — explicitly patched to fix the EmulationStation regression in 43. Nightlies are bleeding-edge snapshots that exist so the developers and testers can catch problems before they reach a stable tag. They are not where a first install should begin. The only legitimate reasons to grab a nightly are that your hardware is so new that stable does not yet support it, or that you are chasing a specific just-merged fix. Otherwise: stable, 43.1, done.
Reading the Filename
Batocera's filenames are self-documenting if you know the grammar. The historical version 38 file was batocera-x86_64-x86_64-38-20231014.img.gz: the architecture, the version number 38, and a 20231014 datestamp, compressed as a gzipped raw disk image. A 43.1 x86_64 download follows the same template — architecture, then the version, then a build datestamp, then .img.gz. The exact datestamp suffix on any given release is whatever the build farm produced, so do not hard-code it from memory; read it off the actual file you downloaded. The .img.gz extension is the important part: it tells you this is a gzip-compressed raw image, which is precisely what every writer in this guide expects.
Steps 3–5: Download Batocera 43.1
Step 3 — The Official Download Page
Step 3: go to the one canonical source, batocera.org/download, and select your device from the list. The rationale here is part security, part sanity. The official page lists every supported target — PC, Steam Deck, the various Raspberry Pi models, and the rest — and hands you the matching image plus its integrity data. It is the single source of truth maintained by the project itself. Every other “download Batocera” link on the open web is, at best, a mirror of this page and, at worst, someone repackaging the image with an extra surprise inside. Bookmark the real URL. Type it by hand. Do not click the first sponsored search result, because the people who buy ads against open-source software names are rarely doing it out of generosity.
Step 4 — Direct, Torrent, or Mirror
Step 4: choose your transport — direct HTTP, BitTorrent, or a community mirror — in that order of preference. Direct download from the official page is the default and is correct for the overwhelming majority of users. If the direct download crawls, Batocera has shipped official torrent support since version 40, so any release from 40 onward — 43.1 included — can be pulled over BitTorrent, which is both faster on congested links and self-verifying by design. A community-maintained mirror also exists for people who cannot reach the official repository at usable speeds; one such mirror has circulated in the r/batocera download-mirror thread. Mirrors are a legitimate tool when the main server is slow or geo-throttled. They are also a perfect vector for a tampered image, which is exactly why Step 6 exists and is non-negotiable. Use a mirror if you must; trust it only after the hash agrees.
Step 5 — Grab the Checksum Too
Step 5: download the published checksum alongside the image, from the same official page, in the same session. The rationale is that a checksum you fetched from the project is the reference you will compare your downloaded image against. Most releases publish a SHA-256 (and sometimes a SHA-1 or MD5, which you can ignore in favor of SHA-256). Save it next to the image. The single most common mistake here is downloading the image, getting impatient, and skipping the tiny text file that is the entire point of the exercise. The checksum weighs a few dozen bytes and takes one second. Get it now, while you are still on the page that vouches for it, because a checksum from a mirror that also served you the image proves nothing.
Steps 6–7: Verify Before You Flash
Step 6 — Why Verification Is Not Optional
Step 6: understand that verification catches two different failures, and you care about both. The first failure is corruption: a multi-gigabyte download that dropped a few bytes will flash without complaint and then fail to boot in a way that wastes an hour of your life before you suspect the image. The second failure is tampering: an image from a mirror or a torrent that someone has modified to include something you did not ask for. A SHA-256 comparison detects both with equal indifference. The hash is a fingerprint; if the fingerprint of your file does not match the fingerprint the project published, your file is not the project's file, full stop. This step costs about ten seconds and is the difference between “Batocera does not work” and “I downloaded a broken file,” which are very different problems to debug.
Step 7 — Running the Hash
Step 7: compute the SHA-256 of your downloaded image and compare it, character by character, to the published value. On Linux, the tool is sha256sum; on macOS it is shasum -a 256; on Windows it is CertUtil -hashfile yourfile SHA256. Point it at the .img.gz exactly as downloaded — do not decompress first, because the published hash is for the compressed file. Here is the Linux version, which prints the hash next to the filename:
$ sha256sum batocera-x86_64-43-20260530.img.gz
4f9a3c...e1b7  batocera-x86_64-43-20260530.img.gz

# Compare it against the checksum file you downloaded in Step 5
$ cat batocera-x86_64-43-20260530.img.gz.sha256
4f9a3c...e1b7  batocera-x86_64-43-20260530.img.gz
(The hash above is truncated for the page; a real SHA-256 is 64 hexadecimal characters. Your actual values will be full-length and specific to the 43.1 build you pulled.)
Reading the Result
The decision rule is binary and unforgiving. If the two strings are identical — and they must be identical across all 64 characters, not “close” — your image is authentic and intact, and you may proceed to flashing. If they differ by even one character, do not flash it. Delete the file and download it again, preferably from the official page over a direct connection rather than the mirror that just handed you a bad copy. A mismatch is never something to “try anyway.” It means the bytes on your disk are not the bytes Batocera released, and writing them to a boot device is, at best, a guaranteed waste of time. There is no scenario in which a failed checksum is safe to ignore.
Steps 8–10: Flash to USB or SD
Step 8 — Identify the Target Drive
Step 8: positively identify the target drive before you write a single byte, because this is the step that eats people's photo libraries. An image writer does not move files onto a disk; it overwrites the entire disk, partition table and all. Point it at the wrong device and that device's previous contents are gone — not in a recycle bin, gone. On Linux, list your block devices and find the one whose size matches your USB stick or SD card:
$ lsblk -o NAME,SIZE,TYPE,MOUNTPOINT
NAME        SIZE TYPE MOUNTPOINT
sda         931G disk
├─sda1      512M part /boot/efi
└─sda2      930G part /
sdb          29G disk
└─sdb1       29G part /media/usb
nvme0n1     477G disk
└─nvme0n1p1 477G part /home
In that output, sda (931 GB) is the system drive and nvme0n1 (477 GB) is the internal SSD — touch neither. The 29 GB sdb is the USB target. The rationale for this paranoia is that the destination in the next command is the whole disk node (/dev/sdb), not a partition (/dev/sdb1), and a typo of one letter writes to your operating system instead. Match the size, confirm the mount point, and only then proceed.
Step 9 — Etcher, Imager, or dd
Step 9: pick a writer appropriate to your nerve level. For most people, balenaEtcher is the right answer: it reads the .img.gz directly, refuses to target your system drive by default, and validates the write automatically. Raspberry Pi Imager is equally fine, especially for Pi cards. If you prefer the terminal and have completed Step 8 honestly, dd piped through zcat decompresses and writes in one motion:
# Linux: decompress and write in a single pipe
$ zcat batocera-x86_64-43-20260530.img.gz | sudo dd of=/dev/sdb bs=4M status=progress conv=fsync

# macOS: gzcat plus the raw disk node for speed
$ gzcat batocera-x86_64-43-20260530.img.gz | sudo dd of=/dev/rdisk4 bs=4m
The conv=fsync on Linux forces the data to physically land before dd reports success, which matters because the kernel will happily lie about a “finished” write that is still sitting in a buffer. The bs=4M block size is a sane throughput default. On macOS, rdisk rather than disk bypasses the buffer cache and is dramatically faster.
Step 10 — Write and Validate
Step 10: write the image, let the tool validate it, and do not yank the drive early. Etcher and Imager validate automatically — they re-read the written data and compare it to the source, which catches a failing USB stick before it catches you. If you used dd, the conv=fsync handled the flush, but you should still run sync once more and wait for it to return before unplugging. The rationale is the same as the checksum: a write that looks done but is not yields a drive that boots halfway and then panics. Validation adds a minute. Re-flashing after a mystery failure costs far more. When the tool reports success and validation passes, the drive is ready.
Steps 11–12: First Boot and Setup
Step 11 — Boot Order and Secure Boot
Step 11: insert the drive into the target machine and tell the firmware to boot from it, which on a PC means a detour into the BIOS/UEFI. Reboot, hit the firmware key during POST — usually Del, F2, F12, or Esc depending on the board — and set the Batocera drive first in the boot order. Two settings trip people up. First, disable Secure Boot: Batocera's kernel is not signed for Microsoft's Secure Boot chain, and with it enabled the firmware will silently refuse to boot the drive. Second, on older or quirky boards, you may need to toggle between UEFI and Legacy/CSM boot modes; Batocera supports both, but the firmware has to be pointed at the right one. On a Raspberry Pi there is no BIOS — the Pi boots from whatever card is in the slot — so Step 11 collapses to “insert card, apply power.”
Step 12 — Filesystem Expansion and Setup
Step 12: let the first boot finish completely before you touch anything, because it is resizing the filesystem and an interrupted resize is a corrupted partition. On the very first boot, Batocera grows its userdata partition to fill the drive, then drops you into EmulationStation. This can take a couple of minutes and may include a reboot; that is normal. Do not pull power, do not get impatient, do not assume it has hung. Once you reach the EmulationStation interface, plug in a controller and follow the on-screen prompt to map its buttons — Batocera recognizes most USB and Bluetooth controllers automatically. From there, set your language, timezone, and keyboard layout in the main menu. The rationale for patience is mechanical: the resize is a one-time disk operation, and the one time it runs is the one time an interruption can leave you reflashing from Step 8.
Confirming the Version
Trust, but verify — including verifying that you are running what you think you are running. Batocera enables SSH by default; the hostname is batocera.local, the user is root, and the default password is linux. From any machine on the same network:
$ ssh root@batocera.local
# default password: linux

[root@BATOCERA]$ batocera-info
# prints CPU, RAM, GPU, and the running Batocera version

[root@BATOCERA]$ batocera-es-swissknife --version
# the EmulationStation/front-end utility, handy for scripted checks
The version string should read 43.1. If it does not — if you somehow flashed an older datestamp — this is the moment to discover it, before you have poured a game library onto the drive. The EmulationStation main menu shows the same version under its system-information screen for anyone who would rather not open a terminal. Change that default password, by the way, the instant the machine is exposed to a network you do not fully control. “root / linux” is convenient precisely because it is well known, which is also why it is the first thing a hostile script on your LAN will try.
Adding Games, BIOS, and Cores
The roms Folder and the share Partition
Everything you add lives under /userdata, the writable partition that survives reboots and, crucially, survives updates. Games go in /userdata/roms, organized into one subfolder per system: /userdata/roms/snes, /userdata/roms/megadrive, /userdata/roms/psx, and so on. The folder names are not suggestions — Batocera maps each one to a specific system and its default emulator, so a SNES ROM dropped into the nes folder simply will not appear where you expect. After copying games in, either reboot or use the EmulationStation menu to update the game lists so the front-end rescans. The official Batocera wiki publishes the canonical folder-name-to-system mapping; when in doubt, consult it rather than guessing.
BIOS Files and Cores
Some systems emulate cleanly with no firmware; others — the PlayStation, the Sega CD, the Neo Geo — require a BIOS file you must supply yourself, for the legal reasons covered earlier. BIOS files go in /userdata/bios, and Batocera includes a BIOS-checking screen in its menus that lists exactly which files each installed system wants, with their expected checksums. Cores are the emulator engines, most of them from the Libretro project, and Batocera ships a curated set per system already. The research bears out how actively these move: NES runs on Fceumm (a September 2025 build in the 41 era), Genesis on Genesis Plus GX (a December 2025 build by version 42), arcade on MAME2003-Plus (a January 2026 build in 43). If you want to understand which core to pick for which system and why, our deep-dive on installing 200 RetroArch cores is the companion piece to this one.
Copying Over the Network
You do not need to keep shuttling the drive between machines. Batocera exposes /userdata as a network share over Samba — visible as //batocera.local/share — and accepts SSH and rsync. To move a folder of SNES ROMs from your desktop straight into place:
# Mount the Batocera share interactively (SMB)
$ smbclient //batocera.local/share -U root
# password: linux

# Or push a folder over rsync, which resumes and verifies
$ rsync -av --progress ./snes/ root@batocera.local:/userdata/roms/snes/
The rsync approach is the one to internalize, because -av preserves structure and prints what it is doing, --progress shows per-file status, and rsync only transfers what is missing or changed — so re-running it after adding a few games copies only the new ones. For large libraries this is the difference between a coffee break and an afternoon.
Common Pitfalls and Their Fixes
Flashing the Wrong Disk
Pitfall one: writing the image to your system drive or an external backup disk instead of the USB target. This is the catastrophic one because it is silent and irreversible — the writer does exactly what you told it to, which happens to be “erase the wrong device.” The fix is procedural, not technical: always run the lsblk identification from Step 8, always match the size of the target to the physical device in your hand, and prefer Etcher or Raspberry Pi Imager, both of which hide or block system drives by default. If you use dd, read the of= argument out loud before pressing Enter. There is no undo for this mistake, so the entire defense is to not make it.
Counterfeit and Slow Media
Pitfall two: trusting a cheap, counterfeit, or worn-out USB stick or SD card. The symptoms are maddening — a flash that “succeeds” but fails validation, an OS that boots once and then corrupts, random freezes that look like emulator bugs but are actually a dying flash controller. The fix is to spend the extra few dollars on name-brand media from a vendor you trust, choose A2-rated microSD for Raspberry Pi builds because random I/O is what a front-end hammers, and run the writer's validation step rather than skipping it. A fake “512 GB” card that is really a relabeled 16 GB controller will pass a casual look and fail catastrophically once you exceed its real capacity. Validation in Step 10 exists precisely to catch this before your save files do.
Skipping the Checksum and the Wrong Arch
Pitfall three is skipping verification; pitfall four is downloading the wrong architecture; pitfall five is leaving Secure Boot on. All three are the same disease — impatience — and all three have trivial cures. Skipping the SHA-256 check means a corrupt or tampered image flashes cleanly and fails mysteriously; the fix is Step 7, ten seconds, no exceptions. Downloading a Pi image for a PC (or vice versa) yields a drive that the firmware flatly refuses or that paints a rainbow screen; the fix is Step 1, confirm the architecture before you download. And leaving Secure Boot enabled produces a machine that ignores your perfectly good Batocera drive and boots straight back into whatever it booted before; the fix is Step 11, disable Secure Boot in the firmware. None of these are hard. All of them are common, because each one is a step that feels skippable and is not.
Interrupting the First Boot
Pitfall six: pulling power during the first-boot filesystem expansion. The first boot resizes the userdata partition to fill the drive, and that resize is the one disk operation in this entire process where an interruption causes real corruption rather than a simple retry. People see the screen sit for ninety seconds, assume it has frozen, and cut the power — and now the partition table is half-rewritten. The fix is patience: give the first boot a full few minutes, expect a possible automatic reboot, and only intervene if it has genuinely sat motionless for a long while. If you did interrupt it and the system will not come up, the recovery is to reflash from Step 8; there is no partial fix for a half-resized filesystem.
Troubleshooting Table
The Table
Most post-flash problems fall into a dozen recurring shapes. The table below maps the symptom you actually observe to its most likely cause and the fix that resolves it the majority of the time. Work top to bottom; the entries are roughly ordered from “most common” to “most annoying.”
| Symptom | Likely Cause | Fix |
|---|---|---|
| “No bootable device” at power-on | Boot order wrong or Secure Boot enabled | Enter firmware, set Batocera drive first, disable Secure Boot |
| Black screen after the boot logo | GPU driver mismatch (often NVIDIA) or bad flash | Add nvidia-driver=true to batocera-boot.conf; re-verify and re-flash |
| EmulationStation crashes on launch | The ES regression shipped in Batocera 43 | Update to 43.1, which exists specifically to fix it |
| Image fails to flash or fails validation | Corrupt download or failing USB/SD media | Re-check SHA-256; try a different, name-brand drive |
| Checksum does not match | Incomplete download or tampered mirror | Delete and re-download from the official direct link |
| Games do not appear in a system | Wrong folder, wrong extension, or stale game list | Confirm the roms subfolder name; update game lists; reboot |
| System present but “missing BIOS” | Required firmware not supplied | Place the named BIOS in /userdata/bios; check the BIOS screen |
| Wi-Fi adapter not detected | Missing or unsupported wireless firmware | Use Ethernet; confirm the chipset is supported on the wiki |
| Controller not recognized | Unmapped or unpaired device | Re-run controller config in ES; re-pair Bluetooth |
| Saves or scrapes vanish after reboot | Writing outside /userdata or a read-only card | Confirm userdata mounted writable; replace a failing card |
Black Screens and Boot Failures
The two failures that generate the most forum traffic are the black screen and the “no bootable device” message, and they are usually firmware problems wearing an OS costume. A black screen immediately after the Batocera logo, on a machine with an NVIDIA GPU, is almost always the driver: the open-source default cannot drive the card, and the fix is a single line in the boot configuration that we will show in the advanced section. A “no bootable device” before you ever see a logo is the firmware, not Batocera — the drive is fine, but the BIOS is not looking at it. Re-seat the drive, re-enter the firmware, re-confirm Secure Boot is off and the boot order is right. Ninety percent of “it will not boot” reports are one of these two, and neither is a flaw in the download.
When EmulationStation Itself Crashes
If the front-end itself falls over on launch, the single most likely explanation in 2026 is that you are running Batocera 43 rather than 43.1. The entire reason 43.1 shipped on 30 May 2026 was to fix emulation-related crashes in EmulationStation that the 43 release introduced three weeks earlier. The fix is not to fiddle with config files; it is to update. Batocera updates in place from its own menu without disturbing your userdata, so moving from 43 to 43.1 is a few minutes and costs you nothing. If you are already on 43.1 and ES still crashes, the cause has moved to your content — a malformed game list or a corrupt scrape — and the diagnostic path is to check the logs over SSH under /userdata/system/logs.
Advanced Tips
SSH, Samba, and Remote Management
Treat Batocera as the headless appliance it secretly is. SSH is on by default (root@batocera.local, password linux until you change it, which you should), and nearly everything the menus do has a command-line equivalent under the batocera-* family of scripts. The boot partition holds batocera-boot.conf, the low-level knobs read before the system is fully up — this is where the NVIDIA fix lives:
# /boot/batocera-boot.conf
# Use the proprietary NVIDIA driver (x86_64 builds only)
nvidia-driver=true

# Force a specific console resolution at boot if autodetect fails
console::resolution=1920x1080
Combine SSH for control with the Samba share for bulk file movement and you never need to physically touch the machine again. For scripted or scheduled tasks, the rsync pattern from the games section is your friend; for one-off fixes, SSH in, edit, reboot.
Splitting Games Onto a Second Drive
The most useful intermediate trick is separating the boot media from the games library. Flash Batocera to a small, fast, expendable USB stick or SSD, and keep your multi-terabyte ROM collection on a second drive that Batocera mounts under /userdata. The advantage is operational: when a new release lands, you reflash the small boot drive in five minutes and your enormous, painstakingly scraped library is untouched on the other disk. Batocera supports designating an alternate storage device for userdata in its system settings precisely for this workflow. It is the difference between treating updates as a routine and treating them as a dreaded migration.
Updating In Place vs Reflashing
You have two ways to move between versions, and they are good at different jobs. In-place updates, triggered from the EmulationStation menu, pull the new release and apply it while preserving userdata — this is the right tool for point releases like 43 to 43.1, and for staying current within a major line. Reflashing — repeating this entire guide with a new image — is the right tool for jumping across major versions on aging media, for switching architectures, or for cleaning out an installation that has accumulated cruft. The deciding question is the state of your boot media: a tired SD card that has survived two years of writes is better replaced than upgraded. Either way, if your games live on a separate drive as recommended above, both paths leave your library intact. Set updates.enabled=1 and updates.type=stable in your config and the system will at least tell you when a new stable build like 43.1 is available.
A Complete Working batocera.conf
The File and Where It Lives
Batocera's master configuration is a single flat file at /userdata/system/batocera.conf. It is plain key=value text, it survives updates because it lives in userdata, and almost every toggle in the EmulationStation menus ultimately writes a line here. You can edit it from the menus, over SSH, or across the Samba share. Below is a complete, sane starting configuration for a 43.1 install — copy it, adjust the obvious personal fields (timezone, Wi-Fi, achievements), and you have a reproducible baseline you can redeploy after any reflash.
The Configuration
The per-system core choices at the bottom map directly to the cores the project has been shipping through the 41-to-43.1 cycle: Fceumm for NES, Genesis Plus GX for Mega Drive, and the heavy x86_64-only emulators — PCSX2, Xemu, and Xenia — for PlayStation 2, original Xbox, and Xbox 360 respectively. Lines beginning with # are comments or disabled options you can switch on by removing the hash.
# /userdata/system/batocera.conf — STARESBACK reference baseline (Batocera 43.1)

# ---- System ----
system.language=en_US
system.kblayout=us
system.timezone=Europe/Paris
system.hostname=BATOCERA

# ---- Updates ----
updates.enabled=1
updates.type=stable

# ---- Network (uncomment and fill to use Wi-Fi) ----
wifi.enabled=0
# wifi.ssid=YOUR_SSID
# wifi.key=YOUR_PASSWORD

# ---- Audio / Video ----
audio.device=auto
audio.volume=90
global.videomode=default
global.smooth=1
global.integerscale=0
global.rewind=0
global.autosave=0
global.shaderset=none
global.bezel=default

# ---- RetroAchievements (off by default) ----
global.retroachievements=0
global.retroachievements.hardcore=0
# global.retroachievements.username=YOUR_USER
# global.retroachievements.password=YOUR_TOKEN

# ---- Per-system core overrides ----
nes.core=fceumm
snes.core=snes9x
megadrive.core=genesisplusgx
gba.core=mgba
n64.core=mupen64plus_next
psx.core=swanstation

# ---- Heavy systems (x86_64 builds only) ----
ps2.emulator=pcsx2
xbox.emulator=xemu
xbox360.emulator=xenia
After You Save It
Changes to batocera.conf take effect on the next launch of the relevant component; the safe move after a bulk edit like this is a full reboot from the EmulationStation menu, which re-reads everything cleanly. If a setting appears to do nothing, the usual cause is a typo in the key — the parser silently ignores lines it does not recognize, which is forgiving and infuriating in equal measure. Keep a copy of this file somewhere off the device. The entire promise of the separate-games-drive plus saved-config approach is that recovering from a dead boot drive becomes a fifteen-minute chore — reflash 43.1, drop this file into /userdata/system, point it at your games disk, and you are exactly where you were. That is the payoff for doing the boring parts correctly: the boring parts stay boring forever.
That is the whole pipeline, from a blank drive to a configured 43.1 system, with the law and the lore intact. The download was always the easy part. Doing it without lying to yourself about verification, media quality, and boot configuration is what separates a thirty-minute job from a lost weekend.
Questions the search bar asks me
- Is Batocera really free, or is there a paid version?
- Batocera is 100% free and open-source under the batocera-linux/batocera.linux project on GitHub. There is no paid tier, license key, or account. You can optionally support development through a donation or GitHub sponsorship, but nothing is gated behind payment.
- What is the latest version of Batocera in 2026?
- Batocera 43.1, released on 30 May 2026, is the current stable build. It is a point release over Batocera 43 (8 May 2026) and exists mainly to fix the EmulationStation emulation regressions that shipped in 43.
- How large is the Batocera download?
- Expect roughly 3 GB compressed and about 8 GB uncompressed for the x86_64 image — the documented version 38 file (batocera-x86_64-38-20231014.img.gz) was exactly that. Plan for at least a 16 GB drive, and 32 GB or more if you intend to store games.
- Can I download Batocera with a torrent?
- Yes. Official torrent support for the IMG releases arrived with version 40, so any release from 40 onward — 43.1 included — can be pulled over BitTorrent. A community mirror also exists, but verify the SHA-256 checksum regardless of where the file came from.
- Does Batocera include games or BIOS files?
- No. Batocera ships zero copyrighted ROMs and zero BIOS files — that is what keeps it legally distributable. You supply your own game dumps and any required BIOS into the /userdata folder; the distribution only provides the emulators and the front-end.
Ben covers the hardware end of retro gaming: FPGA cores, real-cartridge dumping, capture setups, CRT vs scaler workflows, and the legal and physical preservation infrastructure that keeps old games playable. Every post under this byline is reviewed pre-publish by Sam P., Editor & Operator — corrections to info@instalinkoteam.com. Published 2026-06-25 · Last updated 2026-06-25. Full bios on the author page.