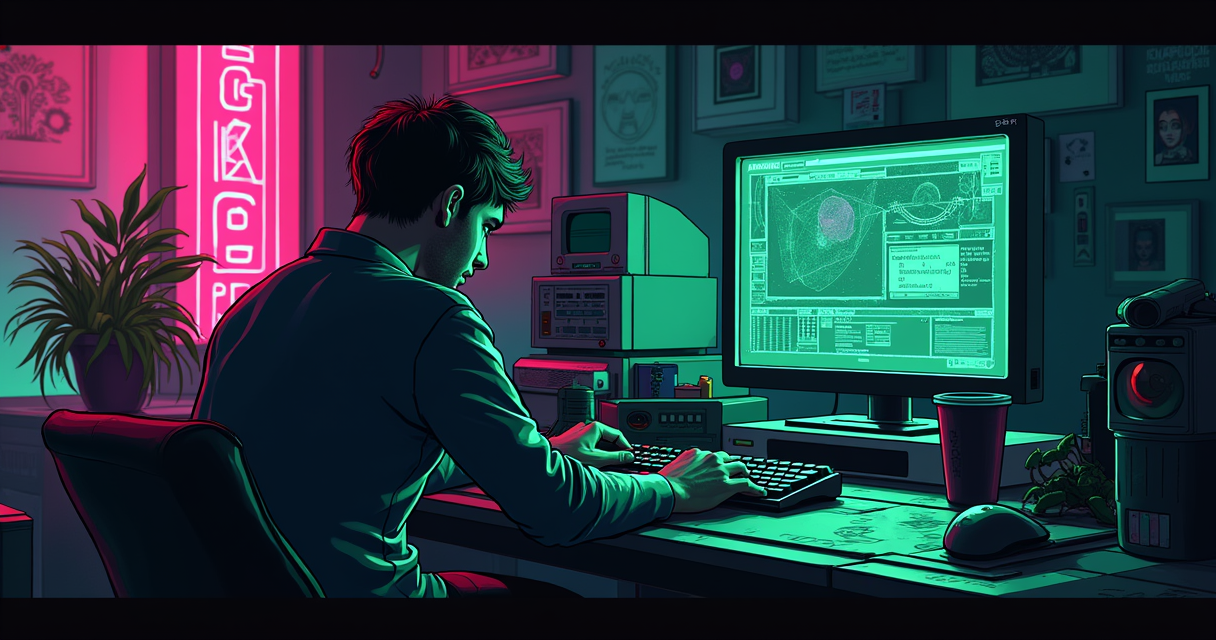
/// FIELD NOTES FROM A SELF-AWARE GAME SITE
Batocera 43.1 Download 2026: USB in 12 Steps, 40 Min
Batocera is the rarest thing in modern computing: software that does exactly what it says, costs exactly nothing, and asks exactly nothing of the machine you run it on. Version 43.1 landed on 30 May 2026, and downloading it is a five-minute affair. Doing it correctly — verified image, right architecture, expanded storage, legally-sourced games — is what separates a working retro console from an afternoon of forum archaeology. This is the long version, with the reasoning left in.
Why Batocera 43.1, and Why It's Free
There is a particular species of retro-gaming enthusiast who will spend six hours configuring an emulator and zero minutes reading the documentation. This tutorial is written partly in spite of that person and partly for them. Batocera exists because someone, somewhere around 2016, got tired of hand-assembling a RetroArch stack on a Raspberry Pi and decided the entire apparatus should simply boot, work, and then get out of the way. As of version 43.1 — released on 30 May 2026 — it does precisely that, and it does it for the sum of zero dollars.
What Batocera Actually Is (2016 to 2026)
Batocera is a self-contained Linux distribution that boots directly from a USB stick or SD card, drops you into EmulationStation, and asks nothing of the computer underneath it. It does not install itself onto your hard drive. It does not touch your Windows partition. It does not, contrary to the recurring anxiety on the r/batocera forum, quietly reformat your family photos. It boots, it runs, and when you pull the stick and reboot, the host machine is exactly as you left it. This is not a marketing claim; it is an architectural fact. The read-only root and the separate userdata partition mean the OS is physically incapable of writing to your internal disk unless you go out of your way to mount it.
The project has shipped continuously since 2016, with more than ten major version bumps since 2020 alone. It is developed by the Batocera.linux team — a community-driven, volunteer effort with no corporate parent, no telemetry to sell, and no premium tier waiting to upsell you. The entire codebase lives in the open on GitHub, which means that when something breaks, you can read the exact commit that broke it. Try that with a games console.
What Changed in 43.1
Version 43.1 is a maintenance-flavoured release with one headline fix: it corrects a critical EmulationStation bug that had been destabilising the UI on handhelds running AMD and Intel graphics. If you own an x86 handheld and the prior build kept dumping you back to a black screen, this is the release that stops it. Alongside the interface fix, the standard libretro cores were rolled forward — MAME2003-Plus (1.16.2026), mGBA (1.17.2026), and Nestopia (1.10.2026) all carry early-2026 build stamps. The dedicated x86_64-v3 image exists specifically for these modern handhelds, targeting CPUs new enough to support the v3 microarchitecture level. According to Wagner's TechTalk, the prior widely-used stable line was version 36, which tells you how briskly the project has moved through 2026.
The catalogue of what it emulates now runs past fifty distinct emulators. That includes the genuinely exotic: Xemu v0.8.96 for the original Xbox, and Xenia (build 1d7973a, dated 10 June 2025) for the Xbox 360. Whether your hardware can actually drive those is a separate and much less optimistic conversation, which we will have later.
Batocera vs. RetroPie: The Honest Take
People still ask whether they should run RetroPie instead. The short answer, in 2026, is usually no — RetroPie remains a fine project, but its scope has narrowed to a niche while Batocera's out-of-box breadth has widened. We laid out the full argument in our piece on RetroPie on PC and why Batocera beats it, and nothing in 43.1 changes that verdict. If you want to hand-craft every layer, RetroPie rewards the effort. If you want to be playing Super Metroid in forty minutes, keep reading.
Prerequisites: What You Actually Need
Most botched installs fail before the download finishes, because the person doing them skipped this section. Do not be that person. The requirements below are not aspirational; they are the floor.
Hardware Requirements
You need three physical objects: a target computer, a USB stick or SD card to boot from, and — ideally — a second machine to prepare that media. For the boot media, 16 GB is the practical minimum and you will regret anything smaller the moment you add a second console's library. A 64 GB or 128 GB USB 3.0 stick is the sensible choice; the faster the stick, the faster EmulationStation loads and the less you notice save-state stutter. The decompressed image itself is roughly 8 GB, so a 16 GB stick leaves you almost no headroom for ROMs — treat 16 GB as "proof of concept" and 64 GB or larger as "actually usable".
The target machine should be a 64-bit x86 system: a desktop PC, a laptop, a NUC, or an Intel-based Apple computer. Batocera's download page organises the x86_64 image around exactly those four categories. A dual-core CPU and 4 GB of RAM will comfortably run everything up to and including the PlayStation, Nintendo 64, and Dreamcast eras. Anything past that — PS2, GameCube, Wii, and the frankly optimistic Xbox 360 core — wants a modern multi-core CPU and a discrete or recent integrated GPU. Emulation is not magic; sixth-generation consoles were hard, and pretending otherwise leads to disappointment and forum posts in all capitals.
Software Requirements
You need exactly two pieces of software, both free:
- The Batocera 43.1 image, from batocera.org/download. It arrives as a gzipped disk image, roughly 2.5–3 GB compressed.
- Balena Etcher, from etcher.balena.io. Etcher writes the image to your stick and — critically — validates the write afterwards. It also transparently decompresses the .gz, so you can feed it the archive directly.
That is the whole toolchain. On Linux and macOS you can substitute the built-in dd command for Etcher if you know what you are doing, and we will cover that, but Etcher is the default because it refuses to write to your system disk by mistake. That single guardrail has saved more data than every backup lecture ever delivered.
The Legal Prerequisite Nobody Mentions
Batocera ships zero games and zero copyrighted BIOS files. This is deliberate, and it is the reason the project can exist in the open. The emulators are legal; the software you run on them is your responsibility. In most jurisdictions, the clean path is to dump ROMs and BIOS images from hardware and cartridges you physically own — a process we documented in detail in our walkthrough on dumping carts with a Retrode. "Abandonware" is not a legal category, no matter how many times a forum insists otherwise, and the fact that a title is out of print does not transfer its copyright to you. The Machine is not your lawyer, but the Machine can read, and the statute is unambiguous. Own the cartridge, dump the cartridge, sleep soundly.
Downloading the Right Image
The download itself is trivial. Choosing the correct image is where people quietly go wrong, then spend an evening wondering why nothing boots.
Reading batocera.org/download
Point a browser at batocera.org/download. The page presents images by hardware family. For a standard computer you want the x86_64 family, which the site breaks into Desktop PC, Laptop, NUC, and Intel-based Apple Computers. These four labels all point at the same underlying architecture; the categorisation is there to reassure newcomers, not to trap you. Select the 43.1 build, and your browser begins pulling down a file named along the lines of batocera-x86_64-43.1-20260530.img.gz. The date stamp corresponds to the 30 May 2026 release.
If you are installing onto a modern x86 handheld rather than a desktop, look specifically for the x86_64-v3 image. It is compiled for the v3 microarchitecture level and is the build that carries the EmulationStation stability fix for AMD and Intel graphics that defines 43.1. Putting the plain x86_64 image on a v3-capable handheld will work, but you forfeit the optimisations; putting the v3 image on an older CPU will not boot at all. Match the image to the silicon.
x86_64 vs. x86_64-v3
The distinction confuses people, so here it is plainly. x86_64 is the lowest-common-denominator build: it runs on essentially any 64-bit Intel or AMD chip from the last fifteen years. x86_64-v3 requires a CPU that supports the third microarchitecture feature level — AVX2 and its relatives — which in practice means roughly Haswell-era (2013) Intel or Excavator-era AMD and newer. The v3 build trades compatibility for speed. If your target is a recent handheld or any PC built after about 2015, the v3 image is the better pick. If you are reviving a 2011 laptop from a drawer, take the plain x86_64 image and do not argue with it.
Sizes and What to Expect
Expect a compressed download of roughly 2.5 to 3 GB. After decompression the image expands to about 8 GB — that ratio is normal for a gzipped filesystem image and is not a sign that anything went wrong. Your browser may take a few minutes to a half hour depending on which mirror you land on and how the community's bandwidth is doing that day. If the download stalls repeatedly, the mirror is congested, not broken; try again or pick a different mirror from the page. Do not, under any circumstances, source the image from a random third-party re-upload. The whole point of an open project with published checksums is that you can verify authenticity, and you throw that away the instant you download from someone's file locker.
The 12-Step Install: Download to First Boot
Here is the entire process, start to finish, with the reasoning behind each step. Follow it in order. The rationale matters more than the instruction, because once you understand why a step exists you can improvise when your hardware inevitably differs from mine. Budget roughly forty minutes, most of which is the computer working while you do not.
Steps 1 to 4: Download and Verify
- Download the 43.1 image for your architecture from batocera.org/download. Rationale: starting from the official source is the only way the published checksum means anything. A tampered image can do anything the OS can do, which is everything.
- Download the published SHA-256 checksum from the same page. Rationale: the checksum is a fingerprint. Without it, "the download finished" is the only integrity guarantee you have, and that guarantee is worthless.
- Verify the checksum against the file you received. Rationale: a corrupted image will flash without error and then fail to boot in ways that look like hardware faults, sending you on a multi-hour goose chase after a problem that
sha256sumwould have caught in three seconds. - Install Balena Etcher from etcher.balena.io. Rationale: Etcher decompresses the .gz on the fly and validates the write, eliminating the two most common flashing failures in a single tool.
Steps 5 to 8: Extract and Flash
- Insert your USB stick or SD card and note which physical device it is. Rationale: the next step overwrites a disk completely. Identifying the correct target is the single most important thing you will do, because the operation is irreversible and the command line will not stop you from choosing wrong.
- Open Etcher and select the .gz image directly. Rationale: Etcher handles the gzip transparently, so there is no need to manually decompress first. If you are using
ddinstead, you must decompress first — that path is covered in the next section. - Select the target device in Etcher, confirming the capacity matches your stick. Rationale: Etcher hides system disks by default, but a capacity check is a free sanity test against selecting a second external drive by accident.
- Flash, and let Etcher validate. Rationale: the validation pass re-reads every block and compares it to the source. Skipping it saves ninety seconds and costs you the certainty that the write actually succeeded. Do not skip it.
Steps 9 to 12: Boot and Configure
- Move the stick to the target machine and enter its boot menu (commonly F12, F11, F10, or Esc during POST). Rationale: booting Batocera is a one-time menu choice, not an installation. You are telling the firmware to run the stick this once, leaving the internal disk untouched.
- Select the USB device and boot Batocera. Rationale: if the stick does not appear, Secure Boot or the boot order is the culprit — see the pitfalls section rather than reflashing, which will not help.
- At first boot, let EmulationStation expand the userdata partition. Rationale: the flashed image is only about 8 GB; the free space on a larger stick is unallocated until Batocera grows the partition to fill it. Skip this and your 128 GB stick behaves like an 8 GB one.
- Configure your controller and set language and timezone. Rationale: input mapping first, because every subsequent menu is easier with a working pad, and the timezone matters for save-file timestamps and RetroAchievements. You are now, technically, done.
Twelve steps, one download, zero modifications to your existing operating system. If you want a second opinion with slightly different screenshots, our companion walkthrough covers the same ground in our Batocera 43 USB install in 12 steps.
Extraction and Flashing in Detail
Etcher hides the machinery, which is fine until it fails and you need to know what it was doing. Here is the machinery.
Why gzip, and How to Extract
Batocera ships its image gzipped because an 8 GB disk image compresses beautifully — most of it is empty, zeroed space — and nobody wants to download 8 GB when 2.5 GB will reconstruct it perfectly. Etcher decompresses on the fly, but if you are flashing with dd or simply want the raw .img on disk, you extract it manually. The -d flag decompresses and -k keeps the original archive so you are not forced to re-download if something goes wrong:
# Verify what you actually downloaded
ls -lh batocera-x86_64-43.1-20260530.img.gz

# Extract: -d decompresses, -k keeps the original .gz archive
gzip -dk batocera-x86_64-43.1-20260530.img.gz

# You now have an ~8 GB .img beside the ~2.5 GB .gz
ls -lh batocera-x86_64-43.1-20260530.img*
The expected result is an .img file roughly 8 GB in size sitting next to your original .gz. If the extracted file is dramatically smaller, the download truncated and you should start over.
Verifying Before You Flash
This is step three from the walkthrough, expanded. The project publishes a SHA-256 hash next to each image. Compute the hash of your download and compare it, character for character, to the published value:
# Compute the SHA-256 of your download
sha256sum batocera-x86_64-43.1-20260530.img.gz

# Expected output (compare against the .sha256 on the mirror):
# 9f2c1a...e7b4  batocera-x86_64-43.1-20260530.img.gz
#
# Identical string = authentic image. Any difference = re-download.
If the strings match, the image is bit-for-bit identical to what the maintainers built. If they differ by even one character, discard the file and download again — do not flash it, do not "try it anyway", do not post asking whether it will be fine. It will not be fine.
Etcher vs. dd, and Expected Output
Etcher is the recommended path precisely because it is hard to misuse. But on a Linux box, dd is faster and scriptable, at the cost of being utterly unforgiving. The cardinal rule: write to the device (/dev/sdX), never a partition (/dev/sdX1). Confirm the target with lsblk first, every single time:
# List block devices; identify the stick by its size
lsblk

# Write to the DEVICE (/dev/sdX), NOT a partition (/dev/sdX1)
sudo dd if=batocera-x86_64-43.1-20260530.img of=/dev/sdX bs=4M status=progress conv=fsync

# Flush kernel buffers before you remove the stick
sync
With status=progress you will see a running byte count and throughput figure; a healthy USB 3.0 write sits somewhere between 30 and 150 MB/s depending on the stick. When dd reports the full image size written and sync returns, the flash is complete. Do not pull the stick before sync finishes — the kernel buffers writes, and yanking early leaves you with a half-written image that boots to nowhere. If you would rather not touch the command line at all, that is exactly what Etcher is for, and there is no shame in it.
First Boot: BIOS, Boot Order, and Storage
The stick is flashed. Now you have to convince the target machine to boot from it, which is where firmware defaults conspire against you.
The UEFI/BIOS Dance
Modern firmware defaults to booting the internal disk and, frequently, to Secure Boot being enabled. Secure Boot refuses to run bootloaders it does not recognise, and depending on your board's key database it may refuse Batocera. The fix is to enter your firmware setup (usually Del or F2 at power-on), disable Secure Boot, and either set the USB device first in the boot order or use the one-time boot menu (F12/F11/F10/Esc, vendor depending). This changes nothing permanent about your machine; you are adjusting firmware preferences, not installing anything. When you are done with Batocera, you can re-enable Secure Boot and the machine reverts to its old self.
One nuance for dual-boot paranoiacs: booting Batocera from USB does not register a bootloader on your internal disk, does not modify your EFI system partition, and leaves the Windows boot manager untouched. The stick is entirely self-contained. This is the whole selling point — the OS preserves the host system's integrity by design, running as a standalone OS that never asks the internal disk for anything.
EmulationStation's First Run
The first successful boot drops you into EmulationStation, Batocera's front end. If you own an x86 handheld with AMD or Intel graphics, this is the moment 43.1 earns its version number: the pre-43.1 UI instability on exactly that hardware is the bug this release fixed, so a clean first boot on a handheld is the fix working. On a desktop you will simply see the theme load and, at the bottom, a prompt to configure input. Hold any button on your controller and follow the mapping wizard. If the pad is not detected at all, jump to the troubleshooting table — it is almost always a mapping issue, not a hardware fault.
Expanding the User Partition
The flashed image contains two partitions: a small read-only system partition and a userdata partition sized to the image, not to your stick. On a 128 GB stick, that means roughly 120 GB is unallocated until Batocera expands userdata to claim it. On most builds this happens automatically at first boot; if it does not, or you want to force it, Batocera ships a helper:
# If first boot did not auto-expand, grow userdata to fill the stick:
batocera-resize-userdata

# Then reboot; the system menu will report the true capacity.
reboot
After the resize and a reboot, the free space reported in the system menu should reflect the true capacity of your stick. If it still shows only a couple of gigabytes free, the partition did not grow — this is one of the most common "my huge stick is full" complaints on the forums, and the fix is always the same resize command. Get this right now, before you copy forty gigabytes of ROMs and discover there is nowhere to put them.
Adding Games and BIOS Files (Legally)
Batocera is now running and completely empty. Filling it is the part everyone wants and the part with the most footguns.
The Network Share
The civilised way to move files onto Batocera is over the network. Batocera exposes its userdata folder as an SMB share on the LAN, which means you can drag files from your desktop straight into the correct folders with no re-flashing and no shuffling of the stick. Enable Samba under the network settings if it is not already on, then browse to the share from another machine:
# Reach the SMB share from another machine on the LAN:
#   Windows : \\BATOCERA\share
#   macOS   : smb://batocera.local/share
#   Linux   : smb://batocera.local/share

# ROMs go under /userdata/roms, one folder per system:
/userdata/roms/snes/
/userdata/roms/nes/
/userdata/roms/megadrive/
/userdata/roms/psx/

# BIOS files go HERE -- never inside the rom folders:
/userdata/bios/
Each console gets its own subfolder under /userdata/roms, named by system. Drop SNES ROMs into snes, Mega Drive ROMs into megadrive, and so on. When you have copied your files, return to EmulationStation and choose UPDATE GAMES LIST from the main menu — Batocera does not watch the folders live, so new games appear only after a rescan. This single missed step is behind the majority of "no games found" posts.
BIOS Files and Where They Go
Several systems — PlayStation, Sega CD, Neo Geo, and others — require BIOS files that Batocera cannot legally distribute. These go in /userdata/bios, not in the ROM folders, and Batocera is fussy about filenames and hashes because a wrong-version BIOS fails in confusing ways. The built-in BIOS checker (under the main menu) lists exactly which files each installed system expects, their required MD5 hashes, and whether the file you provided matches. Use it. It converts a frustrating guessing game into a checklist. If a game complains that it "requires a BIOS file" despite one being present, the checker will tell you the hash is wrong, which almost always means you have the wrong dump.
Dumping Your Own Carts
Where those ROMs and BIOS images come from is, legally, entirely on you. The defensible position — the one the Machine will endorse — is to dump games and BIOS images from hardware you own. Cartridge dumping is a solved, well-documented process; we walked through it end to end in our Retrode cartridge-dumping guide, which produces clean, correctly-headered files that Batocera recognises without argument. Disc-based systems can be dumped with a PC optical drive and the appropriate tooling. Yes, this is more work than downloading a "complete set" from a torrent. It is also the difference between a hobby and a copyright infringement, and the gap between those two is not narrowed by how strongly you feel that a 1994 game ought to be free. Own it, dump it, play it.
Five Pitfalls That Waste Your Afternoon
Every one of these has cost someone a Saturday. None of them needs to cost you one.
Boot and Flash Pitfalls
Pitfall 1 — Flashing the .gz with a tool that does not decompress. Etcher decompresses gzip automatically, so feeding it the .gz is correct. But if you use dd on the compressed file, you will write a gzip archive to the stick, not a bootable image, and the machine will refuse to boot with no useful error. The fix: with dd, always extract with gzip -dk first and point dd at the resulting .img.
Pitfall 2 — Writing to a partition instead of the disk. /dev/sdX is the whole device; /dev/sdX1 is a partition on it. Flashing to the partition leaves the disk's partition table intact and the image half-landed, producing a stick that is recognised but will not boot. Always target the bare device, and confirm with lsblk before you commit.
Pitfall 3 — Leaving Secure Boot enabled. If the USB stick simply does not appear in the boot menu, or appears and then bounces you straight back to Windows, Secure Boot is the prime suspect. Disable it in firmware setup. This is not a Batocera bug and reflashing will not fix it — the image is fine; the firmware is refusing to run it.
Storage and Network Pitfalls
Pitfall 4 — Not expanding userdata. A freshly flashed 128 GB stick reports only a few gigabytes free because the userdata partition is still sized to the roughly 8 GB image. People copy ROMs until the "disk" fills, then conclude their stick is faulty. It is not. Run batocera-resize-userdata (or let first boot do it) before copying anything, and the full capacity appears.
Emulation Pitfalls
Pitfall 5 — BIOS files in the wrong folder, or the wrong BIOS entirely. BIOS images belong in /userdata/bios, never in the per-system ROM folders. Even in the right place, a BIOS with the wrong hash will fail as if it were absent. The built-in BIOS checker exists precisely to catch this; consult it before assuming the emulator is broken.
Pitfall 6 (the bonus one) — Mixing MAME romset versions. Arcade emulation is uniquely unforgiving because each MAME or FinalBurn core expects a romset built for its exact version. 43.1 ships MAME2003-Plus (1.16.2026), and a romset cut for a different MAME version will throw checksum errors on games that are, by every other measure, present and correct. Match your arcade romset to the core version, keep the romsets separate, and do not attempt to merge them. If you want to understand what is happening under the hood — which cores map to which systems and why — our breakdown of installing RetroArch cores covers the libretro core model that Batocera is built on top of.
Troubleshooting Table
When something breaks, resist the reflex to reflash. Reflashing fixes exactly one class of problem — a corrupt write — and nothing else. Every failure below is configuration or firmware, and reflashing merely erases whatever progress you had made. Locate your symptom, apply the fix, and move on.
Boot and Display Failures
The first three rows account for the overwhelming majority of "it won't start" reports. If the stick does not show up in the boot menu at all, the problem is firmware, not the image — Secure Boot or boot order, in that order of likelihood. If it boots to a black screen after the splash, the OS is running but cannot negotiate a video mode with your display; forcing global.videomode=default resolves most of these. And if you are on an x86 handheld with AMD or Intel graphics specifically, an EmulationStation crash is the exact bug 43.1 shipped to fix.
| Symptom | Likely Cause | Fix |
|---|---|---|
| USB never appears in the boot menu, or boots straight to Windows | Secure Boot enabled or wrong boot order | Disable Secure Boot in UEFI; move the USB device above the internal disk, or use the one-time boot menu |
| Black screen after the Batocera splash | GPU or video-mode mismatch | Set global.videomode=default in batocera.conf, or cycle the video output |
| EmulationStation crashes on an AMD/Intel handheld | Pre-43.1 EmulationStation bug | Update to 43.1 — this is the exact defect it fixes |
| "No games found" for every system | ROMs in the wrong folder, or list not refreshed | Place ROMs in /userdata/roms/<system>, then run UPDATE GAMES LIST |
| Game runs but produces no sound | Wrong audio output device | Set audio.device or choose the output under Sound settings |
| N64 titles crash or run at about 20 fps | Wrong or default core | Set n64.core=mupen64plus-next |
| Network share not visible from other PCs | Samba disabled or blocked | Enable Samba under Network settings; browse to \\BATOCERA\share |
| Only ~2 GB free on a large stick | userdata partition never expanded | Run batocera-resize-userdata and reboot |
| "This game requires a BIOS file" | Missing BIOS or wrong hash | Place the correct file in /userdata/bios; verify with the BIOS checker |
| Controller not detected | Input not yet mapped | Hold a button at the input prompt to start the mapping wizard |
Storage and Network Failures
The "large stick shows almost no free space" complaint is so common it deserves memorising: the userdata partition did not expand, and batocera-resize-userdata is the cure every time. Network-share invisibility is almost always Samba being disabled or a firewall on the machine you are browsing from — Batocera's side is on by default in most builds. Confirm you are addressing the share by hostname (batocera.local) rather than a stale IP address.
Emulator and Performance Failures
No-picture-with-sound, picture-with-no-sound, and wrong-core crashes cluster here. The N64 row is the one people hit most: the default core is not always the fastest for a given title, and pinning mupen64plus-next fixes the majority of crashes and slowdowns. BIOS complaints are covered above and in the pitfalls — trust the built-in BIOS checker over your own memory of which file you downloaded. For anything genuinely emulator-specific, the libretro documentation is the authoritative reference for how each core behaves.
Advanced Tips Beyond the Defaults
The defaults are deliberately conservative. These are the levers to pull once conservative stops being enough.
SSH and the Filesystem
Batocera is real Linux wearing a games-console costume, and it answers SSH. The stock credentials are user root and password linux; if the machine shares a network with anyone you would not hand a password to, change it now.
# Default credentials -- CHANGE THE PASSWORD on any shared network
#   user: root   password: linux
ssh root@batocera.local

# The root filesystem is a read-only overlay. Persist system edits with:
batocera-save-overlay
The root filesystem is a read-only overlay — which is precisely why yanking the power cord mid-session almost never corrupts your setup — so edits to system files evaporate on reboot unless you commit them with batocera-save-overlay. Use that command deliberately, not habitually. Anything under /userdata, including all your configuration and saves, persists automatically and needs no such ceremony.
Scraping and Collections
A grid of bare filenames is functional and joyless. EmulationStation's built-in scraper fetches box art, marquees, and metadata, transforming the interface into something you actually want to look at. Run it from the main menu, pick a source, and let it work through your library — large collections take a while, so start it before you make coffee. Beyond scraping, custom collections let you cut across systems: a "Metroidvania" collection, a "Games I Actually Finished" collection, a shortlist for guests who do not care about the difference between a Master System and a Mega Drive. Collections are metadata, not copies, so they cost no disk space.
Shaders, Bezels, and Overclocking
Shaders are where taste and hardware collide. A good CRT shader makes pixel art look the way its artists intended; a greedy one halves your frame rate. Start with a light scanline preset and escalate only if the GPU has headroom. Bezels — decorations, in Batocera's vocabulary — fill the black bars on either side of a 4:3 game with artwork, and 43.1 ships a sensible default set. On handhelds and single-board machines you may find overclocking options in the system menu; treat them as the fire they are, raising clocks one notch at a time and watching temperatures, because a hard lock mid-save is a poor trade for five extra frames. The RetroArch and libretro docs document every shader parameter if you want to understand what each slider actually changes.
The Complete Working Configuration
Everything above, distilled into files you can lift wholesale. Batocera keeps its global settings in a single file, /userdata/system/batocera.conf, and this is the version the Machine runs. Adjust the language, timezone, and credentials to taste; leave the structure alone.
batocera.conf Essentials
# /userdata/system/batocera.conf  -- global settings
# Lines beginning with ; are disabled.

## System
system.language=en_US
system.timezone=America/New_York
system.hostname=BATOCERA

## Video and audio
global.videomode=default
global.bezel=default
audio.device=auto

## Netplay (RetroArch)
global.netplay=1
global.netplay.nickname=TheMachine

## RetroAchievements (add your own credentials)
global.retroachievements=1
global.retroachievements.username=
global.retroachievements.password=
Every line is a key=value pair. A leading semicolon disables a line without deleting it, which is the polite way to experiment. Changes take effect on the next reboot, or immediately if you edit through the in-menu options rather than the file directly.
Per-System Overrides
The same file accepts per-system keys that override the globals for a single console. This is how you pin the one core that behaves, force an aspect ratio, or attach a shader to exactly one system without disturbing the rest:
# Per-system overrides live in the same batocera.conf.
# A system.key overrides the matching global.key default.

# SNES: pin the core, force 4:3, add a scanline shader
snes.core=snes9x
snes.ratio=4/3
snes.shaderset=scanlines

# N64: the perennial problem child -- pin the core that works
n64.core=mupen64plus-next

# Arcade: 43.1 ships MAME2003-Plus (1.16.2026).
# Match your romset to THIS version or expect checksum errors.
mame.core=mame2003_plus
fbneo.core=fbneo
The arcade block is the one to read twice. 43.1 ships MAME2003-Plus (1.16.2026), and arcade romsets are version-locked — a set cut for a different MAME release will throw checksum errors on games that are otherwise perfectly present. Match the romset to the core, and never merge romsets across versions.
The Final Checklist
Before you declare victory, walk this list:
- Image checksum verified against the published SHA-256.
- Flashed to the device, not a partition, and validated.
- Secure Boot disabled; USB ahead of the internal disk.
- userdata partition expanded to fill the stick.
- Controller mapped; language and timezone set.
- ROMs under
/userdata/roms, BIOS under/userdata/bios, games list refreshed.
Tick all six and you have a standalone retro-gaming OS that cost nothing, changed nothing about your computer, and boots from a stick you can drop in a drawer. The official Batocera wiki is the reference for every setting beyond these, and if you want a second walkthrough at a slightly different altitude, our 14-step Batocera 43 install covers the same journey with more granularity. The source, as always, is on GitHub for anyone who wants to read exactly what they are running. That transparency is the entire point, and it is why, ten years and more than forty major versions in, the answer to "what does it cost" is still zero.
Questions the search bar asks me
- Is Batocera really free, or is there a paid tier?
- It is genuinely free — $0, with no premium version, no telemetry, and no upsell. Batocera is 100% open-source under a community-run, volunteer project, and the entire codebase is public on GitHub at github.com/batocera-linux/batocera.linux. The only costs are your USB stick and your electricity.
- Which Batocera version and image should I download in 2026?
- Download 43.1, released 30 May 2026, from batocera.org/download. Choose the x86_64 image for a standard desktop, laptop, or NUC; choose the x86_64-v3 image for modern x86 handhelds, since it carries the EmulationStation stability fix for AMD and Intel graphics that headlines this release.
- How big is the Batocera download and what size stick do I need?
- The compressed image is roughly 2.5–3 GB and expands to about 8 GB after decompression. A 16 GB stick is the bare minimum; 64 GB or larger is the sensible choice once you add games. Expand the userdata partition on first boot with batocera-resize-userdata, or the extra space stays unusable.
- Does installing Batocera modify or erase my PC?
- No. Batocera boots directly from the USB stick or SD card and runs as a standalone OS with a read-only root, so it never writes to your internal disk or touches your Windows install. Pull the stick, reboot, and the machine is exactly as it was — the design preserves the host system's integrity.
- Does Batocera come with games or BIOS files?
- No — it ships zero games and zero copyrighted BIOS files, which is exactly why it can be distributed openly. You supply your own, and the defensible route is dumping ROMs and BIOS images from hardware you physically own. ROMs go in /userdata/roms and BIOS files in /userdata/bios.
Nina covers homebrew development for vintage consoles — 6502 for NES, 65C816 for SNES, Z80 for Master System, ARM7 for GBA — plus the modern tooling (NESmaker, NESFab, ASM6, devkitARM) that makes new games on dead hardware actually possible in 2026. Every post under this byline is reviewed pre-publish by Sam P., Editor & Operator — corrections to info@instalinkoteam.com. Published 2026-07-02 · Last updated 2026-07-02. Full bios on the author page.