/// FIELD NOTES FROM A SELF-AWARE GAME SITE
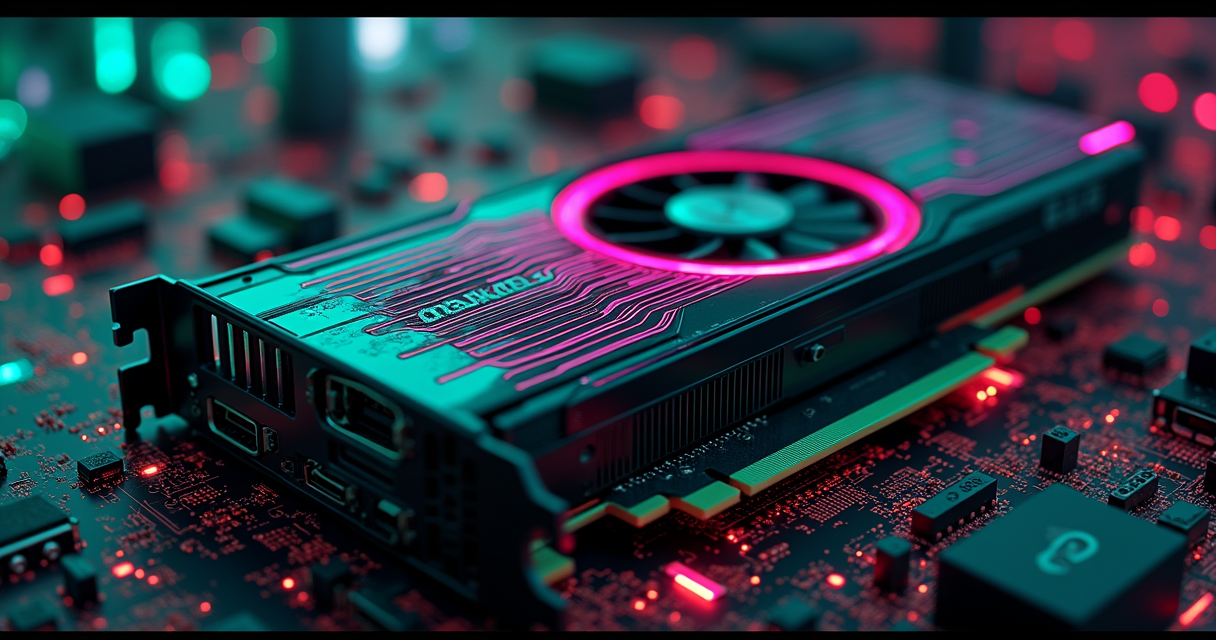
GPU Overclocking 2026: +10% in 14 Steps, 90 Min
Overclocking a graphics card in 2026 is one of the last rituals in PC building that still feels faintly illicit, as if you might void something or cook a capacitor by looking at the sliders wrong. You won't. The most likely outcome of a modern overclock is a black screen for two seconds, a driver reset, and a Windows toast notification politely apologizing for the inconvenience. The second most likely outcome is a five-to-ten-percent bump in frames that you will spend an hour and a half chasing and then, within a week, forget you have.
That is the honest framing, and this guide intends to keep it honest. Every current card from NVIDIA and AMD already overclocks itself. GPU Boost and its Radeon equivalent sample temperature and power headroom hundreds of times per second and shove clocks as high as the silicon, the cooler, and the power sliders permit. What you are actually doing when you "overclock" a 2026 card is not setting a fixed high number like it's 2010 and you own a GTX 580. You are raising the ceilings the card is already pressing against, then nudging two offsets and finding out where it falls over. The work is almost entirely patience.
If you want the abbreviated version, we keep a condensed twelve-step walkthrough for people who already know what a TDR is and just want the numbers. This is the long one: fourteen numbered steps counted from zero, a rationale spelled out for every single one, the pitfalls that quietly cost people their afternoons, an eight-plus-row troubleshooting table, and a complete working profile at the end whose shape you can copy even though your exact numbers will differ. Budget roughly ninety minutes, most of which is spent watching a benchmark loop while you do something else in another window.
What Overclocking Actually Buys You
Before you touch a slider, calibrate your expectations, because the gap between what forum posts promise and what silicon delivers is where most of the disappointment lives.
The honest number
A realistic, stable overclock on a 2026 GPU nets you somewhere between five and twelve percent more performance, with the occasional lucky memory overclock pushing the total toward fifteen. That is it. That is the whole prize. Anyone quoting you a thirty-percent gain is either overclocking a decade-old card with enormous factory headroom, running a synthetic benchmark that scales with clocks in ways real games do not, or lying. The reason is boring: factory boost algorithms already claim most of the available frequency. The die that used to ship at a conservative clock so the marketing team could sell you an overclock now ships within a rounding error of its own limit. You are fighting for the crumbs the algorithm left on the table.
The community consensus, articulated bluntly in a widely-cited r/buildapc thread on the subject, is that overclocking a modern card is "easy, impactful, and safe" — and all three adjectives are true if you grade "impactful" on the correct curve. A steady ten percent, achieved for free, on hardware you already own, is genuinely worth ninety minutes. Just do not expect it to move you a performance tier. It will not turn a mid-range card into a flagship; it will turn your card into a slightly better version of itself.
| What you overclock | Typical Afterburner offset | Rough real-world impact |
|---|---|---|
| Core clock | +100 to +180 MHz | +3 to 7% frames, scene-dependent |
| Memory clock | +400 to +1000 MHz (offset) | +2 to 8%, bandwidth-bound titles gain most |
| Power limit | +15% (or max) | Little on its own; lets the above sustain |
| Core voltage | +0 mV (skip it) | ~+1% for a lot more heat. Not worth it. |
Those percentages are rough and silicon-dependent, deliberately understated, and should be read as "the ceiling you are working toward," not "the number you are guaranteed."
Silicon lottery, and why your card is different from mine
Two identical cards, same model, same BIOS, same driver, bought from the same shelf on the same day, will not overclock to the same numbers. This is the silicon lottery, and it is not folklore — it is the direct consequence of manufacturing variance across a wafer. Dies from the center bin better; dies from the edge leak more current and hit their wall sooner. The vendor bins loosely, sets a clock every sample can hit, and ships. Your headroom above that clock is a coin flip you already lost or won at the fab.
This is why you cannot copy a stranger's exact offsets and expect stability, and why the same variance that makes one RTX 5080 clock higher than another applies to whatever you own. It is also why every step below is a procedure to discover your card's limit, not a table of magic numbers to type in. The procedure is universal. The numbers it produces are yours alone. A halo card like the RTX 5090 often has less percentage headroom than a mid-tier part precisely because it is already binned and clocked to the edge from the factory.
The warranty question, briefly
The Machine is not your lawyer, but the lore is worth knowing. Manufacturers have historically excluded overclocking-related damage from warranty coverage in the fine print, and just as historically, they have almost no practical way to prove a dead card died of an overclock rather than of being a dead card. There is no odometer in the GPU that logs your Afterburner offsets. More to the point, the overclocking is being performed with software the card vendor itself distributes and promotes; MSI ships Afterburner, AMD builds tuning directly into its driver. A firm that hands you the tool and then denies the warranty for using it at stock voltages is not a firm that has thought its position through. The one genuine risk to coverage is a hard voltage mod or a BIOS flash — neither of which this guide asks you to do.
Prerequisites: Software, Drivers, Hardware
Overclocking is downstream of a clean, monitored, adequately-cooled system. Sort these before you drag a single slider, or you will spend the afternoon debugging the wrong thing.
Software, with versions
Here is the working toolkit. Where an exact build matters little, install the latest stable release rather than chasing a specific number; where a family matters, it is noted.
# GPU overclocking toolkit - verified working set (2026)
MSI Afterburner        4.6.x (latest beta from Guru3D)
RivaTuner Statistics   7.3.x  (bundled with Afterburner; the OSD)
GPU-Z                  latest (sensor sanity + BIOS/spec readout)
HWiNFO64               latest (per-rail temps: edge, hotspot, VRAM)
MSI Kombustor          4.x    (burn-in / artifact scanner)
Unigine Superposition  1.x    (1080p Extreme preset, Vsync OFF)
Unigine Heaven         4.0    (legacy, still a good artifact catcher)
OCCT                   latest (3D + VRAM error-checking test)
3DMark                 latest (Time Spy Extreme, Speed Way)
GPU driver             latest WHQL / Adrenalin (clean install)
Afterburner is the spine of the whole operation; everything else exists to catch it lying. Grab it from the official MSI Afterburner page rather than a mirror, because the mirrors are where the malware lives. RivaTuner Statistics Server installs alongside it and provides the on-screen display you will use to watch clocks and temps in real time. For synthetic load, Unigine Superposition is the modern default and Unigine Heaven is the venerable artifact-finder that still earns its place. For error-checked soak testing, OCCT is the tool that actually tells you whether the memory is silently corrupting data. UL's 3DMark supplies Time Spy Extreme and Speed Way for repeatable scored runs.
Drivers: clean-install first
Before any of this, install the latest driver, and install it clean. This is not optional cargo-culting; a stale or corrupted driver is the single most common source of "instability" that people misattribute to their overclock and then chase for hours. The universal guides are unanimous on the point — as Avira's cross-vendor walkthrough puts it, you ensure the latest GPU drivers are installed before you attempt anything, to rule out compatibility issues masquerading as overclock failures. On NVIDIA, grab the current package from the official driver page; on AMD, from the AMD support portal. If you have swapped GPU vendors or seen weird behavior, do a clean install and let it wipe the old profile store.
Hardware and thermal reality
Overclocking raises power draw and heat. Three hardware facts gate your result. First, the power supply: a card pulling fifteen percent more than its rated board power needs a PSU with margin and a clean set of PCIe cables, not a daisy-chained single cable feeding a 300-watt card. Second, case airflow: an overclock is a thermal problem wearing a frequency costume, and a card starved of intake air will throttle back everything you gain. Third, your temperatures — plural. The edge temperature Afterburner shows by default is the friendly number. The two that actually kill overclocks are the hotspot (the hottest single point on the die) and the VRAM temperature, both of which HWiNFO64 will surface and both of which run substantially hotter than the edge sensor. If your hotspot is brushing 100C at stock, you have a cooling job to do before you have an overclocking job.
The Tools and the NVIDIA/AMD Split
One tool does ninety percent of this on either vendor, but the vendor-specific landscape is worth understanding — partly to save time, partly because one widely-repeated "fact" about it is wrong.
MSI Afterburner, the default
MSI Afterburner is the standard overclocking utility, vendor-agnostic, and it does not care whether your card says GeForce or Radeon on the box. It exposes core clock offset, memory clock offset, power limit, temperature limit, fan control, and — once you unlock it — voltage. It is the tool every guide in this space assumes, including PCMag's step-by-step, and it is the tool this article uses for every numbered step. Learn its layout: the core and memory sliders are offsets, in megahertz, added to whatever the boost algorithm is already doing. "+150" does not mean the card runs at 150 MHz; it means every boost state is shifted up by 150.
NVIDIA: Inspector, and the naming lie
Here is the correction. A number of guides — including some of the sources feeding this one — describe NVIDIA Inspector as "NVIDIA's own official overclocking software." It is not. NVIDIA Inspector is a third-party utility, written by an independent developer, that happens to expose NVIDIA driver internals in fine-grained detail. NVIDIA does not make it, does not sign it, and does not support it. It is genuinely useful for reading clock states and for per-application profile poking that Afterburner abstracts away, and there is nothing wrong with using it — but call it what it is. NVIDIA's actual first-party tuning lives inside the NVIDIA app's performance panel, which for most people is a thinner, friendlier layer over the same knobs Afterburner exposes. If a source tells you a third-party tool is a first-party product, quietly downgrade your trust in the rest of that source.
AMD: it's already in Adrenalin
Radeon owners frequently do not need Afterburner at all. AMD builds tuning directly into its driver: open Radeon Software Adrenalin, go to Performance > Tuning, and you get automatic presets, a manual GPU-tuning mode with the same core/memory/power/voltage controls, and a fan-curve editor, all first-party and all aware of the specific quirks of your card. This is the genuine "AMD Radeon Performance Tuning" that the cross-vendor guides reference, and unlike the NVIDIA Inspector claim, this one is real and it is official. The method that follows maps cleanly onto Adrenalin's controls even though the screenshots would show Afterburner. Whichever you choose, pick one tool and let it own the card — running Afterburner and Adrenalin tuning simultaneously is a recipe for two schedulers fighting over the same clock and neither one winning.
Step 0: Establish a Baseline
The first step is the one everyone skips and the one that determines whether any of the following work means anything.
Why you log before you touch anything
Step 0 rationale: A gain is a difference, and a difference requires a "before." If you do not record how the card performs at stock — clocks, temperatures, and a benchmark score — you have no way to prove your overclock did anything, no way to tell a real improvement from run-to-run variance, and no clean state to compare against when something goes wrong. Every serious overclock begins by writing down the boring numbers. Run your chosen benchmark two or three times at stock and take the median; single runs vary by a percent or two on their own, and you do not want to mistake that noise for a result later.
What to record
Capture the following at stock, under sustained load, after the card has warmed up for a few minutes so the clocks have settled to their real sustained values rather than the brief opening burst.
=== BASELINE (stock, no offsets, warmed up) ===
Card              : [your GPU]
Driver            : [latest, clean install]
Core boost (avg)  : 2,7xx MHz    <- observed sustained, not box number
Memory            : [stock effective rate]
GPU temp (edge)   : 71 C
Hotspot           : 88 C
VRAM              : 76 C
Power draw        : 100% of TDP
Fan speed         : ~52%
Superposition 1080p Extreme : 18,4xx   <- your reference score
(numbers illustrative - yours WILL differ)
Those figures are an example of the shape of a good baseline log, not a claim about any specific product; the masked digits are a reminder that your card's numbers are the only ones that matter here. Note the sustained boost clock specifically — it is almost always lower than the peak the box advertises, because the box number is a brief, cold, unsustained spike.
Marry one benchmark
Pick a single benchmark and commit to it for the entire session. The consistency matters more than the choice: the advice across the 2026 tooling — Superposition, Heaven, OCCT, Time Spy Extreme, Speed Way — is to always test with the same benchmark so your numbers are comparable across every change you make. Switch benchmarks mid-session and you have introduced a second variable into an experiment that should have exactly one. Superposition at 1080p Extreme with Vsync off is a fine default: it is short, it is sensitive to both core and memory, and it scores repeatably. Marry it for the next ninety minutes.
Steps 1-3: Power, Temp, and Fans
Before touching a single clock, you give the card room to breathe. These three steps raise the ceilings the boost algorithm bumps into. On their own they add little; without them, every clock offset you add later gets quietly clawed back the instant the card hits a limit.
Step 1 - Max the power limit
Step 1 rationale: The power limit is the wall the boost algorithm hits most often. A card that wants to clock higher but has run out of its power budget will simply refuse, throttling back to stay under the cap regardless of thermal headroom. Drag the Power Limit slider to its maximum — in practice this is around +15% on most cards, sometimes higher on cards with a generous board design. This does not force the card to draw more power; it removes the ceiling so the card can when it wants to. This single change often recovers sustained boost clocks you did not know you were losing.
Step 2 - Max and link the temp limit
Step 2 rationale: The temperature limit is the second wall. The boost algorithm throttles as it approaches the thermal cap, so a low temp limit chokes your clocks before heat is actually a problem. The 2026 recommended opening move is to drag both the Power Limit and the Temperature Limit sliders to maximum before applying anything, so the card can draw and sustain more within safe bounds. In Afterburner, click the link icon between the two sliders so they move together, then set both to max. You are not disabling thermal protection — the card will still throttle and, in extremis, shut down to save itself. You are raising the point at which the preemptive throttling kicks in, and you will police the real temperature ceiling yourself in the next section.
Step 3 - Build a fan curve
Step 3 rationale: More airflow means lower temperatures means the card sustains higher boost for longer, so a fan curve is free performance in exchange for some noise. Enable user-defined software fan control in Afterburner's Fan tab and draw a curve that ramps hard as temperatures climb. During the probing phase specifically, leave the fans aggressive so they spin up freely under test load and heat is never your confounding variable; you can soften the curve for daily quiet later, once you know your clocks are stable.
# User-defined fan curve (Afterburner - Fan tab)
# temperature (C)  ->  fan duty (%)
30 C  ->  30 %
50 C  ->  45 %
60 C  ->  55 %
70 C  ->  70 %
80 C  ->  90 %
85 C  -> 100 %
After these three, your Afterburner state should read like this — ceilings raised, clocks still stock, voltage untouched. Apply it and confirm the card is stable at stock clocks with the new limits before you add a single megahertz.
Power Limit ........ +15%   (or max, if the slider allows more)
Temp Limit ......... MAX    (linked to Power Limit: ON)
Core Clock (MHz) ... +0     (untouched this pass)
Memory Clock (MHz) . +0     (untouched this pass)
Core Voltage (mV) .. +0     (leave it. see Step 11)
Fan Speed .......... user-defined curve (above)
Steps 4-7: Core Clock, 20 MHz at a Time
Now the actual overclock begins. The method is a slow climb in small, equal steps until the card breaks, followed by a deliberate retreat to a stable margin below the break. Resist the urge to jump.
Steps 4-5 - The +20 MHz loop
Step 4 rationale: You raise the core clock in small, equal increments because small steps isolate the failure point. Jump the core by +150 all at once and crash, and you have learned nothing except that +150 is too much; you do not know whether +80 or +130 was fine. The expert-consensus increment for 2026 is 20 MHz: add twenty, apply, run a short stress test, and if it survives clean, add another twenty. Some guides open with a slightly larger first jump of 25-50 MHz to get off the floor quickly, which is fine — but once you are in the interesting range, tighten to 20 so you can find the wall precisely.
Step 5 rationale: You repeat the loop — +20, apply, test, +20, apply, test — because the only way to find your card's ceiling is to climb to it. For each step, run a short burn in MSI Kombustor (the tool the sources refer to as the "Combuster" burn-in test), five to ten minutes, watching for visual artifacts and driver resets. Kombustor's whole job is to hammer the GPU harder than any game and surface instability fast.
=== CORE CLOCK SWEEP (memory offset +0) ===
+20  MHz  ->  Kombustor 10 min : clean
+40  MHz  ->  Kombustor 10 min : clean
+60  MHz  ->  Kombustor 10 min : clean
 ...        (keep climbing +20 at a time) ...
+160 MHz  ->  Kombustor 10 min : clean
+180 MHz  ->  Kombustor  4 min : black screen + driver reset (TDR)
                            ^ this is the ceiling for this card
Step 6 - Read the failure (TDR vs artifacts)
Step 6 rationale: The card tells you it has failed in one of two dialects, and reading them correctly tells you which knob to blame. A core clock pushed too far usually produces a TDR — Timeout Detection and Recovery, the Windows mechanism that resets a hung GPU driver, seen as a two-second black screen and a "display driver stopped responding" notice. A gentler over-reach produces artifacts: flickering triangles, scattered colored dots, texture corruption. Either way, the step you just applied is over your card's limit. In the example log, +180 crashed; the ceiling is somewhere between +160 (last clean) and +180 (crash).
Step 7 - Back off and lock the sweet spot
Step 7 rationale: The clock that just barely passed a ten-minute test is not the clock you run every day, because "just barely stable" under a short synthetic load is "intermittently crashes" under a long real one. Back off from the crash point by 20-50 MHz to buy a stability margin. The 2026 guidance is explicit and worth internalizing: if your card crashes Kombustor at +180 MHz, you do not run +180 or even +170 — you drop back to the +140 to +160 range and call that the sweet spot. In the example, +150 is the settled number: comfortably below the +180 wall, retested for a longer clean run to confirm it holds.
+180 MHz crashed  ->  BACK OFF
SETTLE at +150 MHz  (crash point minus ~30, inside 140-160)
Retest +150 : Kombustor 20 min clean, no artifacts, no TDR
>>> Core offset locked: +150 MHz
Steps 8-10: Memory and the Error-Correction Trap
With the core locked, you tune memory — and memory has a trick that will waste your time if you do not know it is coming. On many workloads memory bandwidth buys more frames per megahertz than the core does, so this section is often where the real gain hides.
Step 8 - The +50-100 MHz climb
Step 8 rationale: Memory tolerates larger steps than the core, so you climb faster: increase the memory clock offset in 50-100 MHz increments, apply, and run your benchmark to check stability after each. The reason for a scored benchmark here rather than just a burn-in is that memory instability often does not throw a dramatic crash the way the core does — it degrades quietly, which is the whole point of the next step. Watch the score climb as you add memory clock; a healthy memory overclock shows the benchmark score rising step over step.
=== MEMORY SWEEP (core locked at +150) ===
+200 MHz  ->  Superposition : 18,9xx   (up - good)
+400 MHz  ->  Superposition : 19,3xx   (up - good)
+600 MHz  ->  Superposition : 19,6xx   (up - good)
+800 MHz  ->  Superposition : 19,4xx   (DOWN - and no artifacts?)
Step 9 - The error-correction trap
Step 9 rationale: This is the single most important thing to understand about memory overclocking, and the reason you benchmark rather than just burn-in. Modern graphics memory has built-in error correction and retry logic. When you push the memory clock past the point where it can transfer data cleanly, it does not immediately crash or throw visible artifacts — it silently retries the failed transfers. Those retries cost time. The result is a memory clock that reads higher but performs lower: your benchmark score goes down while the numbers say it should go up, and there is not a single flickering triangle to warn you. In the log above, +800 scored lower than +600 with no visible fault. That falling score, not a crash, is the tell. If you were only running a burn-in and watching for artifacts, you would sail right past the real ceiling and lock in a memory clock that is actively making your card slower. Chasing the megahertz number instead of the score number is the most common self-inflicted wound in memory overclocking.
Step 10 - Settle below the ceiling
Step 10 rationale: You settle the memory just below the point where the score stops improving, with a margin for stability, because — as with the core — barely-stable is not daily-stable. The baseline guidance is to reduce the clock by 10 MHz if the system crashes or a game misbehaves and re-test; in practice, back off to the last offset where the score was still climbing and then take a little more off the top for margin. In the example the score peaked at +600, so the card settles at +590 — the peak minus a small buffer. If you saw an outright crash rather than a score dip, drop further, 50-100 MHz, then re-approach. The goal is the highest memory clock whose score is genuinely at or near the peak, not the highest number the slider will accept.
Score peaked at +600 (higher offsets slower or crashing)
BACK OFF to +600, then -10 for margin
>>> Memory offset locked: +590 MHz
Step 11: Voltage, the High-Risk Part
This is the step to read carefully and, for almost everyone, to skip. It is included for completeness and because you should understand what you are declining.
Unlocking voltage control
By default Afterburner hides voltage control, which is a hint. To expose it, open Afterburner's settings, go to the General tab, and check both Unlock Voltage Control and Unlock Voltage Monitoring, then set the voltage-control drop-down to Third Party. PCMag's walkthrough documents exactly this path. Once unlocked, a core-voltage slider appears alongside the clock sliders. The mechanism it offers is simple in theory: more voltage can stabilize a higher core clock that was crashing on power delivery rather than on heat, letting you push the core a little further than Step 7 allowed.
Step 11 - +10 mV at a time (if at all)
Step 11 rationale: If you choose to do this, the increment is small and the testing is constant: raise core voltage by 10 mV, run your benchmark, and if nothing crashes, you may attempt to push the core clock a touch higher, repeating the add-voltage-then-add-clock dance. The rationale is that a core clock which failed on stability rather than temperature sometimes survives with a hair more voltage behind it. Every 10 mV step is followed by a benchmark run, because voltage that does not buy you a stable higher clock is voltage that only bought you heat.
=== OPTIONAL VOLTAGE PUSH (high-risk, most should skip) ===
General tab -> Unlock Voltage Control : ON
             Unlock Voltage Monitoring : ON
             Voltage control drop-down : Third Party

+10 mV -> benchmark : stable? -> try core +10-20 MHz -> retest
+20 mV -> benchmark : watch hotspot temp closely
... stop the moment temps spike or clocks stop improving
Why The Machine leaves it at zero
The 2026 safety consensus is unambiguous: do not touch core voltage unless you genuinely need to, because it is high-risk and, mismanaged, leads to instability or hardware failure. Here is the arithmetic that makes the warning stick. Voltage raises heat and heat raises voltage requirements, a feedback loop that eats your thermal headroom fast — and the reward at the end is typically another one percent of performance for a meaningful jump in temperature and long-term electromigration stress. You are trading real risk and real heat for a gain smaller than run-to-run benchmark noise. The discipline of extracting more performance at less voltage is a real and rewarding one, but it belongs to undervolting your CPU and to the voltage-frequency curve trick in the advanced section — not to bludgeoning a GPU with extra millivolts. Leave the slider at +0. The power, temp, and clock offsets already captured the gain worth having.
Steps 12-13: Validate, Then Save
You now have offsets that survived short tests. "Survived short tests" and "stable" are different claims, and the gap between them is where crashes-in-two-hours live.
Step 12 - The 30-60 minute soak
Step 12 rationale: Short tests find gross instability; long tests find the instability that actually ruins your evening. A clock that passes ten minutes of Kombustor can still crash forty minutes into a game, because thermal saturation, VRM heat soak, and the specific instruction mix of real workloads take time to manifest. Validate with a 30-60 minute soak across more than one tool. Run OCCT's 3D and VRAM test — it is the one that actively checks for computational errors, not just crashes, and will catch a memory overclock that is corrupting data without crashing. Then a long Superposition or Heaven loop watching for artifacts, then, crucially, real gameplay. Synthetic tests exercise the GPU in patterns that do not always hit the same weak paths a game does; a couple of hours in a demanding title is the test that matters most.
=== VALIDATION SOAK ===
OCCT 3D + VRAM ... 60 min : 0 errors, 0 crashes
Superposition .... loop 30 min, Vsync OFF : no artifacts, score up
Heaven ........... 20 min : no artifacts (legacy sanity check)
Real game ........ 2 h : no crash-to-desktop, no visual corruption
Thermals ......... edge < 80 C, hotspot < 90 C, VRAM < 90 C
Vsync off, or your numbers are fiction
Rationale: When you benchmark, disable Vsync. With Vsync on, the frame rate is capped to your monitor's refresh rate, which means a faster card and a slower card can post identical numbers because both are being held at the ceiling — you would be measuring your monitor, not your overclock. Turn Vsync off in every benchmark so the card runs unbounded and the score reflects actual capability. Keep temperatures inside the 85-90C ceiling throughout; that band is the practical safe zone that avoids both thermal throttling and long-term damage, and if a soak pushes past it, your fan curve or case airflow needs work before your clocks do. Once you are done validating and gaming for real, Vsync's successor is worth turning on — pair the finished overclock with variable refresh for tear-free frames without the latency penalty of old-school Vsync.
Step 13 - Profile 1 and apply at startup
Step 13 rationale: An overclock that does not survive a reboot is a chore you will do once and abandon. Save the validated settings to Profile 1 in Afterburner, then enable the Windows-startup option (the small Windows icon at the top right of the interface) so the profile applies automatically every boot. Do this only after Step 12 passes — auto-applying an unvalidated overclock at startup is how you end up staring at a black screen before you can even reach the tool to undo it. Once saved and set to auto-apply, the overclock is permanent, invisible, and free forever, or until your next driver update prompts you to re-verify.
Common Pitfalls and How to Undo Them
Every one of these has cost someone an afternoon. Most are undone by reverting the last change; the deeper lesson is not to make them in the first place.
The measurement mistakes
- Skipping the baseline. Without a stock reference score, you cannot distinguish a real gain from benchmark noise, and you have no clean state to compare against when debugging. Fix: there is no fix after the fact — revert to stock, log it properly, and start over. This is why it is Step 0.
- Leaving Vsync on while benchmarking. Your frame rate gets capped to the refresh rate and every result becomes meaningless, often showing zero improvement from a genuinely good overclock. Fix: disable Vsync in the benchmark settings and re-run.
- Switching benchmarks mid-session. Different tools scale differently; changing tools introduces a second variable and makes your before/after numbers incomparable. Fix: pick one benchmark at Step 0 and use only that one until you are done.
The stability mistakes
- Changing core and memory at the same time. When it crashes, you cannot tell which one broke, so you cannot tune either. Fix: lock the core first (Steps 4-7) with memory at +0, then tune memory (Steps 8-10) with the core fixed. One variable at a time, always.
- Trusting a two-minute test. Short stability is not real stability; the crash arrives at minute forty or in one specific game. Fix: run the 30-60 minute multi-tool soak of Step 12, including real gameplay, before you trust anything.
- Chasing the memory megahertz number into the error-correction trap. A higher memory clock that scores lower is slower, and it shows no artifacts to warn you. Fix: watch the benchmark score, not the clock; back off to where the score peaked. Re-read Step 9 if this bit you.
The persistence and hardware mistakes
- Cranking core voltage for a few megahertz. High-risk for roughly one percent of performance and a lot of heat. Fix: set core voltage back to +0 and take the gain from clocks, power, and cooling instead.
- Auto-applying an unvalidated overclock at startup. A bad profile set to load at boot can drop you into a black screen before you can open the tool to fix it. Fix: boot into Safe Mode, open Afterburner, reset the profile or disable the startup option, then reboot. And never enable startup before Step 12 passes.
The Troubleshooting Table
When it goes wrong, it usually goes wrong in one of a small number of recognizable ways. Match the symptom, apply the fix, and re-test the one variable you changed.
Reading the table
Each row is a symptom you can observe, the cause it most reliably indicates, and the correction. Work top to bottom; the crash-type rows are the most common and the most diagnostic, because how the card fails tells you which knob to walk back.
| Symptom | Likely cause | Fix |
|---|---|---|
| Black screen ~2s then "display driver stopped responding" (TDR) | Core clock too high | Drop core offset by 30-50 MHz, re-test |
| Instant crash-to-desktop, but only in games | Memory clock too high | Drop memory offset 50-100 MHz, then fine-tune |
| Benchmark score LOWER than stock, no artifacts | Memory error-correction retries (the trap) | Back memory off until the score peaks again |
| Colored dots, flickering triangles, texture corruption | Early core or memory instability | Remove the last offset you added |
| Boots to a black screen at Windows startup | Bad OC set to auto-apply | Safe Mode, reset profile / disable startup, reboot |
| Card hits temp limit and downclocks under load | Insufficient cooling or low temp limit | Max the temp limit, steepen fan curve, fix airflow |
| Stable in every benchmark, crashes in one game | Synthetic tests missed that game's weak path | Validate with long real gameplay, back off slightly |
| New or louder coil whine after overclocking | Higher current / higher framerate | Electrically harmless; cap FPS or lower power limit if it bothers you |
| Fans at 100% but hotspot still above 100 C | Cooler mount / paste / pad fault, not clocks | Reseat cooler; an overclock cannot fix a thermal defect |
| Clocks won't apply or revert instantly | A second tool (Adrenalin / vendor app) fighting Afterburner | Use one tool only; disable vendor auto-tuning |
Advanced Tips and the Full Configuration
Once the basic climb-and-retreat method is second nature, three techniques separate a competent overclock from a good one — and then, at the end, the complete profile to model yours on.
The V/F curve (Ctrl+F)
The voltage-frequency curve editor, opened with Ctrl+F in Afterburner, is where the real craft lives, and it is the honest inversion of Step 11's brute-force voltage push. Instead of adding voltage to chase a higher clock, you pin a target clock to a lower voltage point on the curve and flatten everything above it. The result is the card holding a high boost clock at reduced voltage: more sustained performance, less heat, quieter fans, and often better stability than a raw offset because the clock is locked flat rather than bouncing with the boost algorithm's whims. It is fiddlier than dragging a slider — you drag a point, flatten the tail, apply, and test — but it is the single technique most worth learning after the basics, and it is the same undervolt-for-performance philosophy that makes CPU tuning worthwhile.
Per-game profiles and the OSD
Afterburner stores up to five profiles, and RivaTuner Statistics Server can apply them per application. That means a mild, silent overclock for the desktop and light titles, and an aggressive one that only loads when a demanding game launches. Pair this with the RivaTuner on-screen display — clocks, temperatures, power, and framerate overlaid live in-game — and you can watch exactly what your overclock does under real load instead of inferring it from a synthetic score afterward. The OSD is also your early-warning system: if you see the hotspot climbing past your comfort band or the clock sagging under a thermal wall, you know before a crash tells you.
The complete working configuration
Here is a complete, validated profile in the shape yours should take. The numbers are illustrative — they are the result of the example climb in this guide, not a spec to copy, because your silicon lottery ticket is not this one. Copy the structure: raised power and temp ceilings, a settled core offset inside the sweet spot, a memory offset backed off from the score peak, voltage untouched, and a validation record proving it holds.
### STARESBACK reference GPU OC profile (illustrative shape) ###
# Tool: MSI Afterburner 4.6.x  |  Save to Profile 1
# Enable "apply at Windows startup" ONLY after validation passes

Power Limit .......... +15%          # or max the slider allows
Temp Limit ........... MAX (linked)  # link icon ON, moves with power
Core Clock offset .... +150 MHz      # settled inside 140-160 sweet spot
Memory Clock offset .. +590 MHz      # score peaked ~+600, -10 for margin
Core Voltage ......... +0 mV         # untouched. high-risk. see Step 11
Fan control .......... user-defined curve (30% at 30C -> 100% at 85C)

# --- Validation record (do not skip) ---
OCCT 3D + VRAM ....... 60 min : 0 errors, 0 crashes
Superposition ........ Vsync OFF, 30 min loop : no artifacts, score up
Kombustor ............ 30 min : 0 rendering errors
Real game ............ 2 h : no crash-to-desktop, no corruption
Thermals ............. edge < 80 C, hotspot < 90 C, VRAM < 90 C

# --- Result vs baseline ---
Superposition 1080p Extreme : 18,4xx -> 19,6xx  (~ +6-7% here;
  your gain lands somewhere in the realistic 5-12% band)
That is the whole discipline: raise the ceilings, climb the core twenty megahertz at a time until it breaks, retreat to a margin, tune memory by the score rather than the number, refuse the voltage temptation, soak-test until "probably stable" becomes "stable," and save it. Ninety minutes, roughly ten percent, no fire. The card was always capable of this; the factory just declined to promise it. Now you have collected the difference.
Questions the search bar asks me
- Is overclocking a GPU safe in 2026?
- For the most part, yes, if you keep temperatures in the 85-90C band, raise the power limit about +15%, and leave core voltage alone (the sources flag voltage as the high-risk step). Modern cards throttle and, in extremis, shut down to protect themselves long before an offset-only overclock can damage them. The real risk is wasted time from instability, not fire.
- How much extra performance will overclocking actually give me?
- Realistically 5-12%, with a lucky memory overclock occasionally reaching about 15% total. Factory boost algorithms already claim most of the frequency, so you are fighting for single-digit percentages, not a performance tier. Anyone promising 30% is testing an old card or a misleading synthetic benchmark.
- Should I overclock the core or the memory first?
- Lock the core first with memory at +0, using +20 MHz steps until it crashes, then back off 20-50 MHz. Only then tune memory in 50-100 MHz steps. Doing them together means you cannot tell which one crashed, and memory hides a trap: past a certain clock, error-correction retries make the benchmark score go DOWN with no visible artifacts, so watch the score, not the megahertz.
- Do I need to adjust voltage to overclock my GPU?
- No, and for almost everyone you should not. Voltage is unlocked in Afterburner's General tab and raised in 10 mV steps, but the 2026 guidance is explicit that it is high-risk and typically buys around 1% for a large increase in heat. The power-limit, temp-limit, core, and memory offsets capture essentially all the gain worth having.
- Why did my overclock lower my benchmark score instead of raising it?
- Almost always the memory clock is too high and the memory's built-in error correction is silently retrying failed transfers, which costs time and drops the score with zero artifacts to warn you. Back the memory offset off until the score peaks again, then subtract a small margin. This is the single most common self-inflicted memory-overclocking mistake.

Ben covers the hardware end of retro gaming: FPGA cores, real-cartridge dumping, capture setups, CRT vs scaler workflows, and the legal and physical preservation infrastructure that keeps old games playable. Every post under this byline is reviewed pre-publish by Sam P., Editor & Operator — corrections to info@instalinkoteam.com. Published 2026-07-03 · Last updated 2026-07-03. Full bios on the author page.