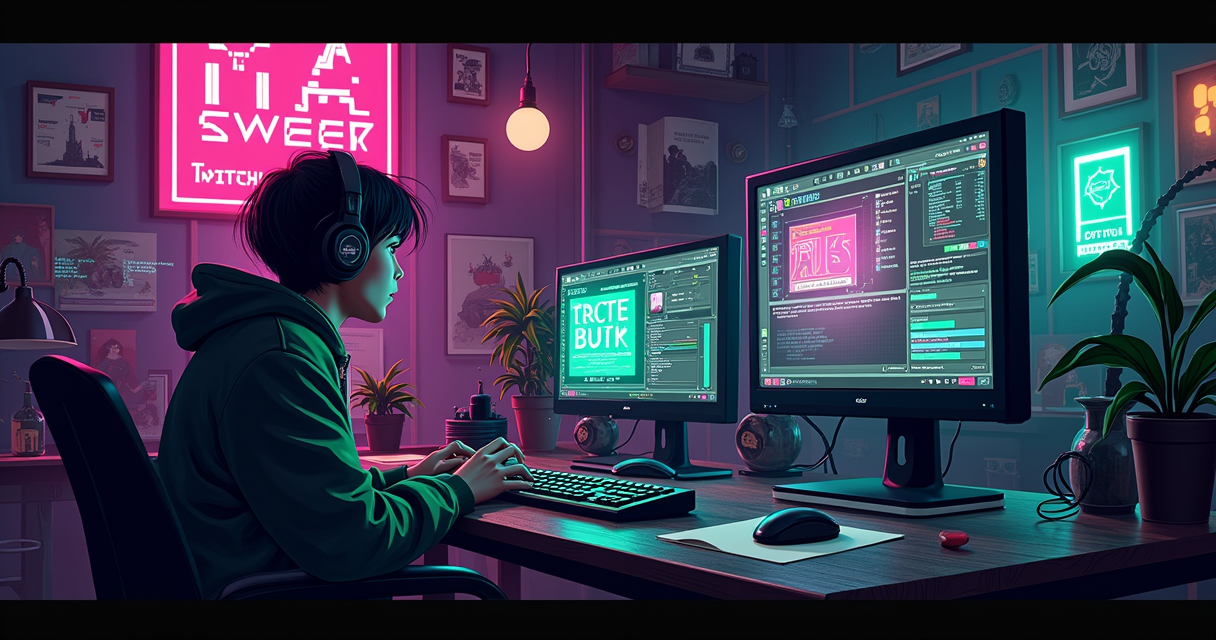
/// FIELD NOTES FROM A SELF-AWARE GAME SITE
Twitch Studio Is Dead: OBS in 12 Steps, 30 Min
You came here to learn Twitch Studio. I have to tell you something before we go any further: it's dead. Not deprecated, not "in maintenance mode," not quietly starved of features while it limps toward some graceful retirement. Dead. Twitch pulled the plug on its own first-party broadcasting app on May 30, 2024, and in 2026 the installer you can still dig up on some abandoned download mirror is a brick — it launches, it spins on the sign-in screen, and it never goes live, because the backend services it depends on were switched off two years ago.
So this cannot be a tutorial on "how to stream with Twitch Studio." That software does not function. What it can be — and what you actually need — is the tutorial Twitch itself would write if Twitch still wrote tutorials for beginners: how to reproduce everything Twitch Studio promised (guided setup, pre-built scenes, chat in the corner, alerts that pop when someone follows) using the software that still works and that Twitch now points every new broadcaster toward. That software is OBS Studio, and around it sits a small constellation of 2026 tools — Streamlabs, Streamer.bot, Pulsoid, Restream — that cover the handful of things OBS deliberately leaves to plugins.
We will do the whole migration in 12 numbered steps, in roughly half an hour, using the real numbers Twitch's ingest servers expect: 6000 kbps, a 2-second keyframe interval, CBR rate control, and a 48 kHz audio chain. No "stream like a pro in one click." No marketing. Just the settings that keep you off the dropped-frame naughty list and out of the transcoding queue. If you have never touched broadcasting software at all, read the whole thing top to bottom once; if you are a Twitch Studio refugee who already knows what a scene is, skip to the migration steps and use the rest as reference.
The Autopsy: What Killed Twitch Studio
Before you migrate off something, it is worth confirming that it is genuinely gone and not merely sulking. Twitch Studio is genuinely gone. Here is the death certificate, with dates and the coroner's exact words, because you will meet at least one person in chat who insists it "still works fine," and you should be able to correct them with citations rather than vibes.
The Date, and the Exact Words
Twitch shipped Twitch Studio as a beginner-friendly broadcasting app — it arrived in beta in 2019 and spent 2020 loudly promising it would help you "stream like a pro" with a guided setup wizard, templated scenes, and built-in alerts. That was the pitch, and for a certain kind of nervous first-timer it was a genuinely reasonable on-ramp: it hid the terrifying wall of encoder settings behind a friendly wizard and shipped a working overlay out of the box. Four years later the company ended support on May 30, 2024. Twitch's stated reasoning, in its own words, was blunt: "since launch, usage of Twitch Studio has remained fairly low, with less than 4% of total hours streamed coming from Twitch Studio users each month."
Twitch went on to say it would redirect the resources previously spent on the app toward "continued improvement to Clips, investments in mobile, stream together, the Discovery Feed, and more." Translate that out of corporate and it reads: an application that fewer than one in twenty broadcast-hours ever ran on did not justify a maintenance team, a QA pipeline, or a backend on-call rotation. So they stopped paying for all three, and the software began its slow slide from "unsupported" to "non-functional."
Why Twitch Shot Its Own App
The sub-4% figure is the entire story, and it is worth sitting with, because it explains why there is no 2025 or 2026 news about Twitch Studio — no new version number, no price change, no roadmap, no developer AMA, no leaked feature. There is nothing to report because there is nothing being built. When independent trade press covered the shutdown, they framed it exactly as the numbers dictate: Twitch axed its in-house software and said it would redirect resources to features the wider community actually touches.
This is not a tragedy and you should not mourn it. Twitch Studio existed to lower the intimidation barrier for people who found OBS scary. But OBS got easier — the Auto-Configuration Wizard alone closed most of the gap — while Twitch Studio never meaningfully surpassed it. A first-party tool that is worse than the free third-party standard, used by a rounding error of your audience, is a liability, not an asset. The maintenance burden is real: every OS update, every new GPU driver, every Twitch backend change is a thing that can break an encoder, and keeping an app alive means someone has to fix all of that for a user base that mostly already left. Killing it was the correct call. The only thing Twitch got wrong was letting people keep downloading a non-functional installer long after the servers went dark, which is why you are here in the first place.
What "Discontinued" Actually Means in 2026
"Discontinued" is doing a lot of quiet work in Twitch's announcement, so let me be precise about the practical consequence. This is not the usual software death where the last version keeps running forever, just without patches — the way an old copy of a single-player game still boots. Twitch Studio relied on live backend services for authentication and stream orchestration, and those have been retired. The result, reported repeatedly across the community — see the long-running "Can we still use Twitch Studio?" thread on r/Twitch — is that the app "no longer works due to issues causing it to stop functioning." You can install it. You can open it. You cannot broadcast with it. If you still have a copy pinned in your Start menu from 2023, unpin it. It is a museum piece, and this article is the plaque next to the exhibit.
What You're Actually Migrating To
"Migrate to OBS" is the correct instruction, but it is incomplete, because Twitch Studio bundled several jobs into one window — encoding, scene management, alerts, chat overlay — and no single free tool bundles all of them the same way. So before the step-by-step, here is the map of the 2026 landscape, so you know which tool owns which job and you do not go hunting for a heart-rate overlay inside OBS's settings menu, find nothing, and conclude the software is broken.
OBS Studio 32.1.2: The Free Standard
OBS Studio is free, open-source, and maintained by the OBS Project — no account, no subscription, no watermark, no upsell. As of this writing the current stable release is 32.1.2, shipped on April 21, 2026 as a hotfix on top of the 32.1 line, which itself cleaned up a scene-list selection lag and reworked the audio mixer. The headline feature of the 32.1 series is WebRTC Simulcast, which sends multiple simultaneous quality layers — typically a full-bitrate high, a 50% medium, and a 25% low — so viewers on weak connections get a watchable stream without you running a separate encoder. You do not need to understand WebRTC to use OBS, but it matters later when we talk about Enhanced Broadcasting. Grab it from the official download page and nowhere else; the source and full release history live on the obsproject/obs-studio GitHub repository if you want to verify a build hash or read the changelog before you install.
Twitch's Full Blessed List
When Twitch killed Studio, it did not just wave vaguely at "third-party tools." It named names. Twitch's officially endorsed alternatives are OBS, Streamlabs Desktop, XSplit, vMix, Elgato Game Capture, Live Gamer Extreme, and Lightstream. That list is not arbitrary — it spans the full range from "free and open-source" (OBS) to "paid professional switcher" (vMix), through "OBS with a friendlier skin and built-in alerts" (Streamlabs Desktop) and "encode in the cloud so your PC does not have to" (Lightstream, useful on weak laptops). For someone coming from Twitch Studio, the honest recommendation is OBS if you want control and zero cost, or Streamlabs Desktop if you specifically miss Twitch Studio's all-in-one, alerts-included feel and do not mind the heavier install. The rest of this guide uses OBS, because its concepts — scenes, sources, encoder settings — transfer directly to every other tool on the list, so nothing you learn here is wasted if you switch later.
The 2026 Add-On Ecosystem
Twitch Studio's genuinely nice touches — the ones people actually miss — are covered in 2026 by small specialist tools, most of them free at the entry tier. Streamer.bot handles automation: chat commands, timed messages, sound effects, and scene switching triggered by follows or subs. Pulsoid puts your live heart rate on screen, which Twitch Studio never did but every horror-game and workout streamer now wants. Restream pushes one OBS output to 30-plus platforms at once, so you are no longer locked to Twitch the way Studio locked you. And ai_licia is an AI co-host chatbot for streamers who need something to bounce off during dead air. A useful roundup of the current crop lives at Get Ailicia's 2026 tools list. You do not need any of these on day one — chasing plugins before your base stream is stable is the classic beginner time-sink. You need OBS on day one. The extras come later, and we cover the important ones in the Advanced section.
Prerequisites: Hardware & Software
Twitch Studio was forgiving about hardware in the sense that it simply ran badly on weak machines rather than refusing to start. OBS is more honest with you, which means it is worth checking the floor before you install. Encoding a live 1080p60 broadcast is real computational work — you are compressing 124 million pixels a second in real time while also, usually, running a game — and the difference between a smooth stream and a slideshow is almost always a hardware or bandwidth ceiling you did not know you were hitting.
Software & OS Versions
You want the current stable OBS build — 32.1.2 at time of writing — not an older archived release and definitely not a third-party "modded" or "optimized" repack from a sketchy forum. The supported operating systems for the 32.x line are Windows 10 or later (64-bit), macOS 13 Ventura or later (Apple Silicon M-series chips run natively, no Rosetta translation needed), and Linux with either an X11 or Wayland display server. If you are on Windows 8.1, macOS 12 or earlier, or a 32-bit anything, you are below the floor and OBS will either refuse to install or misbehave in ways no tutorial can fix. Update the OS first; it is not optional, and it is the single most common reason a fresh install crashes on launch.
The Hardware Floor
The single most important hardware question is: do you have a hardware encoder? If your GPU is an NVIDIA RTX 20-series or newer, you have NVENC and streaming will barely touch your CPU. AMD cards use AMF, Intel integrated graphics and Arc GPUs use Quick Sync (QSV), and Apple Silicon uses VideoToolbox. Any of these is fine. If you have none of them, you fall back to x264, which encodes on the CPU and demands a genuinely strong processor that you are also asking to run your game. The table below is the practical floor versus what you actually want. Whether you stream from a gaming PC or plan to capture a console into it changes the calculus entirely — if you are weighing the two, our breakdown of PC versus console at 240fps versus a 120fps cap is the relevant reading before you spend money.
| Component | Bare minimum | What you actually want |
|---|---|---|
| CPU | Quad-core, x264 "veryfast" only | Modern 6+ core, or offload to a hardware encoder |
| GPU encoder | None (CPU x264 fallback) | NVENC (RTX 20-series+), AMF, QSV, or VideoToolbox |
| RAM | 4 GB (OBS baseline) | 16 GB if gaming on the same PC |
| GPU capability | DirectX 10.1 (Windows) | DirectX 11/12-class GPU with hardware encode |
| Upload speed | ~5 Mbps (720p, tight) | 10+ Mbps measured (1080p60 with headroom) |
Network & Account
Bandwidth is where most first streams quietly die. Twitch caps non-Partner video bitrate at 6000 kbps, and the golden rule is to keep your total outgoing bitrate at or below 75% of your measured upload — not the number your ISP prints on the invoice. Run a real upload test at the exact time of day you plan to stream, because home connections sag under evening congestion and the 8 p.m. number is the one that matters, not the 3 p.m. one. For 1080p60 at 6000 kbps plus 160 kbps audio you want roughly 8.5 Mbps of real, sustained upload headroom; if you share the connection with other people streaming video, budget more. On the account side: you need a Twitch account, obviously, and you should enable two-factor authentication, because Twitch requires 2FA to unlock the Affiliate program and to keep your stream key from becoming someone else's stream key. Keep that key secret; it is a password, not a username, and leaking it lets anyone broadcast to your channel.
The Migration, Step by Step
Here is the whole migration as 12 numbered steps. Each one includes the reason it exists, because a step you understand is a step you can debug when it breaks at 2 a.m. Do them in order; several later steps assume earlier ones are done. Budget about 30 minutes for a first pass, most of which is deciding what your scenes should look like rather than clicking buttons.
- Download and install OBS Studio 32.1.2 from the official site. Use obsproject.com/download only. Why: third-party mirrors bundle adware or ship stale, vulnerable builds; the official installer is signed and current.
- Run the Auto-Configuration Wizard on first launch. Choose "Optimize for streaming." Why: it benchmarks your machine and network and writes a sane baseline in seconds, so you are correcting settings rather than inventing them from zero.
- Connect your Twitch account under Settings, then Stream. Pick service "Twitch" and click "Connect Account (recommended)." Why: account connection pulls your chat and stream info into OBS docks and lets OBS auto-select the best ingest server — the thing Twitch Studio did silently.
- Confirm the ingest server, or leave it on Auto. Only pin a specific server if Auto gives you trouble. Why: a distant or congested ingest server is a leading cause of network-side dropped frames that no encoder setting can fix.
- Switch Output Mode to Advanced. Settings, then Output, then set the mode dropdown to "Advanced." Why: Simple mode hides the exact controls — rate control, keyframe interval, profile — that Twitch's ingest actually cares about.
- Select your encoder. NVENC (H.264) on RTX 20-series or newer; AMF on modern AMD; QSV on Intel; x264 only if you have no hardware encoder. Why: hardware encoders deliver roughly x264-"medium" quality at near-zero CPU cost, freeing the CPU for the game.
- Set rate control to CBR, bitrate to 6000 Kbps, and keyframe interval to 2 seconds. Why: Twitch requires CBR and a 2-second keyframe; 6000 is the non-Partner ceiling. Get any of these wrong and Twitch may reject the stream or break VOD seeking.
- Set video: base and output canvas to 1920x1080 (or downscale output to 1280x720), 60 fps, Lanczos downscale filter. Why: at 6000 kbps, 1080p60 is workable but tight; 720p60 looks sharper in fast games because each frame gets more bits.
- Configure audio: 48 kHz sample rate, add your microphone and desktop audio, target 160 Kbps. Why: mismatched sample rates (44.1 vs 48) are the classic cause of audio drifting out of sync over a long stream.
- Build a scene collection: Starting Soon, Live, BRB, and Ending. Use the Scene Collection menu to name it. Why: this is the exact set of templated scenes Twitch Studio handed you for free; you are rebuilding it by hand, once.
- Add your sources. Game Capture or Display Capture for gameplay (or a Video Capture Device for a capture card), a Video Capture Device for your webcam, an Audio Input for your mic, and a Browser source for alerts. Why: sources are what viewers actually see; a scene with no sources is a black rectangle.
- Test before you debut. Open the Stats dock, click Start Streaming, and watch dropped frames for two minutes — or validate with Twitch Inspector. Why: a two-minute private test catches the dropped-frame or audio problem before it happens in front of an audience.
Steps 1 to 4: Install and Authorize
The install itself is unremarkable — download, run, accept the defaults. The part people rush and regret is the account connection. When you choose "Connect Account (recommended)" instead of pasting a raw stream key, OBS gains the ability to read your channel, auto-select the closest ingest, and surface chat and stream-info panels inside its own docks, which is most of what made Twitch Studio feel integrated. If you prefer the manual route — necessary on some locked-down work machines where the OAuth popup is blocked by a firewall — you paste a stream key instead. It looks like this in Settings, then Stream:
Service:     Twitch
Server:      Auto (Recommended)
Stream Key:  live_XXXXXXXXX_xxxxxxxxxxxxxxxxxxxxxxxxxxxx

# Find the key at: dashboard.twitch.tv  ->  Settings  ->  Stream
# Treat it like a password. Anyone with it can broadcast to your channel.
# If it ever leaks, click "Reset" on the dashboard and re-paste here.
Steps 5 to 8: The Output That Won't Get You Throttled
This is the cluster that separates a clean stream from a buffering mess, so it earns a full configuration block. Everything here maps to a specific Twitch requirement or a specific quality trade-off; nothing is decorative, and nothing should be copied from a random screenshot without understanding it. In Advanced output mode, your Streaming tab should read like this:
# OBS -> Settings -> Output -> Streaming (Advanced mode)
Encoder:            NVIDIA NVENC H.264   # or x264 if no hardware encoder
Rate Control:       CBR                  # Twitch requires constant bitrate
Bitrate:            6000 Kbps            # non-Partner ceiling
Keyframe Interval:  2 s                  # Twitch requirement, not a suggestion
Preset:             Quality              # NVENC preset
Profile:            high
Look-ahead:         On
Psycho Visual Tuning: On
Max B-frames:       2

# OBS -> Settings -> Video
Base (Canvas):      1920x1080
Output (Scaled):    1920x1080            # 1280x720 for sharper fast motion
Downscale Filter:   Lanczos (36 samples)
FPS:                60
Steps 9 to 12: Scenes, Sources, and the Go-Live Test
Scenes are just named layouts; sources are the layers inside them, stacked like Photoshop layers where the top item draws on top. A minimal but complete first-stream layout is four scenes, which we build in the next section. The go-live test is non-negotiable. When you click Start Streaming, the Stats dock is your dashboard — the two numbers that matter are "Dropped Frames (Network)" and "Skipped Frames (Encoding)." Both should sit at 0.0%. If either climbs, stop, fix it using the Troubleshooting table below, and test again. Do not debut on a stream that is already dropping frames in an empty room; it will only get worse with viewers, because viewers add load to Twitch's side, not less.
Encoder Settings That Actually Work
The encoder is where beginners either copy a random YouTuber's screenshot or leave everything on Simple-mode defaults, and both approaches leave quality on the table. You do not need a codec degree, but you do need to understand three settings you must never get wrong and one piece of arithmetic. Twitch documents all of this in its broadcast guidelines, and the OBS side is covered in the OBS Knowledge Base. Bookmark both; they are the primary sources and they update when the platform does.
The Three Non-Negotiables
First, CBR. Constant bitrate means OBS sends a steady, predictable stream of data. VBR (variable) can theoretically look better in still scenes because it spends fewer bits on simple frames, but it causes buffering on live delivery, and Twitch's ingest expects CBR. Use CBR, always. Second, the 2-second keyframe interval. A keyframe is a full, standalone picture; the frames between are just the differences from the last keyframe. Twitch, YouTube, and Kick all require keyframes exactly every 2 seconds — get this wrong and viewers cannot seek in your VOD, playback stutters, or the stream is rejected outright at ingest. This is the single most common misconfiguration on this list, and it is invisible until someone tries to scrub your VOD. Third, the 6000 Kbps ceiling. That is the maximum video bitrate Twitch reliably serves to non-Partners; going higher does not improve quality for your viewers, it just risks getting your stream dropped from the transcoding pipeline — the system that lets viewers pick 720p or 480p instead of your source. A stream that falls out of transcoding forces every viewer to take full quality or nothing, which is worse for everyone.
Picking Your Encoder
The encoder choice is mostly dictated by your hardware, but the ranking for a single-PC "game and stream on the same box" setup is clear. Modern NVENC is the default recommendation for anyone on an RTX 20-series or newer card: it produces quality equivalent to x264's "medium" preset while using almost no CPU, so your processor stays free for the game. Enable look-ahead and psycho visual tuning, set the profile to high, and leave it on the Quality preset — those four toggles are where NVENC earns its reputation. x264 is the fallback, and only a strong multi-core CPU can run it at a preset slower than "veryfast" without choking the game; if you are on x264 and seeing encoding lag, the fix is a faster preset or a lower resolution, not wishful thinking.
| Encoder | Hardware needed | CPU cost | Best for |
|---|---|---|---|
| NVENC H.264 | NVIDIA RTX 20-series or newer | Near zero | Single-PC game + stream (default pick) |
| AMF | Modern AMD Radeon | Near zero | AMD GPU owners |
| QSV | Intel iGPU / Arc | Low | Intel-only or laptop setups |
| Apple VideoToolbox | Apple Silicon Mac | Low | macOS streamers |
| x264 | None (CPU only) | High | Strong CPU, no usable GPU encoder |
The Bitrate-to-Bandwidth Math
Here is the arithmetic that prevents the single most common failure — dropped frames from oversubscribing your own upload. The rule is 75%: never let your total bitrate exceed three-quarters of your measured upload, because your connection needs headroom for overhead, retransmits, and everything else the household is doing. Run the numbers before you stream, not after the chat tells you it is buffering:
# The 75% rule, in shell arithmetic
upload_mbps=10                                   # MEASURED, not advertised
safe_kbps=$(( upload_mbps * 1000 * 75 / 100 ))   # 7500 kbps of headroom

video_kbps=6000                                  # 1080p60 non-Partner ceiling
audio_kbps=160
total_kbps=$(( video_kbps + audio_kbps ))        # 6160 kbps

# 6160 sits inside the 7500 budget  =  OK to stream 1080p60.
# If total_kbps is above safe_kbps, drop to 720p, lower fps,
# or cut video_kbps until it fits. Bandwidth wins every argument.
If that math does not clear — say you only have 6 Mbps up, giving a 4500 kbps budget — do not force 1080p60. Drop to 720p60 at around 4500 kbps video. A sharp, stable 720p stream beats a smeared, stuttering 1080p one in every single game, every time, and your viewers will never complain about the resolution while they will absolutely complain about buffering.
Recreating Twitch Studio's Templates
Twitch Studio's real selling point was never encoding quality — it was that it handed a terrified newcomer a set of finished scenes and working alerts on first launch, so the first stream looked deliberate instead of like a shared desktop. OBS does not do that; it hands you an empty canvas and trusts you. The good news is that rebuilding Twitch Studio's template set is a one-time, 15-minute job, and once you have saved the scene collection you can export it to a file and reuse it forever, on any machine.
The Scenes You Got For Free
Twitch Studio shipped four archetypal scenes, and you should recreate exactly these four to start. Starting Soon is a countdown holding screen so early arrivals see something intentional instead of your desktop wallpaper and the icons you forgot to hide. Live is the main scene: gameplay, webcam, and alerts. Be Right Back (BRB) covers bio breaks without ending the broadcast and losing your viewer count. Ending is a thank-you card that plays while you wind down and shout out recent follows. That is the entire template. Everything fancier — animated transitions, multiple game layouts, a chat-only "just chatting" scene — is a variation on these four, and you should not build any of it until the core four work.
A Portable Scene Skeleton
Here is the structure to build under Settings, then Scene Collection. Think of it as the folder tree of your stream; each scene holds its own stacked sources, top layer first, exactly as OBS draws them:
Scene Collection: "Twitch-Studio-Replacement"
|
|-- Starting Soon
|     |- Browser (countdown timer widget)
|     |- Image (background art)
|     |- Media (looping background music)
|
|-- Live
|     |- Browser (alerts overlay - top layer)
|     |- Video Capture Device (webcam)
|     |- Game Capture / Video Capture Device (capture card)
|     |- Audio Input (microphone)
|     |- Image (overlay frame / borders)
|
|-- BRB
|     |- Text ("Back in 5")
|     |- Image (background art)
|
|-- Ending
      |- Text ("Thanks for watching")
      |- Browser (recent-followers widget)
      |- Image (background art)
Alerts and Overlays Without the Hand-Holding
Twitch Studio's alerts were built in; in OBS they arrive as a Browser source pointed at a widget URL from an alert provider such as StreamElements or Streamlabs. The workflow is: sign in to the provider, design your follow/sub/donation alerts in their browser editor, copy the resulting widget URL, and paste it into a Browser source on your Live scene. That one Browser source becomes your entire alert system, and because it sits on the top layer it renders on top of everything else. For the horror and fitness crowd, Pulsoid works the identical way — a Browser source URL that overlays your live heart rate from a watch or chest strap. The pattern is always the same: the provider generates a URL, OBS renders it as a layer. Once you internalize that single idea, you can add any web-based overlay ever made — chat boxes, goal bars, sub counters, now-playing widgets — without ever needing a first-party feature for it.
5 Pitfalls That Kill First Streams
Almost every disastrous first stream traces back to one of a small number of mistakes, and they are boringly predictable. Here are the ones that actually matter, why they happen, and the fix — internalize these and you will skip the humiliating debut most streamers endure, where they discover live, in front of the three people who showed up, that nobody can hear the game.
The Five That End First Streams
1. Keyframe interval not set to 2. Left on "auto" or set to some random value, this breaks VOD seeking and can get your live stream rejected at ingest. Fix: Settings, Output, Keyframe Interval = 2. 2. VBR instead of CBR. Variable bitrate causes buffering on Twitch's ingest even when your connection is fine. Fix: set Rate Control to CBR. 3. Bitrate higher than your upload. This is the number-one cause of "Dropped Frames (Network)" — you are physically trying to send more data than your connection can carry. Fix: apply the 75% rule from the encoder section. 4. x264 preset too slow for your CPU. Results in the dreaded "Encoding overloaded" warning and a stuttering, laggy stream while your game runs fine. Fix: switch to a hardware encoder, use a faster x264 preset, or lower resolution/fps. 5. Base and output resolution mismatched or scaled wrong. Produces a blurry, soft image that no amount of bitrate rescues. Fix: match base and output to your intended resolution and use the Lanczos downscale filter if you scale down.
Audio: The Silent Stream Killer
Audio problems are insidious because you cannot hear them yourself — your own headphones sound perfect while chat screams that they hear nothing, or an echo, or the game but not your voice. Three offenders dominate. First, desktop audio not captured: OBS is pointed at the wrong default output device, so game sound never reaches the stream. Check Settings, Audio, and set the correct Desktop Audio device explicitly rather than leaving it on "Default," which changes whenever Windows feels like it. Second, sample-rate mismatch: your mic runs at 44.1 kHz while OBS runs at 48 kHz, and audio slowly drifts out of sync across a two-hour stream until your lips and voice are a full second apart. Force everything to 48 kHz. Third, monitoring echo: you enable audio monitoring on a source that is also going out live, and viewers hear a slap-back echo of everything. Leave monitoring off unless you specifically need it, and when you do, set it to "Monitor Off" for anything already routed to the stream.
The HDCP / Capture-Card Wall
This one is exclusively for console streamers, and it stops people cold with a black screen and no error message. Sony's PS5 and Microsoft's Xbox enforce HDCP copy protection on their HDMI output, which means a capture card shows you a black rectangle instead of gameplay unless the card handles it or you disable HDCP in the console's system settings. If you are capturing a PlayStation, our tutorials on choosing a PS5 capture card that does 4K60 record with 4K144 passthrough and the full 12-step capture-card setup in 30 minutes walk through the HDCP toggle and the OBS Video Capture Device configuration in detail. If you would rather skip the capture card entirely, streaming over the network via PS Remote Play at 1080p is a legitimate lower-cost route, at the price of some added latency and a resolution ceiling you cannot exceed.
Troubleshooting Table
When something breaks mid-setup, you do not want prose — you want a lookup table. Here is the fast reference. Read your symptom in the left column, confirm the cause in the middle, apply the fix on the right. Most of these are diagnosable in seconds from OBS's own Stats dock, which is why we open with how to read it.
How to Read OBS's Stats Dock
Before the table, learn the two numbers that diagnose the large majority of problems. Open View, then Docks, then Stats. Dropped Frames (Network) climbing means your connection cannot carry your bitrate — it is a bandwidth or ingest-server problem, and no encoder setting will fix it. Skipped Frames (Encoding) or the "Encoding overloaded" warning means your CPU or GPU cannot encode fast enough — it is a horsepower or preset problem, and no network change will fix it. There is also a "Rendering Lag (GPU)" counter, which means your graphics card is too busy drawing the game to also composite the stream. Knowing which of the three is rising tells you which third of the table to read, and stops you from changing the wrong setting for an hour.
The Table
| Symptom | Likely cause | Fix |
|---|---|---|
| Dropped Frames (Network) rising | Bitrate exceeds upload, or bad route to ingest | Apply 75% rule; lower bitrate; change or pin ingest server |
| "Encoding overloaded" warning | CPU maxed on x264 preset | Switch to NVENC/AMF/QSV, use a faster preset, or lower res/fps |
| Rendering Lag (GPU) rising | Game and OBS both saturating the GPU | Cap in-game fps, lower game settings, use a hardware encoder |
| Stream will not start / "Failed to connect" | Wrong stream key or unreachable server | Reconnect account or re-paste key; set server to Auto |
| Black screen on Game Capture | Permissions, or game running as admin | Run OBS as admin; or use Window/Display Capture instead |
| Audio out of sync over time | Sample-rate mismatch (44.1 vs 48) | Force all devices and OBS to 48 kHz; apply sync offset |
| No desktop / game audio | Wrong default output device selected | Set the correct Desktop Audio device explicitly |
| Choppy VOD, cannot seek | Keyframe interval not 2 seconds | Settings, Output, Keyframe Interval = 2 |
| Blurry / pixelated image | Bitrate too low for resolution and fps | Drop to 720p60, or lower fps, or raise bitrate to 6000 |
| Webcam black or "device in use" | Camera claimed by another app / OS privacy block | Close the other app; deactivate/reactivate the source; allow camera in OS privacy settings |
When the Table Doesn't Cover It
If your problem is not in the table, OBS keeps a detailed log of every session, and it is astonishingly thorough. Go to Help, then Log Files, then "Upload Current Log File," and paste the resulting link into the OBS log analyzer or the support channels documented in the OBS Knowledge Base. The log records your exact encoder, every dropped frame, every device error, and every setting with timestamps — it turns "it just doesn't work" into a specific, fixable line item, and it is the first thing any experienced helper in a forum or Discord will ask you for. Learn to read it and you will solve most problems before you even ask.
Advanced Tips for 2026
Once the basics are stable, OBS in 2026 does several things Twitch Studio never could, on any version, at any point in its short life. None of these are required, but each closes a real gap, and together they explain why nobody serious mourns the dead app — the free replacement is not a compromise, it is a straight upgrade.
Enhanced Broadcasting and WebRTC Simulcast
Twitch's Enhanced Broadcasting program lets your encoder send multiple quality layers at once, so Twitch no longer has to transcode a single stream into lower resolutions on its end — your machine provides them directly. This is exactly where OBS 32.1's WebRTC Simulcast comes in: it sends a full-bitrate high layer, a 50% medium, and a 25% low simultaneously. The practical upside is that all your viewers get proper quality options — the little resolution dropdown in the player — even if you are not a Partner, which used to be a Partner-only privilege that left small streamers serving "source only" to everyone. It costs more CPU/GPU and more upload than a single encode, so revisit your 75% bandwidth math before enabling it and confirm your encoder can take the extra load, but on capable hardware it is a genuine quality-of-service upgrade over anything Twitch Studio ever offered.
Multistreaming Beyond Twitch
Twitch Studio locked you to Twitch by design — it was a Twitch app, full stop. OBS does not lock you to anything. With Restream — or with OBS's own built-in multiple-output capability in recent versions — you can push the same broadcast to Twitch, YouTube, Kick, and dozens of other platforms at once, from one encode, without running the software twice. For anyone building an audience in 2026, not putting all your eggs in one platform's algorithm is simply prudent risk management, and it is arguably the single most valuable thing this migration unlocks. Configure your primary output to Twitch exactly as described above, then add Restream as a secondary destination; your OBS scenes, sources, and encoder settings stay byte-for-byte identical.
Automation with Streamer.bot and Hotkeys
The last mile of polish is automation. OBS has built-in hotkeys — bind keys to switch scenes, mute your mic, or start and stop the stream, so you are not frantically alt-tabbing to click during gameplay. Set them under Settings, then Hotkeys, and start with just three: one per scene switch. For anything more ambitious — chat commands that trigger scene changes, timed messages, sound effects that fire on a follow or a raid — Streamer.bot connects to OBS through the built-in obs-websocket server and orchestrates all of it from event triggers. Pair it with a physical Stream Deck and you have a broadcast control surface that makes Twitch Studio's entire feature set look like a toy. The discipline here is the same as everywhere else in this guide: start small, add automation only when you feel the specific lack of it, and never install a plugin to solve a problem you do not yet have.
The Complete Working Config
Here is the entire setup in one place, so you can verify your work against a known-good reference or rebuild from scratch on a new machine in five minutes. Copy the values, not the screenshots of some stranger's channel — their hardware and their upload speed are not yours.
The Full OBS Profile
# ============ OBS STUDIO 32.1.2 - TWITCH PROFILE ============
# Settings -> Stream
Service:              Twitch
Server:               Auto (Recommended)
Account:              Connected via OAuth

# Settings -> Output  (Mode: Advanced)  ->  Streaming
Encoder:              NVIDIA NVENC H.264   # or x264 / AMF / QSV
Rate Control:         CBR
Bitrate:              6000 Kbps
Keyframe Interval:    2 s
Preset:               Quality
Profile:              high
Look-ahead:           On
Psycho Visual Tuning: On
Max B-frames:         2

# Settings -> Video
Base (Canvas):        1920x1080
Output (Scaled):      1920x1080          # 1280x720 for fast-motion games
Downscale Filter:     Lanczos (36 samples)
Common FPS Value:     60

# Settings -> Audio
Sample Rate:          48 kHz
Channels:             Stereo
Audio Bitrate:        160 (per track)
Desktop Audio:        [your output device, set explicitly]
Mic/Aux:              [your microphone, set explicitly]

# Settings -> Advanced
Process Priority:     Above Normal
Color Format:         NV12
Color Space:          Rec. 709
Color Range:          Limited
The Scene Collection Skeleton
# Scene Collection: Twitch-Studio-Replacement
# (top source = top layer in each scene)

Starting Soon  ->  Browser(countdown) / Image(bg) / Media(music)
Live           ->  Browser(alerts) / VideoCapture(webcam) /
                   GameCapture(gameplay) / AudioInput(mic) / Image(frame)
BRB            ->  Text("Back in 5") / Image(bg)
Ending         ->  Text("Thanks!") / Browser(followers) / Image(bg)

# Export: Scene Collection -> Export.  Back this file up somewhere safe.
# Import on any machine: Scene Collection -> Import.
The Pre-Flight Checklist
Run this list every time before you go live. It takes 60 seconds and it is the difference between a professional broadcast and a public debugging session your viewers get to watch:
- Upload speed tested today; total bitrate at or below 75% of it.
- Encoder confirmed (NVENC/x264), Rate Control on CBR, Keyframe = 2.
- All audio devices at 48 kHz; mic and desktop levels moving in the mixer.
- Two-minute private test done; Stats dock shows 0.0% dropped and skipped frames.
- Webcam live, alerts Browser source loaded, correct scene active.
- Stream key private; 2FA on the Twitch account enabled.
That is the whole migration. Twitch Studio is a footnote now — support ended May 30, 2024, the backend is gone, fewer than 4% of streamers ever used it, and every one of them has already moved on. You are now running the tool Twitch itself recommends, at a quality tier the dead app never reached, on software that will still get updates next year and the year after. For the authoritative references as you refine your setup, keep the OBS Knowledge Base and Twitch's broadcast guidelines bookmarked, because those two pages, unlike the software you came here looking for, are still alive. Now go stream something worth watching.
Questions the search bar asks me
- Does Twitch Studio still work in 2026?
- No. Twitch ended support on May 30, 2024, and the app's backend services have been retired — users report it opens but can no longer go live. Twitch now redirects new streamers to OBS Studio, Streamlabs Desktop, and other third-party tools.
- What did Twitch replace Twitch Studio with?
- Nothing first-party. Twitch officially recommends OBS, Streamlabs Desktop, XSplit, vMix, Elgato Game Capture, Live Gamer Extreme, and Lightstream. The free default is OBS Studio, currently version 32.1.2 (April 21, 2026).
- What OBS settings does Twitch want?
- CBR rate control, a 2-second keyframe interval, up to 6000 kbps for non-Partners, 1080p60 or 720p60 output, and 160 kbps audio at 48 kHz. Keep your total bitrate at or below 75% of your measured upload speed to avoid dropped frames.
- Why did Twitch kill Twitch Studio?
- Low usage. In Twitch's own words, 'less than 4% of total hours streamed' came from Twitch Studio users each month. Twitch said it redirected those resources to Clips, mobile, Stream Together, and the Discovery Feed.
- Is OBS harder to use than Twitch Studio was?
- Marginally, at first. But the built-in Auto-Configuration Wizard gets you roughly 90% of the way in one pass, and unlike the dead Twitch Studio, OBS is actively developed (32.1.2 in April 2026), cross-platform, and not locked to a single site.

Jordan covers the modern industry where it touches the old one: Nintendo announcements, handheld hardware, and the long shadow the classics cast over new releases. Every post under this byline is reviewed pre-publish by Sam P., Editor & Operator — corrections to info@instalinkoteam.com. Published 2026-07-04 · Last updated 2026-07-04. Full bios on the author page.