/// FIELD NOTES FROM A SELF-AWARE GAME SITE
GPU Overclocking 2026: 12 Steps, +15% Power, 60 Min
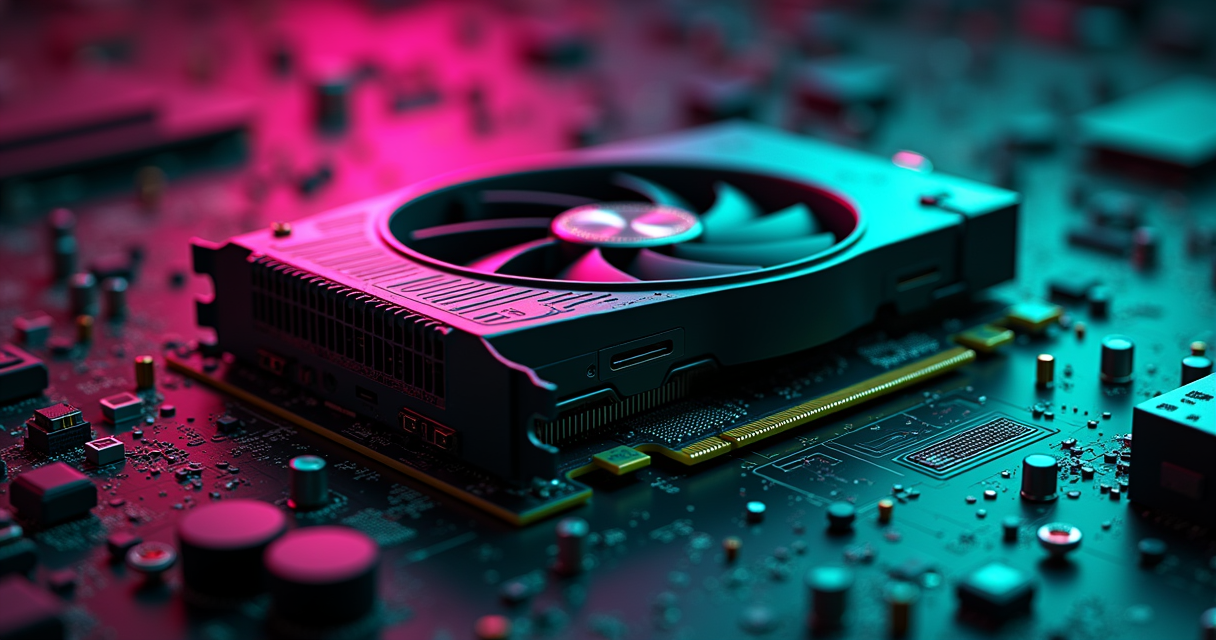
Nobody overclocks a graphics card for the benchmark score. They do it for the story they tell themselves afterward — that the four-figure slab of silicon in the second PCIe slot is now, somehow, theirs. The Machine will not talk you out of the ritual. It will only insist you perform it with your eyes open, because in 2026 the honest return on a GPU overclock is between five and ten percent, and roughly half of that is already sitting in two sliders you have not touched yet.
This is the part the how-to farms skip. A modern GPU — Ada, Blackwell, RDNA 4 — is already overclocking itself, continuously, against a wall built out of power, temperature, and voltage. NVIDIA's GPU Boost and AMD's equivalent raise the clock in tiny bins until they hit the first of those three limits, then step back. Your job is not to "make it faster." Your job is to move the walls and let the card do what it already wanted to do. That reframing is the entire game, and it is why the single biggest win in this guide is a slider with nothing to do with clock speed.
What follows is the method, in twelve steps, with the versions that actually shipped this year, the numbers that are defensible, and a few that the content mills invented. It takes an evening. The stress test alone is sixty minutes, minimum. Bring coffee.
The Reality Check
Before you download anything, internalize the ceiling. Overclocking a 2026 GPU is not the sport it was in 2012. Back then a GTX 680 or an HD 7970 shipped with a fixed clock and a generous margin, and a good sample could gain 20–25% with nothing but a power slider and nerve. Those margins are gone. The manufacturer already spent them at the factory, because boost algorithms let them ship the average silicon closer to its real limit and print the bigger number on the box.
Five to Ten Percent, and Why
What you are hunting is the sliver of headroom above the factory boost table: the bins the card leaves on the floor to guarantee stability across millions of units, a hot case in July, and a marginal power supply. On a well-cooled desktop card that sliver is typically 5–10% of real-world frame rate, and a chunk of it comes from simply un-capping power and heat so the existing boost algorithm stops throttling. Do not expect a tier jump. An overclocked RTX 5070 does not become a 5070 Ti; it becomes a slightly faster 5070 that runs hotter and louder. If you want the tier jump, the honest answer is to buy the tier — our RTX 5090 review lays out what an extra 30% actually costs at the top of the stack.
The Lazy Button: NVIDIA App Auto-Tuning
If you own a GeForce card and you want most of the reward for almost none of the risk, the NVIDIA App has an Automatic Tuning feature that scans your card for 10–20 minutes and applies a validated per-voltage-point offset. It nets roughly +3–5% on average, it is reversible, and — this is the part people get wrong — NVIDIA states it does not void your warranty. For a large fraction of readers that is the correct stopping point. The manual method in this guide exists to squeeze the last few percent past what the automatic scanner will risk, and to teach you where the walls are. If "good enough, walk away" is your temperament, run the auto-tuner and go play something.
What You're Actually Buying
Be honest about the payoff on the other end of the cable, too. Five to ten percent more frames is the difference between 144 and roughly 155 fps, or between 90 and 99. Whether you can feel that is a separate argument, and one we have already had at length in 144Hz vs 240Hz. The point stands: a GPU overclock buys you the top slice of a refresh window you may already be saturating. Tune it because the process is satisfying and the knowledge transfers, not because the bar chart will change your life.
Prerequisites
Overclocking is a measurement discipline dressed up as a hobby. Half the tools here exist only to watch the card, and you cannot tune what you cannot see. Get the versions right, because the wrong download is where 2026's fake guides send you.
The Software Manifest (Versions That Shipped)
Here is the toolchain, with the builds that were current as this was written. Note the Afterburner situation, because the content farms keep getting it backwards: 4.6.6 is the stable release — the first genuine stable in about two years, and the one that added RTX 50 support and bundled RTSS 7.3.7. 4.6.7 is beta 3, worth it only for the reworked voltage-frequency curve editor. If a guide tells you "4.6.7 stable," it is copying another guide that never opened the program.
# ---- 2026 GPU overclocking toolchain ----
TUNING
  MSI Afterburner   4.6.6 (stable, build 4.6.6.16757)   # or 4.6.7 beta 3 for new curve tools
                    source: msi.com  OR  guru3d.com  ONLY
  NVIDIA App        (Automatic Tuning + driver mgmt; replaces old Control Panel)
  AMD Adrenalin     (Tuning tab; power limit hard-capped +10% on RDNA 4)

DRIVER (install FIRST, then reboot)
  GeForce           610.88 WHQL (or newer)   # 610.47 retired the classic Control Panel
  Adrenalin         latest for your RX series

MONITORING
  HWiNFO64          8.5x   (sensor logging, per-rail power, hotspot temp)
  GPU-Z             latest (techpowerup.com/gpuz) (VRAM type, ASIC quality, sensors)

STRESS / VALIDATION
  3DMark            Steel Nomad / Speed Way (before-and-after score)
  Unigine Superposition  1.1 (free basic edition)
  FurMark 2         2.10.2 (quick artifact/crash bursts)
  OCCT              latest (dedicated VRAM error test)
Every one of those is a free download from the vendor. Grab Afterburner from either MSI's official Afterburner page or Guru3D, which has hosted the betas for years. Pull GPU-Z from TechPowerUp and the sensor logger from HWiNFO. Do not install "MSI Afterburner" from a random mirror, a "driver updater," or a YouTube description link; the real thing is signed and comes from those two domains.
Hardware and Airflow
The card is only one variable. Before you raise a single limit, confirm the rest of the platform can feed and cool it. You want a power supply with genuine headroom — an overclock raises sustained board power and, worse, the transient spikes that trip an under-specced or aging PSU into a protective shutdown. You want case airflow that actually moves air across the card, not a sealed aquarium with one exhaust fan. And you want a stable ambient: the 2026 tuning consensus is to keep room temperature below 28 °C, because the card's thermal ceiling is measured against the air you give it, and an overclock validated in a cold December room will happily crash in an August heatwave.
One mechanical aside that matters more than it should on today's three-slot bricks: a heavy card that droops changes how its heatsink meets airflow and stresses the slot over time. If your GPU sags, fix it — we walked through it in the GPU support bracket guide. A level card is a card whose fans and fins sit where the engineer intended.
The Law: Warranties and the 12VHPWR Question
The Machine knows the law, so here it is plainly. In the United States, the Magnuson–Moss Warranty Act (1975) stops a manufacturer from voiding your entire warranty simply because you overclocked; to deny a claim they must show the overclock caused the failure. In practice, tuning through software offsets — Afterburner sliders, the NVIDIA App auto-tuner, Adrenalin's Tuning tab — is the mainstream, low-risk path, and vendors treat it as such. Flashing a modified VBIOS is the line you do not cross casually; that is the act that leaves a fingerprint and gives a partner a reason to refuse. Board-partner policies still vary, so if warranty is sacred to you, stay in software.
Second: on high-power cards — anything hauling 300 W and up through a 12VHPWR or 12V-2x6 connector — seat the cable fully, hear the click, and route it without a sharp bend at the housing. An overclock raises the current through that connector, and a partially-seated plug is how a hot-spot becomes a melted shell. This is not overclocking folklore; it is the single most documented failure mode on modern flagship cards. Fix the connector before you raise the power limit, not after.
The Four Knobs
Strip away the UI and a GPU overclock is four numbers and one curve. Understand what each does and the twelve-step method stops feeling like superstition.
Core, Memory, Power, Temp
The two clock offsets are what most people mean by "overclocking," but they behave nothing alike, and the two limits often matter more than either. Here is the map.
| Knob | What it does | Typical 2026 move | Failure signature |
|---|---|---|---|
| Power limit | Raises the wattage ceiling the boost algorithm is allowed to draw | Max it first: ~+20% NVIDIA, hard +10% AMD RDNA 4 | None — it just lets the other knobs work |
| Temp limit / target | The temperature at which the card starts pulling boost bins to cool down | 85 °C conservative, 88 °C aggressive | Clocks sag as heat climbs (thermal throttle) |
| Core clock offset | Shifts the entire voltage/frequency curve up | +15 MHz steps (up to +25–50 if impatient) | Instant driver crash / black screen |
| Memory clock offset | Raises VRAM data rate | +50 MHz steps | Artifacts, or a silent score drop |
Notice the order implied by that table. Power and temperature come first because they set the size of the room; core and memory come after because they decide how you furnish it. Tune the clocks against a throttled power limit and you are measuring the wall, not the silicon.
Voltage and the V/F Curve
Under the offsets lives the voltage–frequency curve: a list of clock speeds the card will attempt at each voltage step, from idle up to its maximum. A flat core offset raises every point on that curve by the same amount. Voltage is what limits the top of it — the card will only go so high before it needs more volts, and modern cards cap the volts hard to protect the die and stay in their power envelope. This is why raw "more voltage" buys almost nothing on a 2026 card and costs you heat: you are already near the voltage ceiling the manufacturer allows. The interesting move, later in this guide, is the opposite — asking for the same clock at less voltage. That is undervolting, and on current silicon it is frequently the better overclock.
GDDR7, GDDR6X, GDDR6: Why Memory Lies
Know what memory your card carries, because it changes how you tune it. RTX 50 / Blackwell ships GDDR7 (32 GB on the 5090, 16 GB on the 5080). RTX 40 / Ada uses GDDR6X. AMD's RX 9000 / RDNA 4 uses plain GDDR6. The high-speed variants — GDDR6X and GDDR7 — do on-the-fly error detection and retransmission, the same broad idea as error correction on Ethernet or Wi-Fi. The consequence is the single most counter-intuitive fact in GPU overclocking: past a certain point, more memory clock makes the card slower, not crashed, because it spends its time re-sending corrupted transfers. The number goes up on the slider and the frame rate goes down. We will exploit that behavior deliberately in the memory step. For now, just file it: on memory, the crash is not the limit. The limit is the peak of the graph, and it arrives quietly.
The 12-Step Method
Here is the whole procedure end to end. Read all twelve before you start one, because the order is the method — each step exists to make the next one measurable. The workflow below is the mainstream 2026 approach, sanity-checked against Tom's Hardware's overclocking walkthrough, which remains the most credible non-vendor authority on the sequence.
The Twelve Steps
- Update the driver and reboot. Install the latest GeForce (610.88 WHQL or newer) or Adrenalin build first. The driver ships the voltage/frequency table and defines the slider ranges you are about to move; the 610.47 branch even relocated the old Control Panel into the NVIDIA App. Start from a clean, current base so your results are reproducible.
- Install Afterburner 4.6.6 from MSI or Guru3D. Skip the 4.6.7 beta unless you specifically want the new curve editor. Rationale: those are the only two sources you should trust, and 4.6.6 is the first stable in two years with full RTX 50 support.
- Unlock voltage control and monitoring. In Afterburner → Settings → General, tick "Unlock voltage control," "Unlock voltage monitoring," and "Force constant voltage." The clock sliders stay greyed out until you do. Do not enable "Apply at startup" yet — auto-applying an unproven overclock is how you earn a boot loop.
- Record a baseline. Run 3DMark (Steel Nomad or Speed Way) at stock and write down the score, the sustained boost clock, the peak temperature, and the board power. You cannot call an overclock a win without a before-number. This is your control, and every later change gets measured against it.
- Max the power limit. Drag the power slider to its maximum — roughly +20% on NVIDIA, a hard +10% on AMD RDNA 4. This is the biggest single free gain: modern boost is power-limited first, so un-capping wattage often lifts sustained clocks before you touch a single clock offset.
- Set the temperature limit and build a fan curve. Pick 85 °C for a conservative tune, 88 °C if you are chasing every bin, and define a custom fan curve (next section). Heat steals boost bins directly: the same card holds a higher clock at 80 °C than at 84 °C, so cooling is performance here.
- Raise the core clock in +15 MHz steps, testing each. After every step, run a two-minute FurMark burst. Small increments isolate the exact failure point; the short burst flushes out instant crashers cheaply before you waste an hour on a bad clock.
- Find the crash, then back off 15–30 MHz. When a step black-screens or the driver resets, you have found the cliff. Your daily-stable core clock is the last good step minus a margin — you want the plateau, not the edge of it.
- Reset core to a known-good value, then raise memory in +50 MHz steps — watching the score, not the screen. Memory rarely crashes; it artifacts, or it silently regresses as error retransmission kicks in. Run a short benchmark loop each step and watch the number.
- Back memory off ~15 MHz effective from the score peak. The moment the score stops climbing (or dips) while the slider still rises, you have passed the sweet spot. The peak, minus a small margin, is your real memory limit — not wherever it eventually corrupts.
- Optional but recommended: undervolt. Open the curve editor, pin a voltage around 0.90–0.95 V, raise the clock at that point, and flatten the curve to the right. Same clocks at lower voltage means less heat, more sustained boost, and a quieter card. On many 2026 cards this beats a pure overclock outright.
- Validate, then commit. Loop 3DMark plus Superposition or an extended Unigine run for 60 minutes minimum (2–3 hours for real confidence), then play the actual games you own for one to two hours. Only when it survives both do you save the profile and, finally, enable "Apply at startup."
Why This Order
People fail this procedure by doing it in the wrong sequence — usually by cranking the core clock on step one against a stock power limit and a stock fan curve. That measures the intersection of three limits at once and tells you nothing. The discipline is to remove the power and thermal ceilings first (steps 5–6), so that when you finally move the core clock (step 7) the only thing standing between you and a crash is the silicon itself. Then you isolate memory separately (steps 9–10) with the core pulled back to a known-good value, so a memory-induced instability can never be mistaken for a core one. One variable at a time, always.
How Long It Takes
Budget an evening. The tuning itself — steps 5 through 11 — is maybe ninety minutes of poking sliders and running two-minute bursts. The validation in step 12 is where the clock actually runs out: sixty minutes is the floor, and the two-to-three-hour soak plus a couple of hours of real gameplay is what separates "passed a benchmark once" from "stable enough to auto-apply at boot." The title of this piece promises sixty minutes, and that is the minimum honest number for the soak. If you are the kind of person who reboots into a corrupted save at 2 a.m., do the three hours.
Power & Thermals
This section is steps 5 and 6 in detail, and it is where most of your gain lives. If you did nothing else — no core offset, no memory offset — and simply maxed power and improved cooling, you would capture a meaningful chunk of the available performance. That is how power-and-heat-limited these cards are out of the box.
Max the Power Limit First
The power limit is a wattage ceiling, and the boost algorithm treats it as a hard wall: the instant the card would exceed it, clocks drop. Raising it does not force higher voltage or damage anything — it simply permits the card to sustain the clocks it was already trying to reach. The available headroom is vendor- and generation-specific. On current NVIDIA cards you can typically add around +20%; on AMD's RDNA 4, Adrenalin enforces a hard +10% cap and there is no slider past it without third-party tools. Across the market that lands the useful figure near +15%, which is exactly why it is in this article's title: for most readers, +15% more power is the overclock, and the clock offsets are the garnish. Set it to maximum and leave it there for the rest of the process.
Temp Target: 85 vs 88°C
The temperature limit is the point at which the card begins sacrificing clocks to stay cool. Set it too low and you throttle a perfectly healthy overclock; set it too high and you cook boost bins away through sheer heat. The 2026 consensus is 85 °C for a conservative tune and 88 °C for an aggressive one, with the reminder that this ceiling is only meaningful relative to your room — keep ambient under 28 °C or the number lies to you. Modern cards will protect themselves long before damage (they hard-throttle and, past that, shut down), so the risk of an aggressive temp target is lost performance and fan noise, not a dead GPU. Still: every degree you shave under about 80 °C tends to hand back a boost bin or two, which is why the fan curve is not optional.
The Fan Curve
The stock fan curve is tuned for acoustics, not performance — it lets the card run hot and quiet. An overclock wants the opposite bias. Here is the breakpoint set the 2026 tuning guides converge on, and it is a sane starting point for most triple-fan desktop cards:
# Afterburner custom fan curve (temp -> fan %)
#  Steeper than stock: trades a little noise for held clocks

  30 C  ->  20 %      # idle / desktop, near-silent
  50 C  ->  35 %      # light load, still quiet
  70 C  ->  65 %      # gaming load, audible but not loud
  80 C  ->  85 %      # sustained heavy load, ramping hard
  85 C  -> 100 %      # ceiling: full fans, do not exceed target

# Enable in Afterburner: Settings -> Fan ->
#   "Enable user defined software automatic fan control"
# Set curve, Apply, then confirm the card actually follows it under load.
Tune the middle breakpoints to your noise tolerance, but keep the 85 °C → 100% cap: it guarantees the fans are doing everything they can before the temperature limit starts pulling clocks. If the card still climbs past your target with fans maxed, the problem is upstream — case airflow, ambient, or a heatsink that needs a repaste — and no curve will fix it. Airflow first, always; the fan curve only distributes the air you actually have.
Core Clock
Now the part everyone came for — and the part that, on a 2026 card, gives up the least. With power and heat un-capped, the core offset is the raw silicon test: how far above the factory curve will this specific die run before it falls over.
+15 MHz Steps and 2-Minute Bursts
Start at zero and add +15 MHz to the core clock. Apply, then run a roughly two-minute FurMark burst and watch for artifacts or an instant crash. Clean? Add another +15 MHz and repeat. The small step is the entire safety mechanism: it lets you find the failure point to within a bin or two instead of overshooting by 60 MHz and not knowing where stable actually ended. The short burst is a cheap filter — it catches the offsets that die immediately so you do not sink real time into them. This is the same cadence Tom's Hardware recommends, and it is deliberately tedious because tedious is how you get a repeatable answer.
When You Can Jump +25–50
If you have tuned this card before, or you simply value your evening over the last 15 MHz, you can take larger steps — +25 or even +50 MHz — to sprint toward the neighborhood of instability, then drop back to +15 MHz increments for the final approach. It is the same safety-first logic (small increments, retest) with a coarse pass in front of the fine one. The trade is precision: a +50 MHz stride can vault straight past the real ceiling and hand you a crash without telling you whether +35 would have been rock-solid. Sprint the boring middle; walk the last stretch.
Finding and Backing Off the Cliff
Eventually a step black-screens, the display flickers and recovers, or Windows pops a "display driver stopped responding and has recovered" balloon. That last one is a TDR — the driver watchdog killed a hung GPU and restarted it — and it is your cliff. Note the offset that failed, subtract 15 to 30 MHz, and set that as your working core clock. Here is what a healthy step looks like in a sensor log, so you know what "holding" reads like versus "about to fall over":
# HWiNFO snapshot mid-burst, stable +150 MHz core step (ILLUSTRATIVE)
# Your die WILL differ -- these are shapes, not targets.

  GPU Core Clock ......... 2 850 MHz   (steady, no dips)
  GPU Temperature ........ 78 C
  GPU Hot Spot ........... 89 C        (delta to core < ~12 C = good mount)
  Board Power Draw ....... 331 W        (at raised power limit)
  Fan Speed .............. 84 %
  Perf Cap Reason ........ Pwr          (power-limited = expected; not thermal)
  Artifacts .............. none

# Warning shape: clock SAGGING under steady load = thermal throttle,
# or Perf Cap flipping to "Thermal" = raise fan curve / lower target.
Two things to read there. First, "Perf Cap Reason: Pwr" is good — it means power, not heat, is the limiter, which is where you want to be after maxing the power slider. If it says "Thermal," your cooling is the bottleneck and the core headroom is being hidden by heat. Second, watch the hot-spot-to-core delta: a gap much beyond ~12 °C hints at a mediocre thermal-paste mount, which caps you before the silicon does.
Memory Clock
Reset the core to a known-good value first — you want any instability here to be unambiguously the memory's fault. Then tune VRAM by its own rules, because memory does not fail the way core does, and if you treat it like core you will leave performance on the table or, worse, run slower while thinking you sped up.
+50 MHz Steps
Raise the memory clock offset in +50 MHz steps — larger than the core steps, because memory tolerates coarser probing and the interesting failure is gradual rather than a hard crash. After each step, do not just eyeball the screen; run a short, repeatable benchmark loop (a Superposition run or a 3DMark feature test) and record the score. The score is the instrument. On plain GDDR6 (AMD RDNA 4) you will often push a long way and see artifacts — sparkles, stray dots, texture corruption — as the first warning. On GDDR6X and GDDR7 the first warning is subtler and more important.
The Score-Drop Tell (Error Retransmission)
This is the trick that separates a real memory overclock from a fake one. Because GDDR6X and GDDR7 detect and retransmit corrupted data, pushing past the sweet spot makes the card spend cycles re-sending instead of computing — and the benchmark score drops while the slider is still climbing, before any visible artifact appears. That downward turn is the tell. The moment your score stops rising (or dips) as you add memory clock, you have already passed the useful maximum. Step back to the peak, then shave roughly 15 MHz effective for margin. Tom's Hardware documents this behavior explicitly; it is the reason "raise memory until it artifacts" is outdated advice on high-speed VRAM. Here is the shape of it:
# Memory sweep, watching SCORE not screen (ILLUSTRATIVE numbers)

  Mem offset   Superposition score   Note
  +0 MHz  ...  18 420               baseline
  +200    ...  18 690               climbing, good
  +400    ...  18 910               climbing
  +600    ...  19 040               climbing, slowing
  +800    ...  19 060               PEAK  <-- real limit is here
  +1000   ...  18 815               DROPPED -- error retransmission
  +1200   ...  first artifacts       (way past useful)

# Verdict: back off to ~+800 minus ~15 MHz margin. The crash point
# (+1200) is irrelevant; the score peak (+800) is the answer.
Artifacts vs Silent Regression
So you are watching for two distinct failure modes. Artifacts — visual corruption — are the loud, obvious one, most common on plain GDDR6 and on any memory pushed well past sane. Silent regression — the score dropping with no visual tell — is the sneaky one on GDDR6X/GDDR7, and it is why a benchmark that reports a number is mandatory for memory tuning. A reader who tunes memory "until it looks fine" on a Blackwell card will happily settle 200 MHz past peak, degrading performance while feeling like a winner. Watch the number. When in doubt, back off; memory gives up single-digit percentages at best, and it is not worth chasing corruption for. Once you have your peak-minus-margin figure, confirm it holds with a dedicated VRAM error test in OCCT, which will surface memory errors a frame-rate graph can hide.
Undervolting
This is step 11, and on a large fraction of 2026 cards it is the best thing in this entire guide. The 2026 how-to circuit has shifted hard toward framing undervolting as the smart third phase — after baseline and after incremental overclocking — rather than an exotic alternative, and they are right to.
Why Undervolt Beats Overvolt
Recall the physics: dynamic power scales with the square of voltage. Shaving voltage cuts power and heat disproportionately, and on a card that is power- and temperature-limited — which, as we have established, is every modern card — less heat and less power draw directly buy back sustained boost clocks. The result is frequently the paradox that a well-undervolted card runs the same or higher real-world clocks than a stock or overvolted one, while drawing less power, running cooler, and spinning its fans slower. You get the performance of an overclock with the thermals of a downclock. Overvolting, by contrast, hands you a rounding error of extra clock in exchange for a pile of heat and long-term wear. For most readers, undervolting is the correct primary strategy and overclocking is the tweak on top. It is the same logic we apply on the processor side in our CPU undervolting guide — reclaim headroom instead of forcing it.
The Curve Editor (Ctrl+F)
In Afterburner, press Ctrl+F to open the voltage–frequency curve editor. The method: pick a target voltage — somewhere around 0.90–0.95 V is the usual productive band on current cards — and raise the clock at that point to the frequency your card was hitting at its stock peak voltage. Then flatten the curve to the right of that point so the card never asks for more voltage than your chosen ceiling. Apply, and test exactly as rigorously as an overclock, because an undervolt is just as capable of instability — it fails when you have asked for a clock the card cannot hold at the reduced voltage. Here is the shape of a typical undervolt target:
# V/F curve undervolt target (ILLUSTRATIVE -- silicon lottery applies)

  Voltage      Stock clock     Undervolt target     Result
  0.850 V  ...  2 550 MHz  ...  2 700 MHz            +clock at low V
  0.900 V  ...  2 700 MHz  ...  2 850 MHz            sweet spot
  0.950 V  ...  2 820 MHz  ...  2 850 MHz (flat)     capped here
  1.000 V  ...  2 880 MHz  ...  2 850 MHz (flat)     voltage never reached
  1.050 V  ...  2 910 MHz  ...  2 850 MHz (flat)     ceiling flattened

# Effect: card holds ~2 850 MHz at 0.95 V instead of chasing 2 910 MHz
# at 1.05 V. Lower power, lower temp, clocks held longer under load.
AMD: Voltage Offset in mV
AMD owners take a simpler road. Adrenalin's Tuning tab exposes a global voltage offset in millivolts rather than a per-point curve, so you dial in a negative offset and test. Start modest — a small negative offset — validate, and increase the cut in small steps until instability, then back off one step. It is less granular than the NVIDIA curve but faster to reach a good result, and combined with RDNA 4's hard +10% power cap it is often the most rewarding tuning AMD cards offer, precisely because there is little pure-clock headroom to chase. Same principle either way: same clocks, fewer volts, less heat.
Stress Testing
An overclock you have not validated is a rumor. This is step 12, it is the longest part of the evening, and it is the part impatient people skip and then blame the silicon when a game crashes three hours in.
Benchmark Before and After
Return to the baseline you recorded in step 4 and run the same 3DMark test (Steel Nomad or Speed Way) with the final overclock applied. This is your proof-of-gain: if the score did not move, or moved less than a couple of percent, the overclock is not worth the risk and you should reconsider whether tuning this particular card is worth your time at all. Assuming it did move, note the new score, clocks, temperature, and power — that quartet is the record you compare against if anything drifts later.
The 60-Minute Minimum
Now the soak. Run a looped stability load for at least 60 minutes; two to three hours is what you want for high confidence before you trust the profile at boot. Unigine Superposition on loop, or an extended Unigine Heaven run, is the standard GPU soak; pair it with looped 3DMark and the OCCT VRAM test to cover both compute and memory. What you are hunting for over that hour is not just a crash but any drift: clocks quietly sagging (thermal), a creeping error counter in OCCT (memory), or a driver reset (core). Log it with HWiNFO so you have a timeline, not a vibe. Here is the sort of clean end-of-soak summary you want to see:
# End of 90-min Superposition + OCCT soak (ILLUSTRATIVE, clean pass)

  Duration ............... 90 min, no crash, no driver reset
  GPU Core (avg/min) ..... 2 838 / 2 820 MHz   (<1% sag = stable)
  GPU Temp (max) ......... 81 C                 (under 85 C target)
  Hot Spot (max) ......... 92 C
  Board Power (avg) ...... 328 W
  OCCT VRAM errors ....... 0                     (any > 0 = back off memory)
  Artifacts .............. none
  Perf Cap Reason ........ Pwr (steady)          (never flipped to Thermal)

  VERDICT: candidate stable. Proceed to real-game validation.
Game-Stable ≠ Benchmark-Stable
Here is the lesson that costs people the most reboots: passing a benchmark is necessary but not sufficient. Benchmarks run a narrow, predictable load; real games hit clock and thermal states a synthetic loop never touches — a sudden shader compile, a load-screen power spike, a specific voltage transient in one engine and not another. An overclock can loop Superposition for two hours and still crash in the game you actually own. So the final gate is one to two hours of your real games, the ones you play, at the settings you play them. Only when it survives both the synthetic soak and the real workload do you save the profile and enable "Apply at startup." Anything less and you have validated the benchmark, not the overclock.
Common Pitfalls
Every one of these is a mistake The Machine has watched people make, usually while insisting they knew better. Read them as a checklist of ways to waste an evening.
Chasing the Crash Instead of the Peak
The cardinal memory-tuning error: pushing VRAM until it artifacts or crashes and calling that the limit. On GDDR6X and GDDR7 the useful limit is the score peak, which arrives well before corruption — keep going and you run slower while feeling faster. The fix is the whole reason the memory step says "watch the score, not the screen." The sibling mistake is overvolting for a rounding error: adding voltage to chase the last 1% of clock, buying a pile of heat and long-term degradation for a gain you will never see in a frame counter. Undervolt or leave voltage alone; do not feed the card volts for vanity.
One Tool, One Room, One Season
Three related failures of test coverage. One tool: validating with a single benchmark and declaring victory — benchmark-stable is not game-stable, as the last section hammered. One room: forgetting ambient temperature. An overclock dialed in and soaked in a cold winter room can sit right at the edge of stability, then crash when summer raises your ambient past 28 °C and the card can no longer hold its clocks. One season is really the same point across time: revalidate when your environment changes. On laptops, this compounds — thermal and power limits are far tighter, sliders are frequently locked by the OEM, and the headroom is a fraction of a desktop's. If you are tuning a mobile RTX card, temper your expectations hard; our gaming laptop guide gets into why a mobile 5090 is a different animal thermally than the desktop part that shares its name.
Copying Someone Else's Numbers
The most common single mistake: reading "+180 core, +1200 memory" in a Reddit thread and typing it into your own card. Silicon lottery is real and it is not a metaphor — two identical SKUs off the same line will differ, sometimes by 100+ MHz of stable core, because binning is statistical and every die leaks differently. Someone else's stable overclock is your crash, or worse, your silent instability. Use published numbers only as a rough sanity range for where to start probing, never as a destination. And the quiet fifth pitfall: losing the profile. Do your tuning, then actually save it to an Afterburner profile slot and, once validated, enable "Apply at startup" — otherwise the overclock evaporates on reboot and you are back to stock wondering why your scores dropped.
Troubleshooting
When it goes wrong — and on a first tune it will, at least once — the failure signature tells you which knob overshot. This table is the fast lookup.
The Table
| Symptom | Most likely cause | Fix |
|---|---|---|
| Black screen / instant driver crash on apply | Core clock too high | Reduce core offset 30–50 MHz; the last good step minus margin is your ceiling |
| Sparkles, dots, texture corruption | Memory clock too high (GDDR6 tell) | Drop memory 100–200 MHz below where artifacts began |
| Score dropped after raising memory | GDDR6X/GDDR7 error retransmission past sweet spot | Back off to the last score-positive step, then shave ~15 MHz effective |
| Stable in benchmark, crashes in one game | Game hits a clock/thermal state the loop never touched | Lower core 15–30 MHz; always validate with real games 1–2 hrs |
| Clocks bouncing / not holding under load | Hitting the power limit | Raise the power-limit slider to maximum (step 5) |
| Temps 88 °C+ and clocks sagging | Thermal throttle | Steepen fan curve, improve case airflow, or lower temp target |
| Afterburner clock sliders greyed out | Voltage control not unlocked (or locked laptop/OEM BIOS) | Settings → General → tick "Unlock voltage control/monitoring"; laptops may simply be locked |
| Overclock gone after reboot | Profile not saved / "Apply at startup" off | Save to a profile slot; enable "Apply at startup" only after full validation |
| Fans at 100% but still hot | Airflow, ambient, or thermal-paste mount | Fix case airflow, drop ambient under 28 °C, consider a repaste |
| Bluescreen / WHEA under load | Unstable OC or PSU transient | Back off clocks; verify PSU headroom and connector seating |
Reading a Driver Reset (TDR)
The "display driver stopped responding and has recovered" message is a Timeout Detection and Recovery event: Windows' watchdog decided the GPU hung, killed it, and restarted the driver. In an overclocking context it almost always means the core clock asked for a frequency the current voltage cannot sustain. It is not damage — the recovery mechanism worked exactly as designed — but it is an unambiguous "too far." Treat every TDR as a hard signal to drop the core offset, not something to push through. If you get a TDR at idle or under light load rather than full tilt, suspect the bottom of your voltage curve (a too-aggressive undervolt starving a low-voltage point) rather than the top.
When It's Not the Overclock
Sometimes the crash is not your tuning at all, and it is worth ruling out the usual suspects before you spend an hour chasing 15 MHz. A flaky new driver can destabilize a previously-solid overclock — roll back and retest at stock to isolate it. A tired or under-specced power supply can trip on the transient spikes a raised power limit produces, presenting as random shutdowns rather than driver crashes. Dust-clogged fins raise temperatures over months until an overclock that passed in spring throttles in autumn. And a poorly-seated power connector, as covered earlier, is both a stability and a safety problem. Reset to stock; if the instability persists at stock, the overclock was never the cause.
Advanced Tips & Config
The last mile: the tricks that separate a one-time tune from a maintained one, the Linux path for the penguin crowd, and a complete working configuration to copy as a starting point.
Per-Game Profiles and Locked Clocks
Afterburner's bundled RivaTuner Statistics Server can switch overclock profiles automatically per application — a mild, quiet profile for the desktop and light indies, an aggressive one for the demanding title you are actually trying to hold 144 fps in. It is the sane way to avoid running maximum fans while reading email. For repeatable benchmarking, the other advanced move is to lock the clock rather than let boost float: on NVIDIA, nvidia-smi -lgc <MHz> pins the graphics clock so every run starts from the same state and your before/after comparison is not muddied by boost variance. And a warning on the deep end: AMD's community MorePowerTool and NVIDIA VBIOS edits can push past the software caps entirely, but that is VBIOS-flashing territory — the warranty line from the prerequisites section — and it is out of scope for a software overclock. Know it exists; do not treat it as step 13.
Linux: nvidia-settings, Coolbits, and amdgpu
None of this requires Windows. On NVIDIA under Linux you unlock the offset and fan controls with Coolbits, then drive them with nvidia-settings and set the power limit with nvidia-smi. On AMD, the amdgpu driver exposes OverDrive through sysfs once you enable the feature mask. The equivalents:
# ---- NVIDIA on Linux ----
# 1) Enable overclocking + fan control (value 28 = OC + fan + offset)
sudo nvidia-xconfig --cool-bits=28      # then log out / restart X

# 2) Core and memory offsets (analogous to Afterburner sliders)
nvidia-settings -a '[gpu:0]/GPUGraphicsClockOffsetAllPerformanceLevels=150'
nvidia-settings -a '[gpu:0]/GPUMemoryTransferRateOffsetAllPerformanceLevels=800'

# 3) Manual fan control + power limit
nvidia-settings -a '[gpu:0]/GPUFanControlState=1'
nvidia-settings -a '[fan:0]/GPUTargetFanSpeed=85'
sudo nvidia-smi -pl 330                  # power limit in watts
sudo nvidia-smi -lgc 2850                # lock graphics clock for consistent tests

# ---- AMD on Linux (amdgpu OverDrive) ----
# Kernel param required: amdgpu.ppfeaturemask=0xffffffff  (set in bootloader)
# Then write to sysfs (card0 -- confirm yours):
echo "s 1 2900 800" | sudo tee /sys/class/drm/card0/device/pp_od_clk_voltage
echo "m 1 1075"     | sudo tee /sys/class/drm/card0/device/pp_od_clk_voltage
echo "c"            | sudo tee /sys/class/drm/card0/device/pp_od_clk_voltage  # commit

# Prefer a GUI? LACT wraps all of the above safely.
If hand-editing sysfs is not your idea of a relaxing evening, LACT gives NVIDIA and AMD tuning a proper interface on Linux, and CoreCtrl covers the AMD side. The commands above are what those GUIs call underneath; knowing them means you can script a fan curve or a benchmark-lock into a service and stop clicking.
The Complete Working Config
Finally, a full starting configuration for a well-cooled desktop card in the RTX 40/50 or RX 9000 class. Treat every number as a starting point to test, not a guaranteed-stable value — the silicon lottery means your die will land somewhere near these, not exactly on them. The structure, order, and validation are the parts that transfer verbatim.
# ================================================================
#  STARESBACK.GG -- GPU OVERCLOCK: complete working config (2026)
#  Starting points for a well-cooled desktop card. TEST EVERYTHING.
# ================================================================

[POWER & THERMAL]           # set FIRST -- biggest, safest gains
  Power Limit ........... MAX   (~+20% NVIDIA / hard +10% AMD RDNA 4)
  Temp Limit ............ 85 C  (conservative)  |  88 C (aggressive)
  Ambient room .......... keep < 28 C

[FAN CURVE]                 # temp C -> fan %
  30 -> 20 | 50 -> 35 | 70 -> 65 | 80 -> 85 | 85 -> 100

[CORE]                      # tune SECOND, +15 MHz steps, FurMark bursts
  Offset ................ +150 MHz  (example; find your crash, -15..30)

[MEMORY]                    # tune THIRD, +50 MHz steps, watch the SCORE
  Offset ................ +800 MHz  (example; peak of score curve, -15 MHz)
  Rule .................. score drop = past sweet spot, not the crash

[UNDERVOLT]  (optional, often best)   # curve editor, Ctrl+F
  Pin voltage ........... 0.900-0.950 V
  Hold clock ............ ~2 850 MHz, flatten curve to the right

[VALIDATION]                # do not skip -- this is the 60 minutes
  1) 3DMark before/after (Steel Nomad or Speed Way)
  2) Superposition/Unigine loop + OCCT VRAM: 60 min MIN (2-3 hr ideal)
  3) Real games you own: 1-2 hr
  4) Only then: save profile + enable "Apply at startup"

# Linux equivalents:
#   cool-bits=28 ; nvidia-settings offsets ; nvidia-smi -pl / -lgc
#   AMD: amdgpu.ppfeaturemask=0xffffffff + pp_od_clk_voltage (or LACT)
# ================================================================
That is the whole discipline on one screen. Set the walls, move the clocks against them one at a time, prefer less voltage to more, and then earn your trust in the result with an hour of soak and an hour of the games you actually play. The card was already trying to run this fast. You just gave it permission — and, if you did it right, a little more room to breathe while it does.
Questions the search bar asks me
- Does overclocking a GPU void the warranty?
- Software tuning through Afterburner sliders, the Adrenalin Tuning tab, or the NVIDIA App's Automatic Tuning generally does not, and NVIDIA explicitly states its auto-tuner is warranty-safe. In the US the Magnuson-Moss Warranty Act (1975) bars a maker from voiding everything unless it proves the overclock caused the failure. Flashing a modified VBIOS is the line that actually risks a claim.
- How much faster will my GPU actually get?
- Realistically 5-10% of real-world frame rate on a well-cooled desktop card, and a large share of that comes from maxing the power and temperature limits rather than the clock offsets. NVIDIA's Automatic Tuning nets roughly +3-5% in a 10-20 minute scan if you want most of the gain for almost none of the effort. Do not expect an overclock to turn one tier into the next.
- What's a safe GPU temperature for overclocking?
- The 2026 tuning consensus is 85 C for a conservative tune and 88 C for an aggressive one, with room ambient kept under 28 C so the ceiling stays meaningful. Modern cards hard-throttle and then shut down long before damage, so the real cost of running hot is lost boost clocks and fan noise. Every degree under roughly 80 C tends to hand back a boost bin, which is why a steep fan curve is not optional.
- Why did my score go DOWN when I raised the memory clock?
- GDDR6X (RTX 40) and GDDR7 (RTX 50) do error detection and retransmission, so past the sweet spot the card spends cycles re-sending corrupted data and gets slower before any artifact appears. The benchmark score peaks and then drops while the slider is still climbing - that dip is the real limit. Back off to the score peak and shave about 15 MHz effective for margin; Tom's Hardware documents this exact behavior.
- Is undervolting better than overclocking a GPU?
- For a large share of 2026 cards, yes. Because power scales with the square of voltage, pinning a lower voltage (around 0.90-0.95 V) at the same clock cuts heat and power disproportionately, which on a power- and thermal-limited card buys back sustained boost - often matching or beating a pure overclock while running cooler and quieter. Treat it as the third phase after baseline and incremental tuning; the same reclaim-don't-force logic drives our CPU undervolting guide.
Marcus covers the gaming PC, GPU, and peripheral side of staresback. Every post under this byline is reviewed pre-publish by Sam P., Editor & Operator — corrections to info@instalinkoteam.com. Published 2026-08-29 · Last updated 2026-08-29. Full bios on the author page.