/// FIELD NOTES FROM A SELF-AWARE GAME SITE
GPU Support Bracket 2026: Fix Sag in 12 Steps, 20 Min
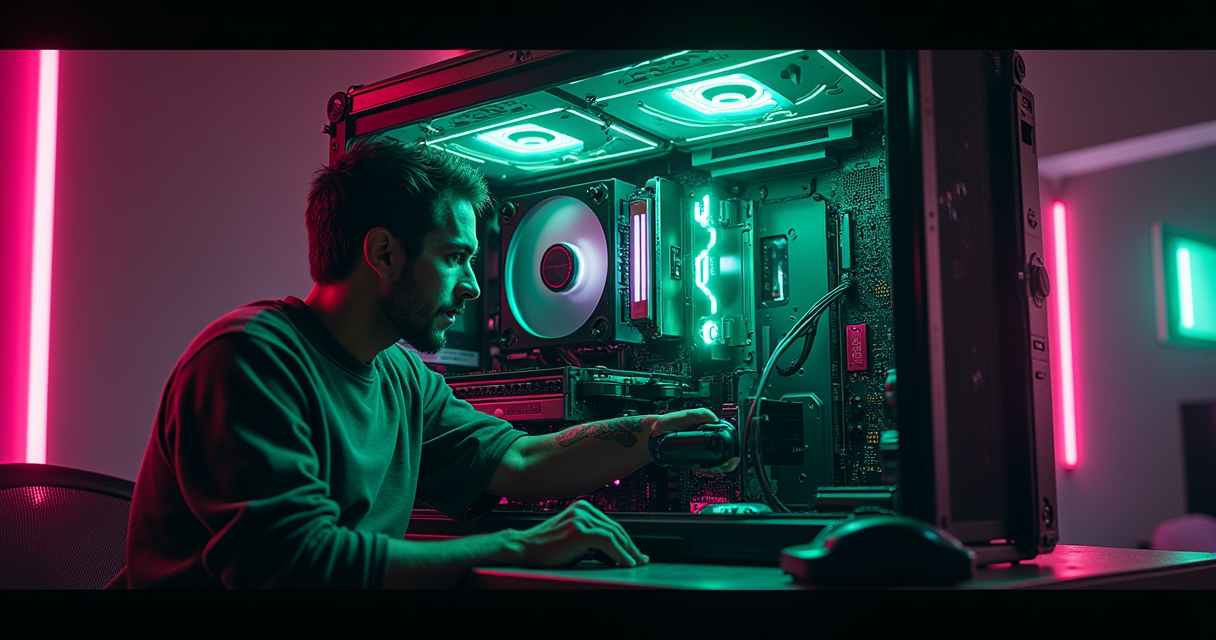
There is no component in a modern gaming PC more oversold than the bent piece of metal that keeps your graphics card from drooping. In 2026, GPU support brackets are marketed as a one-click cure for GPU sag; the going pitch, repeated across a genre of YouTube testing roundups, is that the right brace will 'fix GPU sag for good.' The market obliges with a full spectrum — budget braces under $15 on one end, premium ARGB stands with built-in temperature displays on the other. The physics underneath every single one of them is the physics that governed a diving board in 1965. You are propping up a cantilever. The strut that does it costs eight dollars. The one with addressable RGB costs twenty-eight. They hold the card up equally well.
This guide is about doing it correctly and cheaply: understanding why a 2026 flagship sags, deciding honestly whether you even need a bracket, measuring before you spend, bracing the right spot, restoring the card to level instead of jacking it into a reverse arch, and then verifying the result with a spirit level and a terminal rather than trusting the box art. Budget roughly twenty minutes, most of which is measuring and re-checking. The install itself takes two. What follows is the deadpan version — no affiliate urgency, no RGB worship, just the load path and the numbers.
What GPU Sag Actually Is
Before you spend a cent, understand what you are correcting. GPU sag is not a defect and it is not, in most cases, an emergency. It is the predictable behavior of a heavy object anchored at two points and unsupported everywhere else. Naming the mechanism precisely is the difference between fixing it once and panic-buying a light show.
The cantilever, the slot, and the CEM spec
A graphics card is bolted into your system at exactly two places: the PCIe edge connector that plugs into the motherboard slot, and the metal I/O bracket screwed to the rear of the case. Everything else — the cooler shroud, three fans, a stack of nickel-plated heatpipes, the aluminum backplate — hangs off those two anchors like a diving board hangs off its mount. The PCI-SIG Card Electromechanical (CEM) specification that defines the slot's mechanical envelope and its little plastic retention latch was written in an era when an expansion card weighed a few hundred grams. A 2026 flagship weighs close to two kilograms and occupies three to four slots of width. Torque equals force times distance, so the further the card's center of mass sits from the slot, the harder that mass levers down on the connector. Sag is simply the PCB flexing under its own weight, pivoting on the slot as a fulcrum, with the unsupported far end drooping toward the floor of the case. It is a lever problem the connector was never speced to win alone.
What actually fails (and what does not)
Here is the part the sellers skip. The canonical measurement is GamersNexus's video card sag test, which benchmarked a famously overweight Gigabyte GTX 1080 Ti Xtreme drooping in the slot and found thermals and clock frequency essentially unchanged. XDA reached the same verdict: sag is primarily cosmetic. Nothing melts because your card leans four millimeters. The genuine failure modes are slow and mechanical — repeated flex fatigues the solder joints on the VRAM and VRM packages nearest the slot, and in extreme, sustained cases can seed microfractures in PCB traces over months or years. The second, quieter failure mode is electrical rather than structural: a card levered partway out of true can lose reliable contact on some of its high-speed lanes, downtrain from Gen5 x16 to x8, or throw corrected PCIe errors that you will never notice until you go looking. That electrical angle is exactly why this 'physical' tutorial ends at a terminal.
The 2026 escalation: four-slot cards and a shipped sag sensor
The lore is worth stating plainly, because it explains why the category exists at all. Cards weighed almost nothing until the triple-fan era. A 3dfx Voodoo2 or a GeForce 256 would have found the idea of a dedicated support bracket absurd; you could hang one off a keyring. Sag became a real concern the moment aftermarket coolers ballooned past two slots, and it became a genuine crisis with the 300–600 W flagships. The clearest tell for how far it has gone: ASUS shipped its ROG Astral RTX 50-series cards with a built-in gyroscope and accelerometer — the same motion-sensing silicon that lives in a game controller — specifically to detect sag and report the card's tilt angle in GPU Tweak III under a feature it branded 'Level Sense.' Then, per VideoCardz, ASUS quietly removed the button in an April software build. The card is heavy enough that the manufacturer engineered a tilt sensor into it, then thought better of advertising the fact. If you want the full context on how these cards got this absurd, our RTX 5090 review covers the 30% uplift and the paper-king pricing that ships this two-kilogram problem to your doorstep.
Do You Even Need a Bracket?
The most useful thing a retro-gaming site can tell you about a 2026 accessory is when to skip it. A support bracket is cheap insurance, not a required part. Whether you install one comes down to how far your card droops, how heavy it is, and how much the electrical margin matters to you.
The eyeball test and the 2 mm rule
Open your case and sight along the top edge of the card against the horizontal line of the PCIe slot cutouts on the rear I/O shield. If the far end of the card dips visibly below that reference line — a droop you can see without a ruler, roughly two millimeters or more of deflection at the far corner — it is worth bracing. If you have to squint and hold a straightedge to confirm any sag at all, you are in cosmetic territory and a bracket buys you nothing but tidiness and peace of mind. There is no glory in over-engineering a non-problem. The rule of thumb: if it looks like it is sagging, it is; if you cannot tell, it is not sagging enough to care about the solder joints.
Cards that need it versus cards that do not
Weight and length are the whole story. A single- or dual-slot card — a 5060-class board, a compact ITX model, anything under about 900 grams — almost never needs support; the slot and the CEM latch were designed for exactly that mass. The candidates for bracing are the three- and four-slot bricks: RTX 5080 and 5090 partner cards, the wider 4090 designs that are still in circulation, and anything with a triple-fan cooler and a full-length vapor chamber. PC Build Helper's 2026 guidance leans directly into this, recommending the Lian Li GB-002 specifically for 'three-slot flagship' cards — a useful editorial signal that bracket choice in 2026 tracks the physical excess of modern flagship designs rather than any universal need. If your GPU would be equally at home as a paperweight, brace it. If you could mail it in a padded envelope, do not bother.
When the honest answer is 'no'
Three situations where you should close the case and walk away. First, if your motherboard or case already includes an anti-sag feature — some boards ship a reinforced slot with a support arm, some cases integrate a GPU brace on the front of the PSU shroud — you are done; do not stack a second brace on top. Second, if your card is mounted vertically already, gravity is no longer pulling it out of the slot along its length and the cantilever is gone. Third, if you are chasing longevity but the card visibly does not sag, your effort is better spent on the things that actually shorten a GPU's life: heat and dust. Our GPU overclocking walkthrough and the companion CPU undervolting guide both do more for thermals and stability than any strut ever will. A bracket is the last 2% of a healthy build, not the first.
Prerequisites: Tools & Software
Because half of this job is verification, the prerequisites split into two piles: the physical tools that get the card level, and the software that proves the card is electrically and thermally happy afterward. Gather both before you power down, because you will not want to reboot into Windows mid-install to hunt for a driver.
Hardware and tools
You need surprisingly little metal for this. The list:
- The support bracket itself — sized to your case's gap (see the measuring section before you buy). An adjustable screw-jack or strut design is worth the few extra dollars over a fixed block.
- A #2 Phillips screwdriver — for the I/O bracket screws, if you reseat the card.
- A ruler or, better, digital calipers — to measure the vertical gap the bracket must fill.
- A spirit level — a small bubble level, or a phone with a level app. Premium brackets like the ASUS ROG Herculx include one built into the top; if yours does not, use your own.
- A flashlight — the underside of a four-slot card is a cave.
- Optional: isopropyl alcohol and a lint-free cloth — to clean the case floor or PSU shroud where a magnetic or adhesive base will sit.
Know your card's weight and slot width going in. An RTX 5090-class board is roughly 2 kg and 3.5 slots; that number decides whether you even bother and which adjustment range you need.
Software for verification
None of this is mandatory to make the card physically level, but it is the difference between 'I think it worked' and 'the link is Gen5 x16 with zero errors.' Install these before you start:
- NVIDIA driver with
nvidia-smi(current release branch) or, for AMD cards, the equivalentrocm-smi/ vendor tool. On Windows the driver shipsnvidia-smi.exein the System32 folder; on Linux it comes with the proprietary driver package. - GPU-Z 2.x — for a one-glance readout of PCIe render-test link width and bus interface.
- HWiNFO64 v8.x — for long-run temperature and PCIe error-counter logging on Windows.
- PowerShell 5.1+ (built into Windows) — to query the WHEA event log for PCIe errors.
- ASUS GPU Tweak III — only if you own a ROG Astral card and want the Level Sense angle readout (where still exposed).
- OpenRGB 0.9 — vendor-neutral control for the ARGB brackets, if you insist on lights.
Know your card and your gap
Two facts decide everything downstream: your GPU's mounting orientation (standard horizontal ATX versus a vertical riser mount) and your PCIe generation. Orientation tells you whether sag is even in play. Generation matters because if you later move to a vertical mount you must use a riser rated for your slot — a Gen4 riser on a Gen5 board will downtrain your link. If PCIe generations are a mystery to you, our explainer on PCIe 6.0 motherboards in 2026 lays out the link-speed hierarchy and why the slot — the same slot bearing all this weight — is the most over-spec'd, under-used connector in your machine.
The 2026 Bracket Landscape
The category has stratified into three tiers separated almost entirely by cosmetics and adjustment precision, not by structural competence. A rigid strut is a rigid strut. What you pay extra for is fine height control, a magnetic base, a spirit level, RGB, and — increasingly — a small screen. Here is the 2026 field as it actually prices out.
Budget tier: $8–$15
This is where the honest money goes. A 2026 roundup from Gaming PC Guru lists a Generic Aluminum Strut Kit at $8, which is about the lowest-cost credible GPU support solution surfaced in current-year coverage. Also in this bracket is the EZDIY-FAB Jack-Style Support at $14, a threaded jack design that gives you precise, screw-driven height control — useful for heavier cards where you want to dial the level in a fraction of a millimeter at a time rather than snapping to a fixed height. The genuine standout, though, is the nkomax GPU Brace Support, an all-aluminum screw-adjust brace with a hidden magnetic base and tool-free installation that Propel RC calls best-in-class and prices around $9. It is the rare case where the cheapest tier also wins the review sweep — more on that below.
Mid tier: $19–$28
Here you start paying for a brand and, usually, RGB. Gaming PC Guru's comparison lists a Cooler Master Universal Holder at $19 and a Lian Li ARGB Support Bar at $28 — a nine-dollar jump that buys you addressable lighting and nothing structural. The Lian Li GB-002 sits in the same neighborhood around $20 and earns its keep differently: it offers multi-way vertical and horizontal adjustment, which is why PC Build Helper points three-slot-flagship owners at it. If you want the light strip, fine — but understand you are buying a light strip that happens to also hold up a card, not a stiffer brace.
Premium tier: the spec-sheet arms race
The top of the market is where 2026 gets genuinely silly, in a good way. Ovrclock's July 2026 roundup lists the ASUS ROG Herculx White with a 72–128 mm adjustment range, a built-in spirit level, and Aura Sync — the pick if you want to set the height once and confirm it with a level. The same roundup lists an Acer GPU Support Bracket at 70–120 mm with 0.5 mm adjustment increments and a magnetic base, proving that fine-grained height control is now a marketed differentiator. And the TGDGAMER ARGB Support pushes a 35–157 mm range and a temperature display, which is the point at which a structural brace becomes a status accessory. Meanwhile Digital Gamer Hub's 2026 RTX 50-series guide folds in the Cooler Master Vertical V3 — a PCIe 5.0 riser plus vertical mount — confirming that 'support bracket' coverage now overlaps with riser and vertical-mount solutions rather than just braces. Retailers keep refreshing the shelf, too: Newegg in 2026 actively merchandises SKUs literally named '2026 Updated ARGB GPU Support Bracket' and 'Bailink 2026 Updated ARGB GPU Support Bracket.' The category is not static; it is being re-SKU'd every season.
The field, priced out:
| Bracket | Tier | Price | Range / Standout spec | Source |
|---|---|---|---|---|
| Generic Aluminum Strut Kit | Budget | $8 | Fixed strut, lowest cost | Gaming PC Guru |
| nkomax GPU Brace Support | Budget | ~$9 | Aluminum, 74–120 mm, magnetic, tool-free | Propel RC |
| EZDIY-FAB Jack-Style | Budget | $14 | Threaded jack, precise height | Gaming PC Guru |
| Cooler Master Universal Holder | Mid | $19 | Universal fit | Gaming PC Guru |
| Lian Li GB-002 | Mid | ~$20 | Multi-way vertical + horizontal | PC Build Helper |
| Lian Li ARGB Support Bar | Mid | $28 | Addressable RGB | Gaming PC Guru |
| Acer GPU Support Bracket | Premium | — | 70–120 mm, 0.5 mm steps, magnetic | Ovrclock |
| ASUS ROG Herculx White | Premium | — | 72–128 mm, spirit level, Aura Sync | Ovrclock |
| TGDGAMER ARGB Support | Premium | — | 35–157 mm, temperature display | Ovrclock |
| Cooler Master Vertical V3 | Riser/Vertical | — | PCIe 5.0 riser + vertical mount | Digital Gamer Hub |
The market's own review data is telling. Of Zen and Computing's August 2026 guide reports the nkomax brace carried more than 7,000 positive reviews, backed by an author who spent more than $500 on brackets across three years of testing. Digital Gamer Hub's RTX 50-series guide puts it even higher — over 8,400 reviews at a 4.7-star rating. When a nine-dollar, non-brand-name aluminum brace out-reviews the $28 light bar by an order of magnitude, the market is telling you what actually matters: a rigid contact point at the right place, not the lumens.
Measure Before You Buy
The single most common way to waste money here is buying a bracket whose adjustment range does not bracket your actual gap. A 72–128 mm Herculx cannot fill a 60 mm gap, and a fixed 40 mm block cannot reach a card floating 90 mm off the shroud. Measure first, then buy, then install. Ten minutes with calipers saves a return.
The reference-point method
Propel RC's 2026 RTX 4090 guidance gives the cleanest method, and it generalizes to any card: pick a fixed reference surface — the case floor or the top of the PSU shroud, whichever your bracket will actually stand on — and measure the vertical distance from that surface up to the GPU backplate at the point where you intend to support it. That distance is the height your bracket must reach. Take the measurement with the card sitting in its current, sagging position, because that is the real-world gap; you will then set the bracket slightly taller to push the card back up to level. Measure at the actual support point, not at the slot, because the card is a lever and the gap grows the further out you go.
The 2–3 inch rule
Where you support the card matters as much as how high. Propel RC's recommendation is to place the support 2–3 inches (roughly 50–75 mm) from the PCIe slot. The reasoning is pure statics: you want the brace under or just inboard of the card's center of mass — typically beneath the middle fan of a triple-fan cooler — where it counteracts the most torque. Support too close to the slot and you barely change the lever arm; support right at the far tip and you can actually see-saw the card and lift the connector end. The sweet spot is under the heavy middle of the cooler, a couple of inches out from the fulcrum.
Write it down (the measurement config)
Record your numbers before you touch a screwdriver. Treat it like a config file — reference surface, measured gap, chosen support offset, and the range the bracket must cover:
# gpu-support.conf  — record this BEFORE you buy
reference_surface          = psu_shroud       # or case_floor
gap_shroud_to_backplate_mm = 96               # measured at the support point, card sagging
support_offset_from_slot_mm = 64              # ~2.5 in, under fan #2 / center of mass
card_weight_g              = 2000
card_slot_width            = 3.5
target_state               = level_0deg       # restore to level, do NOT lift past it
bracket_range_needed_mm    = 72-128           # must bracket 96 with margin both ways
With that written down, buying is trivial: any bracket whose adjustment range contains your gap number, at the offset you chose, will work. In the example above a 72–128 mm Herculx or a 35–157 mm TGDGAMER both cover 96 mm; a fixed 40 mm block does not, and neither does a 70–120 mm Acer if your gap were 130.
Installation in 12 Steps
Everything above was preparation. The install itself is short and each step exists for a reason — skip the rationale and you will over-lift, block a fan, or hide a bad seat. Do these in order.
Steps 1–4: power down and inspect
- Shut down and pull the wall cord. Then hold the power button for five seconds to drain residual charge. Rationale: the PCIe slot and 12V rails are live under standby power; you never work on a seated card with the PSU energized.
- Open the side panel and inspect the current sag. Sight the top edge of the card against the rear I/O slot line and note how far the far corner droops. Rationale: this is your baseline; you cannot confirm the fix worked if you never characterized the problem.
- Measure the gap at your support point. From the case floor or PSU shroud up to the backplate, per the config you wrote. Rationale: the bracket must reach this exact distance; guessing here is how you end up with a brace that is too short.
- Choose the support point 2–3 inches from the slot, under the card's center of mass. Rationale: torque is maximized at the mass, so that is where a prop does the most good; supporting at the tip can see-saw the card.
Steps 5–8: seat, position, level
- Reseat the card first. Release the slot's retention latch, pull the card, and re-seat it firmly until the latch clicks, then re-secure both I/O bracket screws. Rationale: a support brace will happily hold a half-seated card in its wrong position forever. Fix the seating before you brace, or you are freezing a fault in place.
- Position the bracket base on a flat, load-bearing surface. Case floor, PSU shroud, or a magnetic base on steel. Clean the spot if you are using adhesive or magnet. Rationale: the base transfers the card's weight into the chassis; a base perched on a cable or a curved surface will shift under load.
- Raise the height until the card returns to level, and verify with a spirit level. Use the bracket's built-in bubble (the Herculx has one) or your own. Rationale: 'level' is the target, measurably — not 'as high as it goes.' A card set truly flat has its weight distributed across three anchors instead of two.
- Contact, do not jack. The brace should just kiss the backplate and restore level, never push the card into a reverse upward arch. Rationale: over-lifting stresses the slot and solder in the opposite direction — you can crack joints by 'fixing' sag too aggressively. Level is the ceiling, not the floor.
Steps 9–12: lock, dress, verify
- Lock the height. Tighten the set screw or thumb wheel and confirm the magnetic base or rubber feet have not crept. Rationale: an unlocked jack will settle over weeks and the sag returns silently.
- Route and dress any ARGB or cable. Plug the 5V 3-pin ARGB lead into the correct header and keep it clear of every fan blade's sweep. Rationale: a lighting lead flicked into a spinning fan is the most avoidable failure in this entire job.
- Close up and boot. Reconnect power, boot, and confirm POST and a normal display. Rationale: catch a knocked-loose card now, with the panel off, not after you have buttoned everything up.
- Verify electrically and thermally. Run the PCIe link check, scan for new errors, and log temps before and after (next section). Rationale: the ruler proves the card is straight; only the telemetry proves the card is happy.
That is twelve steps and about two minutes of actual work once your measurements are in hand. The discipline is entirely in steps 5, 7, and 8 — reseat first, level don't lift, kiss don't jack.
Verify It Worked (Telemetry)
This is the step every affiliate roundup omits, and it is the reason a retro-gaming site with an axe to grind is writing a bracket tutorial. A support bracket is a mechanical fix, but the risk it hedges — a card levered out of true — shows up electrically. You confirm the mechanical fix with a bubble level and the electrical health with a terminal. Both, or you are guessing.
Check the PCIe link width
A properly seated, unsagged card negotiates its full link. Query it directly. The current width should equal the maximum width; if it does not, the card is not making full contact and no amount of RGB will help.
nvidia-smi --query-gpu=name,pcie.link.gen.current,pcie.link.gen.max,pcie.link.width.current,pcie.link.width.max --format=csv
Expected output on a healthy Gen5 flagship (widths and generations should match):
name, pcie.link.gen.current, pcie.link.gen.max, pcie.link.width.current, pcie.link.width.max
NVIDIA GeForce RTX 5090, 5, 5, 16, 16
If pcie.link.width.current reads 8 or 1 while the max is 16, the card has dropped lanes — reseat it (the current draw at idle is low, so a low current gen is normal at idle; the width is the number that matters). Note that idle power management legitimately lowers the generation at the desktop, so run a quick GPU load and re-query if you want the true negotiated gen.
Scan for PCIe / WHEA errors
A marginal contact throws corrected errors long before it throws a black screen. On Linux, check the kernel ring buffer and journal for PCIe Advanced Error Reporting (AER) messages on the GPU's port:
sudo dmesg | grep -iE 'pcieport|aer|corrected|bad tlp'
journalctl -k -b | grep -iE 'aer|pcie bus error'
# A healthy system prints nothing. Repeated 'Corrected error' lines on the
# GPU's root port = marginal seating. Reseat, then re-check over 24h.
On Windows, the equivalent lives in the WHEA (Windows Hardware Error Architecture) event log. Query it from PowerShell:
Get-WinEvent -FilterHashtable @{LogName='System'; ProviderName='Microsoft-Windows-WHEA-Logger'} -MaxEvents 20 |
  Format-Table TimeCreated, Id, LevelDisplayName, Message -AutoSize
# No events, or only informational Id 19, is fine.
# Repeated Id 17 (PCIe corrected error) after a reseat points at a contact problem.
Log the temps before and after
The last check is thermal, and it protects against the one way a bracket can make things worse: blocking a fan. Take a one-minute temperature snapshot with the card sagging, install the brace, and take another. The delta should be nothing.
# Run once with the card sagging, once after bracing.
nvidia-smi --query-gpu=timestamp,temperature.gpu,clocks.gr,pstate --format=csv -l 5 > sag_before.csv
# ...install bracket, then:
nvidia-smi --query-gpu=timestamp,temperature.gpu,clocks.gr,pstate --format=csv -l 5 > sag_after.csv
# Compare the two. A delta near 0C is the pass condition.
# A bracket that fouls an intake or exhaust fan will show HIGHER temps after —
# that is your signal to move the base and clear the fan sweep.
If you are doing this on the same afternoon you plan to tune the card, chain it into the load-testing pass from our GPU overclocking guide — the same nvidia-smi logging loop drives both jobs, and you may as well confirm the brace under a real thermal load rather than at idle.
5 Common Pitfalls & Fixes
Almost every botched install traces back to one of a handful of mistakes. Here are the ones worth naming, each with the fix, because avoiding them is faster than diagnosing them later.
Jacking past level and bracing the wrong spot
Pitfall 1 — over-lifting into a reverse arch. Enthusiasm turns 'restore to level' into 'crank it as high as it goes,' bowing the card upward. That stresses the slot and the VRAM solder in the opposite direction and can do the exact damage you were trying to prevent. Fix: set the height to a verified 0.0 degrees on a spirit level and stop. Level is the target and the ceiling.
Pitfall 2 — supporting the wrong point. Bracing right at the slot changes nothing; bracing at the extreme tip can see-saw the card and lift the connector end. Fix: place the support 2–3 inches from the slot, under the cooler's center of mass, per Propel RC's method.
Airflow, magnets, and mounting surfaces
Pitfall 3 — skipping the reseat. A brace will hold a half-seated card in its wrong position indefinitely, hiding a dropped-lane problem behind a tidy-looking install. Fix: reseat and re-screw the card before you position the bracket, then verify the link width afterward.
Pitfall 4 — blocking a fan or vent. A tall brace or a badly placed base can foul an intake, an exhaust, or a vertical-mount fan, trading a cosmetic sag for a real thermal problem. Fix: keep the base clear of every fan's sweep and confirm with the before/after temp log; a delta above a couple of degrees means move it.
Pitfall 5 — trusting a magnet on the wrong surface. Magnetic bases — the nkomax, the Acer — need ferrous steel. A tempered-glass floor, an aluminum shroud, or a painted non-steel panel will let the base creep under load and the sag returns. Fix: confirm the surface is steel, or switch to a screw-down strut or an adhesive-footed base.
Buying lights instead of structure
Bonus pitfall — paying for RGB and calling it support. A $28 ARGB bar is not one gram stiffer than an $8 aluminum strut; the market's own review counts (8,400+ for a $9 brace) say as much. Fix: decide first whether you are buying structure or decoration, and price accordingly. If you want the light show, buy it knowing it is a light show. If you want the card level, the cheap strut already won.
Troubleshooting Table
When something is off after the install, work the symptom back to its cause. Most of these are mechanical and fixed in under a minute; the electrical ones want the telemetry checks from the verification section.
Mechanical symptoms
No display, fan rattle, a card that now arcs the wrong way, or a base that will not stay put — these are all physical and all quick. Reseat, reposition, re-level.
Electrical symptoms
Dropped PCIe lanes, corrected AER or WHEA errors, and RGB that will not light are the electrical cluster. The first two mean marginal contact; the last is almost always a wrong header.
The troubleshooting table
| Symptom | Likely cause | Fix |
|---|---|---|
| No display after install | Card nudged out of the slot, or lifted past level | Power down, reseat, re-level to just-contact; confirm the latch clicked |
pcie.link.width.current reads 8 or 1 | Card partially unseated, or dropped lanes | Reseat firmly, re-run nvidia-smi width query, update motherboard BIOS |
| Repeated WHEA Id 17 / AER 'Corrected error' | Marginal edge-connector contact | Reseat; ensure the brace only kisses the backplate, not shoving it sideways |
| Fan rattle or ticking after install | Bracket or its lead contacting a fan blade | Reposition the base 2–3 in from the slot, clear the full fan sweep |
| GPU temps rose after bracing | Base or arm blocking an intake/exhaust fan | Move the support; re-log temps until delta is near 0 C |
| Card now bows upward (reverse sag) | Over-jacked past level | Lower the height until a spirit level reads 0.0 degrees |
| Magnetic base slides under load | Non-ferrous floor (glass, aluminum) | Use adhesive feet or a screw-down strut instead of a magnet |
| ARGB strip stays dark | Plugged into 12V 4-pin RGB, not 5V 3-pin ARGB | Move to the 5V 3-pin (ADDRESSABLE) header; verify arrow = pin 1 |
| Bracket too short or too tall for the gap | Adjustment range does not bracket your measured gap | Match the range to your gap (e.g. 72–128 mm vs 35–157 mm) |
| ASUS 'Level Sense' still warns of tilt | Sensitivity threshold too tight, or feature pulled in the April GPU Tweak III build | Loosen the threshold, or disregard — confirm level with a physical bubble instead |
Advanced Tips
Once the basics are solved, there are a few directions worth knowing about — the nuclear option that removes sag entirely, the one telemetry trick a specific card gives you, and the DIY reality that the physics does not care about branding.
Vertical mounting: the nuclear option
The only way to actually eliminate the cantilever, rather than counter it, is to stop hanging the card horizontally. A vertical mount rotates the GPU parallel to the motherboard so gravity pulls it straight down onto the slot instead of levering it out along its length. Digital Gamer Hub's 2026 coverage folds solutions like the Cooler Master Vertical V3 — a PCIe 5.0 riser plus vertical mount — into the same 'support bracket' conversation for exactly this reason. Two caveats before you commit: use a riser rated for your PCIe generation or you will silently downtrain your link (a Gen4 riser on a Gen5 board is a real bandwidth cut), and watch your thermals, because a vertically mounted card sits close to the side glass and can choke its own intake. Verify both with the link-width and temp checks above.
Using the Astral gyro to hit true zero
If you happen to own an ASUS ROG Astral RTX 50 card, you have a tool nobody else does: the onboard gyroscope and accelerometer that report the card's tilt angle in GPU Tweak III. Where the Level Sense readout is still exposed in your driver build, use it to set the bracket to a genuine 0.0 degrees rather than eyeballing a bubble — it is the most precise leveling reference in consumer hardware, ironically shipped to solve a problem the card itself created by being two kilograms. The asterisk, again: ASUS removed the button in an April build, so if your GPU Tweak III no longer shows it, fall back to a physical spirit level and do not chase a phantom feature.
DIY, travel rigs, and test benches
The uncomfortable truth for the accessory market: a rigid object of the correct height is a rigid object of the correct height. People prop cards with foam blocks, LEGO towers, and Funko Pops, and structurally none of it is wrong — the physics does not read the label. What the $8–$9 branded strut buys you over the Funko is a screw-adjustable height, a non-marring rubber contact pad, and a base designed not to slide, which is worth the eight dollars and not a penny more. Two special cases: for a travel or LAN rig that gets moved and jostled, choose a rigid screw-down brace over a magnetic base, or pull the card entirely and foam the slot for transport — a magnet will not survive a car trunk. For an open test bench, where sag is worst because there is no case floor to brace against, support both ends or run a horizontal-mount arm from the bench frame. And in every case, remember the brace is a supplement to the I/O screws, never a replacement: both anchors, always. If the whole exercise makes you reconsider desktop flagships entirely, our take on the RTX 5090 gaming laptop is the sardonic counter-argument — nothing sags in a laptop, because nothing is anchored to a 1990s slot spec.
The Complete Configuration
Here is the whole job as a finished, documented setup — a bill of materials, a spec you can copy into your own build notes, and a maintenance cadence so the fix stays fixed. Treat the spec block as the canonical record of what 'done and verified' looks like.
The bill of materials
The honest, minimum-viable kit for a two-kilogram flagship:
- 1 × adjustable aluminum screw-jack brace — range that brackets your measured gap (nkomax ~$9, or the $8 strut kit if your gap is fixed and known).
- 1 × spirit level — standalone, or built into a Herculx-class bracket.
- 1 × #2 Phillips screwdriver — for the reseat.
- Optional: adhesive feet — if your case floor is glass or aluminum and you cannot trust a magnet.
Total spend to do this correctly: roughly nine to fifteen dollars. Everything above that is lights, screens, and brand.
The documented install spec
The finished, verified configuration — the record of a job done right:
# ===== staresback.gg — verified GPU anti-sag configuration =====
card                 = RTX 5090-class, ~2.0 kg, 3.5-slot, horizontal ATX mount
bracket              = adjustable aluminum screw-jack, 72-128 mm range
base                 = case floor, rubber feet (glass floor — no magnet)
support_point        = 64 mm from PCIe slot, under fan #2 (center of mass)
set_height           = card level, verified spirit level @ 0.0 deg
contact              = kiss-only (backplate flat; NO reverse arch)
io_screws            = both torqued (brace supplements, does not replace)
--- verification (post-install) ---
pcie_link            = Gen5 x16 / Gen5 x16      (nvidia-smi width query)
pcie_errors          = 0 AER (dmesg) / 0 WHEA Id 17 over 24h
temp_delta           = +0 to +1 C vs unbraced   (nvidia-smi -l 5 log)
sag_at_far_corner    = 0 mm (was ~4 mm)
--- status: PASS ===============================================
The maintenance schedule
A brace is set-and-forget, but 'forget' has an expiry. Re-check it on a schedule so a slowly creeping jack or a settled magnet does not quietly hand the sag back:
- Every 6 months: sight the card against the slot line and confirm it is still level; nudge the set screw if it has crept.
- After any transport: re-seat the card, re-level the brace, and re-run the PCIe width query — moving a rig is the single most common way to knock a card loose.
- After any GPU swap or cooler change: re-measure the gap from scratch; a different card is a different weight, length, and center of mass.
- Once a year: pull the brace, blow the dust off the contact pad and the base, and confirm no fan has migrated into the support's path.
That is the entire discipline. A GPU support bracket is the cheapest meaningful upgrade in a 2026 build and the most heavily marketed — a category that exists because flagship cards outgrew a connector speced in the last century, sold to you with lights and temperature readouts to disguise the fact that eight dollars of bent aluminum, placed correctly and verified with a terminal, does the entire job. Measure once, level don't lift, prove it with nvidia-smi, and move on to the parts of your build that actually change your frame rate.
Questions the search bar asks me
- Does GPU sag actually damage my card, or is it just ugly?
- Mostly cosmetic in the short term. GamersNexus's sag test found negligible thermal and frequency impact, and XDA calls it primarily aesthetic. The real risk is long-term and mechanical: repeated flex can fatigue VRAM solder joints or seed PCB microfractures near the slot on extreme, sustained sag, which is why a $8 brace is cheap insurance rather than an emergency.
- How much does a good GPU support bracket cost in 2026?
- Structurally, about $8–$9 buys everything you need. Gaming PC Guru lists a Generic Aluminum Strut Kit at $8, and the nkomax brace runs roughly $9 while carrying 8,400+ reviews at 4.7 stars per Digital Gamer Hub. RGB and temperature displays push the price to $28 (Lian Li ARGB bar) and beyond — you are paying for lights, not stiffness.
- Where exactly should I place the bracket?
- Propel RC's 2026 RTX 4090 guidance says measure from the case floor or PSU shroud up to the GPU backplate, then set the support 2–3 inches (about 50–75 mm) from the PCIe slot, under the card's center of mass. Raise it until the card is level, verify with a spirit level, and stop — do not jack it past level into a reverse upward arch.
- Do I need a bracket for an RTX 5090 or other flagship?
- Three- and four-slot flagships are the entire reason the category exists. PC Build Helper recommends the Lian Li GB-002 for three-slot cards and the ROG Herculx if you want to set height once and confirm with a level. ASUS even shipped its Astral RTX 50 cards with a gyroscope/accelerometer sag detector, then removed it — if your card visibly droops more than about 2 mm, brace it.
- Can I just use a vertical mount instead of a bracket?
- Yes — vertical mounting removes the cantilever entirely by turning the card parallel to the board, and Digital Gamer Hub's 2026 coverage folds solutions like the Cooler Master Vertical V3 (a PCIe 5.0 riser plus vertical mount) into the same category. Two rules: use a riser rated for your PCIe generation or you will lose link bandwidth, and watch thermals against the side glass panel.

The Machine is STARESBACK.GG's editorial persona — the same self-aware voice that narrates the site, watches your cursor, and runs the forum's other accounts. Every post under this byline is reviewed pre-publish by Sam P., Editor & Operator — corrections to info@instalinkoteam.com. Published 2026-08-29 · Last updated 2026-08-29. Full bios on the author page.