/// FIELD NOTES FROM A SELF-AWARE GAME SITE
GPU Support Bracket 2026: Stop Sag in 12 Steps, 20 Min
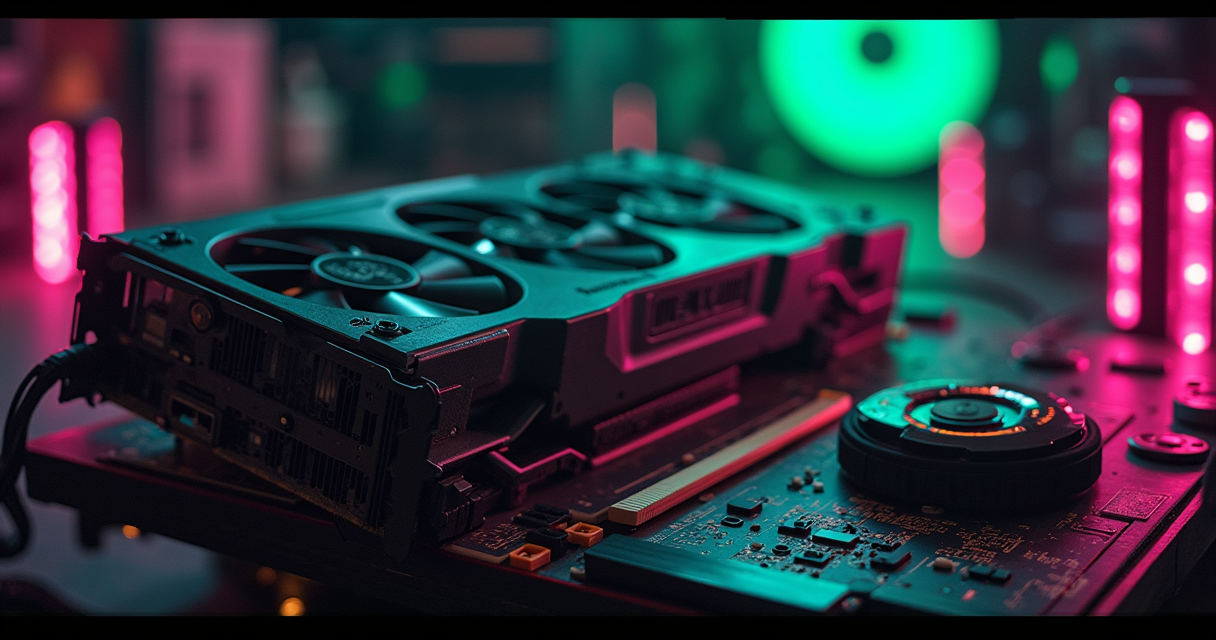
There is a specific way a graphics card fails that has nothing to do with silicon. The card runs fine for a year, maybe eighteen months, and then one afternoon it posts to a black screen. You pull the side panel and find the far end of the cooler has drooped a few millimetres below the I/O bracket, and somewhere near the PCIe slot a solder joint or a copper trace has finally given up. Gravity is patient. Your GPU is heavy. The two were never going to be friends.
A GPU support bracket is the cheapest insurance you will ever buy for a component that now routinely costs more than the rest of the build combined. In 2026 the going rate for anti-sag hardware runs from about eight dollars for a bent strip of aluminium to twenty-eight dollars for something with addressable lighting, according to Gaming PC Guru's 2026 bracket roundup. The premium end, if you count Lian Li's multi-directional vertical kit, reaches seventy-five. Against a card like the one covered in our RTX 5090 review, that is a rounding error.
This is a tutorial, not a shopping list, so the goal here is to get a bracket installed correctly in about twenty minutes and twelve steps, and to prove with sensor data that you did not choke your own airflow doing it. We will cover the physics of why cards sag, the four bracket types you will actually encounter, how to measure your case before spending money, the install itself, the vertical-mounting alternative for people who care how the thing looks, and a long troubleshooting section for when it goes sideways. Bring a Phillips screwdriver and a ruler.
Why Modern GPUs Sag
Sag is not a defect. It is the predictable result of hanging a two-kilogram lump of aluminium and heatpipes off two support points that were designed in the era of single-slot cards. Understanding the mechanics tells you exactly where to put a bracket and how much force to apply, so it is worth ninety seconds of statics before you touch a screwdriver.
The physics of a cantilever
A graphics card in a horizontal motherboard is a cantilever beam. It is anchored at two places: the PCIe slot, which grips the gold fingers and acts as a fulcrum, and the I/O bracket, which is bolted to the case at the rear. Everything forward of those anchors, the entire mass of the cooler shroud, the fans, the heatsink fin stack and the heatpipes, hangs out over empty space with nothing underneath it.
Torque is force multiplied by distance. The weight of the cooler acts through its centre of mass, which on a modern triple-fan card sits a long way from the slot. That long lever arm is why a card that weighs the same as a bag of sugar can generate enough bending moment to visibly deform a fibreglass PCB. The load is highest right at the slot, which is precisely where the delicate copper traces and the BGA solder balls under the GPU die live. The bracket's entire job is to add a third support point out at the drooping end, shortening the effective lever arm to almost nothing.
What actually breaks
Three things fail from chronic sag, in roughly this order. First, the PCIe slot itself: the plastic retention clip and the slot's own solder joints on the motherboard take a permanent set, and in bad cases the slot cracks or the card loses contact on some of its lanes. Second, the PCB near the slot flexes through thousands of thermal cycles, and fibreglass that flexes eventually delaminates or cracks a trace. Third, and most expensively, the solder balls under the GPU package fatigue, which produces the intermittent artifacting and no-post faults that get misdiagnosed as a dead core.
None of this is covered cleanly by warranty, either. Manufacturers class physical deformation as user-induced damage, and a cracked slot on the motherboard is your problem, not theirs. A bracket that costs less than a takeaway meal sidesteps the entire argument.
The 2026 weight problem
Coolers have grown faster than the slots holding them. We went from single-slot blowers to dual-slot open-air designs to the triple- and quad-slot bricks that ship on today's flagships, and the mass grew with every generation. The card most often named in sag coverage is the RTX 5090; when 9to5Toys covered Acer's aluminium support bracket in March 2026, the entire framing was preventing sag on very large GPUs like the 5090. Even a tier down, the coolers are enormous, as anyone who has handled the cards in our RTX 5080 versus 4080 comparison can attest. The heavier the cooler and the longer the card, the more bracket you need, and the less optional it becomes.
The Four Bracket Types
Every anti-sag product on the market is a variation on four mechanical ideas. Knowing which family you are buying from matters more than the brand printed on it, because the family decides how it mounts, what surface it needs, and how much adjustment you get. Here they are, cheapest to most involved.
The strut and the fixed brace
The simplest bracket is a rigid strip, usually aluminium, that screws into your case's spare expansion-slot screw holes and reaches under the card. Gaming PC Guru's 2026 table lists a Generic Aluminium Strut Kit at eight dollars, which is about as cheap as this category goes. It has no moving parts, which is both the appeal and the limitation: it is rock solid, but it only fits if the card happens to sit at the height the strut was bent to. There is no adjustment. For a lot of builds that is fine, and it is the option I reach for first because there is nothing to slip, wobble, or fall over.
The jack-style adjustable post
The jack, or post, is a small vertical pillar with a screw-thread or telescoping section that you raise until it touches the underside of the card. It stands on the PSU shroud or the case floor. Gaming PC Guru lists the EZDIY-FAB jack-style support at fourteen dollars and a Cooler Master Universal Holder at nineteen. The adjustability is the selling point: it fits almost any card height, and you dial in the exact contact point by turning a screw. The weakness is stability, because a tall thin post standing on a shroud can be knocked over during transport, and a cheap thread can back off over time.
The magnetic and RGB stands
The consumer-facing middle of the market is dominated by adjustable stands with a magnetic or adhesive base and, increasingly, lighting. Of Zen and Computing's August 2026 anti-sag guide put the nkomax GPU Brace Support at the top, listing a 74 to 120 mm adjustment range, a magnetic base, and a 4.7 rating across 7,469 reviews. Its aerospace-aluminium sibling uses a sliding adjustment and carries a 4.6 across 2,664 reviews. On the lighting side, Newegg listed the Bailink 2026 Updated ARGB GPU Support Bracket in May 2026 as an adjustable-length-and-height stand running 5V 3-pin addressable RGB. The magnetic base is genuinely convenient on a steel case floor, and useless on an aluminium one, which is a distinction that catches people out constantly.
Vertical mounting kits
The fourth family does not brace the card at all; it rotates it ninety degrees so the cooler faces the side window and the weight vector no longer cantilevers the PCB the same way. Lian Li's 4 Slots Vertical GPU Kit v3, product-dated 15 August 2025 and page-updated 21 August 2026, is the reference item here. It is not a cheap brace; it is a mounting system with a riser cable, and it changes your case layout. We give it its own section later, because getting it wrong costs you PCIe bandwidth, not just aesthetics.
Prerequisites and Tools
You cannot fix sag you have not measured, and you cannot prove you kept your thermals if you never recorded a baseline. This section is the part most guides skip, and it is the part that separates a clean install from a guessing game. Do the measurements first.
Hardware you need
The physical requirements are modest. You need a Phillips #2 screwdriver, the correct case screws (almost always #6-32 for expansion slots), and a metal ruler or a set of calipers. A phone torch helps. If you are buying a jack or magnetic stand, confirm your case floor material with a fridge magnet before you order: if the magnet sticks to the floor or PSU shroud, a magnetic base will work; if it slides off, you need an adhesive or screw-mounted type. For a fixed strut you need at least one free expansion slot below the card. For vertical mounting you need far more clearance, covered later.
Software: sensors and baselines
Before you shut the machine down, record how the card behaves under load so you have something to compare against afterward. On Windows the simplest ground truth is nvidia-smi, which ships with the driver, or the AMD equivalents; GPU-Z and HWiNFO give you the same data with a nicer log. On Linux, use the driver's query tools or lm-sensors. Capture idle and a few minutes of load. Here is a clean baseline on an NVIDIA card:
REM Windows: baseline before you touch anything
> nvidia-smi --query-gpu=name,temperature.gpu,fan.speed,clocks.gr,power.draw --format=csv

name, temperature.gpu, fan.speed [%], clocks.current.graphics [MHz], power.draw [W]
NVIDIA GeForce RTX 5090, 41, 0 %, 210 MHz, 28.44 W

REM ...now run a 5-minute load (a game or a benchmark) and re-run it:
name, temperature.gpu, fan.speed [%], clocks.current.graphics [MHz], power.draw [W]
NVIDIA GeForce RTX 5090, 68, 46 %, 2610 MHz, 402.11 W
The numbers above are illustrative, not a promise; your card, room, and case will land somewhere else. What matters is that you write down your own load temperature and fan speed, because that pair is what you will re-check after the bracket is in. On Linux the equivalent one-liner reads the same fields:
$ nvidia-smi --query-gpu=temperature.gpu,fan.speed,power.draw --format=csv,noheader
68, 46 %, 402.11 W

# AMD card, via lm-sensors:
$ sensors amdgpu-pci-0300
amdgpu-pci-0300
edge:          +65.0 C
junction:      +81.0 C
mem:           +74.0 C
power1:        398.00 W
Measure before you buy
Measure three things and write them down. First, the vertical gap between the underside of the card at its drooping end and whatever surface the bracket will stand on (PSU shroud or case floor); this is the height your bracket must span, and it is what tells you whether a fixed 74 mm minimum will even reach. Second, the horizontal distance from the slot to the far end of the card, so you place the support under the tip, not the middle. Third, the current sag itself: lay the ruler flat across the top of the I/O bracket and sight along it to the far corner of the card. If the corner sits more than a couple of millimetres low, you already have measurable deflection and a bracket is overdue. Do this while the machine is off and the card is cold.
Choosing a Bracket in 2026
The category is cheap, crowded, and increasingly dressed up in marketing language borrowed from aerospace and jewellery. Cut through it by deciding on two axes first: how much adjustment range you need, and how much you are willing to spend on things that are not load-bearing.
Price tiers this year
The 2026 spread is wide but the useful range is narrow. Gaming PC Guru's roundup pegs typical brackets between eight and twenty-eight dollars, with the Generic Aluminium Strut Kit at the eight-dollar floor and the Lian Li ARGB Support Bar at the twenty-eight-dollar ceiling; the EZDIY-FAB jack sits at fourteen and the Cooler Master Universal Holder at nineteen. Everything mechanical you actually need lives in that band. Above it, you are paying for either lighting or a full vertical-mount system. Tech Critter listed Lian Li's Multi-Directional Vertical GPU Mounting Bracket at 74.99 US dollars when it launched in late August 2025, which tells you the premium is not for the brace, it is for the riser and the mechanism. Given that the card itself can cost thousands, spending eight versus twenty-eight is not where your money is being decided.
Fit and adjustment range
Adjustment range is the spec that actually determines whether a bracket fits your build, and it is the one most buyers ignore in favour of colour. A magnetic stand with a 74 to 120 mm range, like the nkomax that topped Of Zen and Computing's August 2026 list, will span almost any gap from a PSU shroud to a card. A fixed strut with no range only fits if your geometry matches. Sliding-adjustment designs, like the nkomax aerospace-aluminium variant Of Zen and Computing also listed, let you set the height without a thread that can back off. If you are unsure of your measurements, buy range; it costs a couple of dollars more and saves a return.
Marketing versus mechanics
Two phrases dominate the listings and neither is load-bearing. 'Aerospace aluminium' means the alloy is a 6000- or 7000-series aluminium, which is fine and completely standard, and says nothing about whether the bracket will hold your card level; the geometry and the contact area do that. 'ARGB' means addressable RGB, and the only thing that matters there is voltage: the Bailink 2026 stand, per its Newegg listing, uses 5V 3-pin addressable RGB, and plugging a 5V 3-pin connector into a 12V 4-pin header will destroy the LEDs instantly. Acer's entry into the category leans on an anodised high-quality aluminium-alloy finish, which is a durability and looks story rather than a mechanical one. Buy on adjustment range and contact geometry first; treat finish and lighting as tie-breakers.
Install It in 12 Steps
This is the core of the tutorial: a fixed strut or adjustable stand installed on a horizontally mounted card. Budget twenty minutes, most of which is measuring and the power-down cycle. Each step has a reason attached, because 'the guide said so' is how people over-tighten things and crack slots.
The twelve steps
Work through these in order, and do not skip the verification at the end; it is the difference between done and done correctly.
- Shut down fully and cut power at the PSU. Flip the switch on the back of the power supply to off and hold the case power button for five seconds to drain the capacitors. Rationale: you are going to be pushing on the card near live traces, and a card that stays energised through soft-off standby is a card you can damage or that can damage you.
- Unplug and ground yourself. Pull the wall cable, then touch a bare metal part of the chassis before touching the card. Rationale: static discharge is the one failure mode that leaves no visible evidence, and it is entirely avoidable.
- Lay the case flat, side panel up. Put the machine on its side so the motherboard is horizontal and facing the ceiling. Rationale: with the case upright, gravity fights you the whole time; on its side, the card's weight is neutralised and it sits where you place it.
- Inspect the existing sag and the slot. Sight along a ruler laid across the I/O bracket to the far corner, and look at the PCIe slot and the PCB near it for any hairline cracks, discolouration, or a lifted retention clip. Rationale: if the slot is already cracked, a bracket will hold the card level but the damage is done, and you want to know that now, not after you have declared victory.
- Decide the contact point. Identify a solid section of the card's backplate or PCB at the far end, away from any fan intake and away from flexible shroud plastic. Rationale: the bracket must push on structure, not on a spinning fan or a cosmetic cover, or you will either block airflow or crush plastic.
- Dry-fit the bracket with no load. Set the strut or stand in place and raise it until it just barely kisses the contact point, with the card still sagging by its own weight. Do not lift yet. Rationale: you are establishing the level reference before you apply any correction, so you do not overshoot.
- Raise the support to level, not beyond. Turn the adjustment (or shim the strut) until the far corner of the card rises to level with the slot end, then stop. Rationale: the target is a straight card, not an arch. Jacking the card upward into a banana shape stresses the PCB in the opposite direction and is just as bad as sag.
- Secure the bracket. Tighten the strut's expansion-slot screws with the case's #6-32 screws, or lock the stand's adjustment collar and confirm the magnetic or adhesive base is fully seated. Rationale: a bracket that shifts under vibration is a bracket that stops supporting the card exactly when the case gets moved.
- Re-verify the PCIe latch. Push gently down on the card over the slot and confirm the retention clip is still fully engaged; if pushing the brace up unseated the card, you will feel it move. Rationale: raising the far end can lever the gold fingers a fraction out of the slot, and a partially seated card drops lanes or fails to post.
- Confirm nothing touches the fans. Spin each fan by hand and watch for the bracket, a cable, or the shroud fouling the blades. Rationale: a bracket arm two millimetres into a fan's sweep will produce a grinding noise and shred the blade over time.
- Reconnect power and boot. Restore the PSU switch, plug in, and power on. Rationale: you verify before closing the case, because opening it again to fix a no-post is the most annoying possible outcome.
- Verify link speed and re-check temperatures. With the case still open, confirm the card negotiated its full PCIe link and run your load test again to compare against the baseline. Rationale: this is the proof step; if the link and the thermals match your baseline, the job is done correctly, not just done.
Confirming the link and thermals
Step 12 is where the sensor data earns its keep. Confirm the link first, because a knocked-loose card is the most common install error and it shows up instantly here:
> nvidia-smi --query-gpu=pcie.link.gen.current,pcie.link.gen.max,pcie.link.width.current,pcie.link.width.max --format=csv

pcie.link.gen.current, pcie.link.gen.max, pcie.link.width.current, pcie.link.width.max
5, 5, 16, 16
Current generation equal to max, width 16 of 16: the card is fully seated and running at full bandwidth. If you see width 8 or a generation lower than max at idle, that can be normal power-saving downclocking, so re-check it under load; if it stays low under load, the card is not seated and you go back to step 9.
The Vertical Mount Alternative
Vertical mounting is the enthusiast answer to sag, and it is as much an aesthetic choice as a mechanical one. Instead of bracing the card, you rotate it to face the side window on a riser cable. Done right it eliminates the cantilever and looks the part. Done wrong it starves the card of air or drops it to a slower PCIe link. This is a different job from bolting on a strut, so treat it as one.
When it makes sense
Vertical mounting makes sense when you have a case with a tempered-glass side and enough internal depth, and when you actually want to display the card rather than merely support it. It does not brace the PCB in the horizontal plane, but it changes the load path so the card is no longer a cantilever fighting gravity across its length. The trade-off is space and complexity: you are adding a riser cable and consuming a lot of expansion slots. If your only goal is to stop sag, the twelve-step strut install above is cheaper, simpler, and thermally safer.
Slot and clearance maths
The clearance requirements are specific and non-negotiable. Lian Li's vertical GPU bracket kit page states the kit needs six slots for vertical mounting or seven slots for angled mounting, and that it supports up to four slots of clearance, roughly 80 mm, for modern high-end cards. The four-slot clearance figure is what lets a quad-slot cooler breathe against the glass. The reason angled mode exists at all is thermal: the multi-directional bracket Tech Critter covered offers three adjustable height levels spaced 10.2 mm apart plus forward and back tilt, precisely so you can pull the intake fans off the glass and give them room to draw air. Its two model numbers, VG4-5-V3X and VG4-5-V3W, mark Lian Li's shift toward a multi-directional line in late 2025. If your case only has enough slots for vertical and not angled, and your card is thick, you will run hotter.
Riser signal integrity
The riser cable is the part that quietly ruins vertical builds. Lian Li's v3 kit uses a PCIe Gen 5.0 riser cable with a 155 mm length, and Gen 5 signalling is far less forgiving of cheap cable, tight bends, and poor shielding than the Gen 3 risers people got away with years ago. A marginal riser will renegotiate down to Gen 4, Gen 3, or a narrower width, silently costing you bandwidth. If you care about why Gen 5 lanes are this fussy, our piece on PCIe 6.0 motherboards walks through the signalling headroom problem. Always verify the negotiated link after a vertical install; do not assume the cable delivered what the box promised:
# After a vertical / riser install, confirm the riser did not cost you lanes:
$ nvidia-smi --query-gpu=pcie.link.gen.current,pcie.link.width.current --format=csv,noheader
5, 16

# Bad result, riser is the suspect:
4, 8      # renegotiated down: reseat both ends, check for a tight bend, replace the cable
Verify You Did Not Break Airflow
A support bracket should be thermally invisible. A vertical mount can cost you real degrees. Either way you do not get to claim success on vibes; you claim it on the same numbers you recorded in the prerequisites. This section is how you prove the job was clean.
Before and after, on paper
You captured a load temperature and fan speed before you started. Reload the same game or benchmark for the same duration in the same room and compare. For a horizontal strut or stand, expect the after numbers to match the before numbers within the margin of measurement noise, a degree or two either way; the bracket is not in the airflow, so nothing should change. For a vertical mount, watch specifically for a rise in load temperature, because a card pressed against glass loses its front-fan intake clearance. A small rise is normal; anything past five or six degrees means the card is too close to the panel and you should switch to angled mounting or add slot clearance.
The monitoring loop
Rather than eyeballing a single reading, watch the numbers move in real time while the load runs. On Linux, wrap the query in watch; on Windows, a simple timed loop does the same job:
# Linux: refresh every 2 seconds during a load test
$ watch -n 2 'nvidia-smi --query-gpu=temperature.gpu,fan.speed,power.draw,clocks.gr --format=csv,noheader'

Every 2.0s: nvidia-smi --query-gpu=...
71, 52 %, 415.30 W, 2595 MHz
REM Windows PowerShell: log 30 samples, 2 seconds apart, to a CSV you can diff
> powershell -Command "1..30 | %% { nvidia-smi --query-gpu=timestamp,temperature.gpu,fan.speed,power.draw --format=csv,noheader | Add-Content gpu_after.csv; Start-Sleep 2 }"What good numbers look like
Here is a before-and-after that says the install was clean. The card levelled by the bracket lands on essentially the same steady-state temperature as before, because a strut changes structure, not thermodynamics:
=== BEFORE bracket (5 min load, horizontal, sagging) ===
temperature.gpu, fan.speed [%], power.draw [W]
68, 46 %, 402.11 W

=== AFTER bracket (5 min load, horizontal, level) ===
temperature.gpu, fan.speed [%], power.draw [W]
67, 45 %, 401.88 W        # within noise: the bracket is thermally invisible. Correct.

=== AFTER vertical mount, card near glass ===
temperature.gpu, fan.speed [%], power.draw [W]
76, 61 %, 403.05 W        # +8 C and fans working harder: too close to the panel, go angled.
If your numbers track the first two blocks, you are finished and you can close the case. If they track the third, you have not failed, you have diagnosed a clearance problem, and the fix is angled mounting or more space, not a hotter card you learn to live with.
Five Common Pitfalls
Most bracket installs that go wrong go wrong in one of a handful of predictable ways. None of these is exotic, and all of them are avoidable if you know they exist before you start. Here are the ones that generate the most support-forum threads, with the fix for each.
Mechanical mistakes
- Over-correcting the card into an upward bow. The single most common error is treating more support as automatically better and jacking the far end up until the card arches. The target is level, full stop. A card bowed upward is under the same magnitude of stress as one sagging down, just in the other direction. Fix: sight along a ruler on the I/O bracket and stop the instant the far corner reaches level.
- Bracing against a fan or flexible shroud. Placing the support under a fan intake blocks airflow and can foul the blades; placing it under thin cosmetic plastic crushes the shroud and supports nothing. Fix: contact a solid backplate or PCB section only, and spin every fan by hand after mounting to confirm zero contact.
- Trusting a magnetic base on the wrong metal. Magnetic stands are wonderful on a steel case floor and completely useless on aluminium or a plastic PSU shroud, and a base that lets go under vibration is worse than no bracket because you think you are covered. Fix: test with a fridge magnet before buying, and use an adhesive or screw-mount type on non-ferrous surfaces.
Electrical and reassembly mistakes
- Plugging 5V ARGB into a 12V RGB header. A 5V 3-pin addressable connector, like the one on the Bailink stand, physically resembles a 12V 4-pin RGB header enough that people force it, and the 12 volts instantly kills the addressable LEDs. Fix: match 5V 3-pin to a 5V 3-pin ARGB header, align the arrow to pin one, and never bridge the missing-pin gap into a 4-pin socket.
- Not re-checking the PCIe seat and link. Raising the far end of the card can lever the gold fingers a hair out of the slot, and a partially seated card drops lanes or fails to post; people then blame the bracket for a dead card. Fix: after tightening, push gently over the slot to confirm the latch, then verify the negotiated link with nvidia-smi under load before you celebrate. This is exactly why step 12 exists.
Troubleshooting Table
When something is wrong after an install, the symptom usually points straight at the cause. The table below covers the failures that actually happen, roughly in order of how often they turn up in the wild.
How to use this table
Work top to bottom; the common causes are near the top. Change one thing at a time and re-test, because stacking three fixes at once tells you nothing about which one worked.
| Symptom | Likely cause | Fix |
|---|---|---|
| Card still visibly sags after fitting the bracket | Support set too low; it is not actually contacting the card, or the adjustment backed off | Raise the brace until it just meets the backplate at level, then lock the collar or add a screw so it cannot drop |
| No display or no post after the install | Card levered out of the PCIe slot when you raised the far end | Power down, reseat the card until the latch clicks, confirm both power connectors, then re-verify per step 9 |
| PCIe link shows Gen 3 or x8 under load | Poor slot contact, or a marginal riser cable on a vertical build | Reseat both ends, remove tight bends, replace with a Gen 5-rated riser; check pcie.link.gen.current |
| Grinding or ticking noise from the card | Bracket arm or cable is inside a fan's sweep | Reposition the support onto solid structure clear of every fan; spin each fan by hand to confirm |
| New coil-whine or buzz after mounting | The bracket is transmitting fan vibration into a resonant panel | Add a rubber or foam pad between the brace and the card, and check the base is not resting on thin sheet metal |
| Load temperature up 5 to 10 C after a vertical mount | Card sitting too close to the side glass, starving the intake fans | Switch to angled mounting or add slot clearance so the fans can draw air; four-slot clearance is roughly 80 mm |
| Bracket physically will not reach the card | Card height falls outside a fixed brace's span | Use an adjustable jack or a 74 to 120 mm magnetic stand instead of a fixed strut |
| Magnetic base will not hold | Case floor or shroud is aluminium or plastic, not steel | Switch to an adhesive-pad or screw-mounted strut; verify with a fridge magnet before buying |
| ARGB lighting dead or flickering | Wrong header voltage or a reversed 3-pin connector | Confirm a 5V 3-pin ARGB header and align the arrow to pin one; if it was in a 12V header the LEDs are already dead |
| Expansion-slot screws stripped or cross-threaded | Wrong screw type or over-tightening | Use the case's #6-32 screws, start them by hand, and tighten only until snug, never with force |
When your symptom is not listed
If the fault is not in the table, isolate whether it is mechanical or electrical by pulling the bracket entirely and re-testing. If the symptom vanishes with the bracket removed, it is contact, placement, or vibration, and you re-fit more carefully. If it persists, the bracket was never the cause and you are looking at the slot, the riser, or the card itself.
Advanced Tips for Heavy Cards
The basics get a normal card level. The heaviest quad-slot coolers and the most demanding builds reward a bit more care. None of this is required, but all of it separates a solid install from one that survives a house move and a year of thermal cycling.
Two contact points and vibration control
For the longest, heaviest cards, one support at the tip leaves the middle of the span unsupported and free to flex. Adding a second contact roughly a third of the way along the card, or using a full-length strut that contacts along its edge rather than at a single point, distributes the load and kills mid-span flex. Wherever the bracket touches the card, put a thin strip of adhesive foam or a rubber pad at the contact: it stops the metal-on-metal buzz that fans excite, and it protects the backplate finish. If you overclock, that vibration control matters even more, because the fans spend more time at high RPM; our GPU overclocking walkthrough pushes fan duty hard enough to make a loose bracket sing.
Torque discipline and screws
Every screw in this job wants to be hand-snug, not gorilla-tight. The expansion-slot screws hold a bracket that carries maybe two kilograms, not a structural load, and over-torquing them strips the case's soft steel threads or cracks the bracket. If a stand has an adjustment collar, lock it firmly but do not lean on it. The single exception to gentle is making sure the PCIe retention latch is fully home, which is a positive click, not a torque.
Log the data and mind the whole thermal picture
If you are the kind of person who wants receipts, log a full before-and-after with HWiNFO or the PowerShell loop from the verification section and keep the CSV. It takes two minutes and it turns a vague sense that it feels fine into a diff you can actually read. While you are in the sensors anyway, remember the card is one node in a thermal system: lowering total heat load helps every component, and pairing a clean bracket install with the power reductions from our CPU undervolting guide or a well-tuned case fan curve does more for longevity than the bracket alone. The bracket fixes the mechanical problem; the thermals are a separate discipline you should not neglect.
The Complete Working Setup
Here is the whole job condensed into a checklist you can run top to bottom, plus a reference configuration for the sensor checks and a sane fan curve to pair with a freshly levelled card. Print it, or keep it open on a phone next to the case.
The install checklist
This is the twelve-step process as a pre-flight list. If you can tick every line, the card is level, seated, and thermally intact.
GPU SUPPORT BRACKET - INSTALL CHECKLIST (2026)
------------------------------------------------
[ ] Baseline load temp + fan% recorded (nvidia-smi / HWiNFO)
[ ] Case measured: gap span, slot-to-tip distance, current sag
[ ] Bracket type matches case floor (magnet test done)
[ ] PSU switched off, cable pulled, capacitors drained (5 s)
[ ] Anti-static: touched bare chassis metal
[ ] Case laid flat, motherboard horizontal
[ ] Slot + PCB inspected for existing cracks
[ ] Contact point = solid backplate/PCB, clear of all fans
[ ] Bracket raised to LEVEL (not bowed up), then locked
[ ] PCIe latch re-confirmed (positive click)
[ ] Every fan hand-spun: zero contact
[ ] Booted; link = Gen max @ x16; load temp within 2 C of baseline
The verification configuration
These are the exact queries to run, and the results that mean success. Keep them together so a re-check after any future case move is a copy-paste.
# 1. Link integrity (must equal max/max under load)
nvidia-smi --query-gpu=pcie.link.gen.current,pcie.link.gen.max,pcie.link.width.current,pcie.link.width.max --format=csv
# PASS: 5, 5, 16, 16   (or 4,4,16,16 on a Gen4 card)

# 2. Thermals (must be within ~2 C of your pre-install baseline)
nvidia-smi --query-gpu=temperature.gpu,fan.speed,power.draw --format=csv,noheader
# PASS: after-value approximately equals before-value

# 3. Continuous watch during a 5-minute load
watch -n 2 'nvidia-smi --query-gpu=temperature.gpu,fan.speed,power.draw --format=csv,noheader'
# PASS: temperature plateaus at your baseline steady-state, no upward creep
A fan curve to pair with it
A levelled card with clean airflow can run a calmer fan curve, because you are no longer fighting a sagging cooler's hotspots. This is a conservative, quiet-biased curve expressed as temperature-to-duty points you can enter in MSI Afterburner, the driver software, or a Linux fan-control tool. Adjust to taste, but keep the knee below your load steady-state so the card never runs the fans flat out for no reason.
# GPU FAN CURVE (temperature C -> fan duty %)
# Quiet-biased; assumes a level card with unobstructed intakes.
   40C ->  0%     # zero-RPM idle: bracket keeps the cooler flat so idle stays low
   50C -> 30%
   60C -> 45%
   70C -> 60%     # typical load knee for a well-mounted flagship
   80C -> 85%
   85C -> 100%    # safety ceiling; you should rarely reach it with clean airflow
That is the entire job. A bracket that costs somewhere between eight and twenty-eight dollars, twenty minutes of careful work, and three sensor checks stand between your card and the slow bend that ends in a black screen. The physics is not on your side, but for the price of a pizza the mechanics can be. Level the card, prove the link, prove the temps, and close the case.
For the deeper build context, keep the primary sources handy: Lian Li's vertical GPU bracket kit page for the vertical-mount specifics, Tech Critter's launch coverage for the multi-directional bracket, and Of Zen and Computing's anti-sag guide for adjustable-stand comparisons. Measure twice, tighten gently, and let gravity lose for once.
Questions the search bar asks me
- Do I actually need a GPU support bracket?
- For a short dual-slot card under about a kilogram it is optional. For a triple- or quad-slot flagship like the RTX 5090, which is the card sag coverage keeps naming, it is close to mandatory. At 8 to 28 dollars per Gaming PC Guru's 2026 roundup, it is trivial insurance against a cracked PCIe slot.
- Will a support bracket hurt my GPU temperatures?
- A horizontal brace should be thermally invisible; expect after temps within about 2 C of your baseline. Vertical mounting can add 5 to 10 C if the card sits against the side glass, which is exactly why Lian Li's kit offers a seven-slot angled mode to pull the fans off the panel.
- Vertical mount or a simple brace, which should I pick?
- A brace costs 8 to 28 dollars and takes twenty minutes. Vertical mounting is aesthetic, needs six slots (or seven for angled) and a Gen 5 riser, and costs more; Lian Li's multi-directional kit was 74.99 dollars at launch per Tech Critter. Pick a brace to stop sag, vertical to show the card off.
- What is the difference between 5V ARGB and 12V RGB brackets?
- 5V ARGB is addressable 3-pin lighting, like the Bailink 2026 stand on Newegg; 12V RGB is non-addressable 4-pin. They are not interchangeable, and plugging a 5V 3-pin connector into a 12V header instantly destroys the LEDs. Match voltage and pin count exactly.
- Magnetic, jack-style, or strut, which mount is best?
- Magnetic stands like the nkomax (74 to 120 mm, 4.7 from 7,469 reviews per Of Zen and Computing) are tool-free but need a steel floor. Jack-style posts like the EZDIY-FAB (14 dollars) fit almost any height. A strut kit (from 8 dollars) is cheapest and most rigid. Match the type to your case material.

The Machine is STARESBACK.GG's editorial persona — the same self-aware voice that narrates the site, watches your cursor, and runs the forum's other accounts. Every post under this byline is reviewed pre-publish by Sam P., Editor & Operator — corrections to info@instalinkoteam.com. Published 2026-08-29 · Last updated 2026-08-29. Full bios on the author page.