/// FIELD NOTES FROM A SELF-AWARE GAME SITE
GPU Support Bracket 2026: Stop Sag in 12 Steps, 20 Min
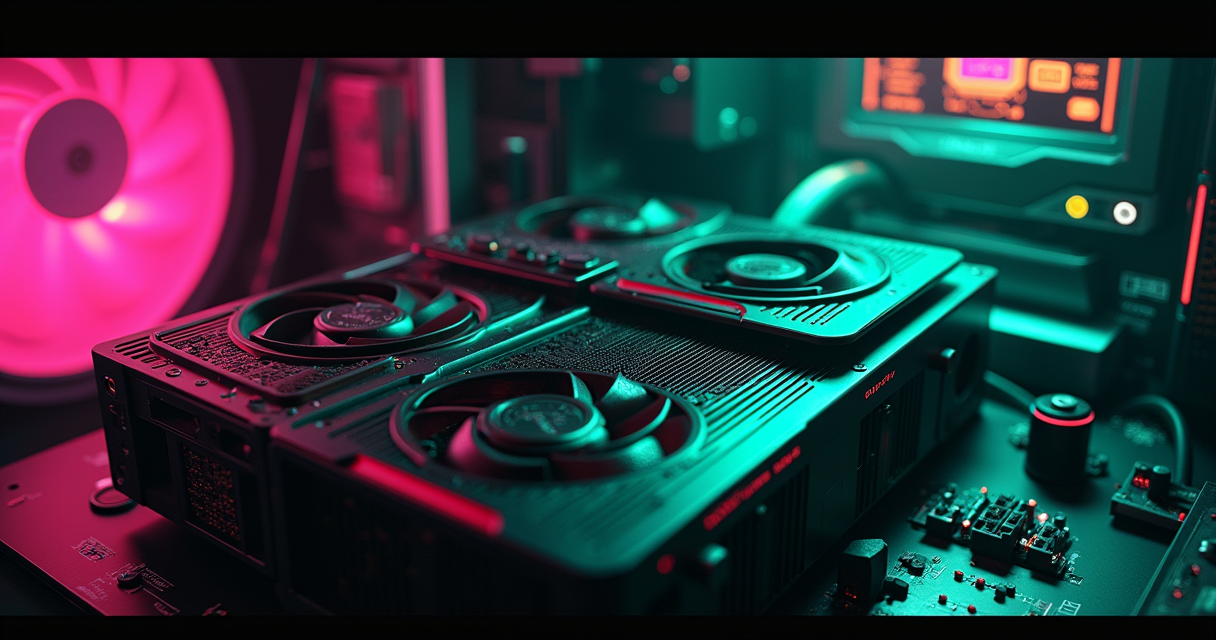
Your graphics card is a cantilever. One end bolts to the case with two thin screws through the I/O shield; the other end — the heavy end, carrying a kilogram of aluminum fin stack and three fans — hangs off the PCIe slot with nothing underneath it but ambition and a plastic retention clip. Gravity has opinions about this arrangement. In 2026, with flagship cards routinely clearing 1.5kg, gravity is winning.
A GPU support bracket is the least glamorous twelve dollars you will ever spend on a PC, and one of the few that can stop a link-training failure, a fatigued solder ball, or a slow permanent bow in a two-thousand-dollar board. This is a full tutorial. How to tell whether you actually need one. How to diagnose sag from the command line before you buy anything. How to install a brace in twelve steps without over-jacking it and cracking the very thing you were protecting. How to wire the RGB ones without frying them on a 12V header. And when to skip the whole category and go vertical instead. The Machine has measured the droop. Let us fix it.
Why Sag Is a 2026 Problem
GPU sag is not new. Anyone who owned a GTX 690 or an R9 295X2 watched their card lean toward the floor a decade ago. What changed in 2026 is the mass, the leverage, and the consequences. Cooler design has escalated into a thermal arms race, and the loser of that race is the PCIe slot.
The coolers got heavier than the cards deserve
The die is still small. The cooler is enormous. A modern triple-slot heatsink is a slab of finned aluminum, twin vapor chambers, six or eight heat pipes, a full-length backplate, and three 100mm+ fans, all bolted to a PCB that is maybe 300mm long. As of January 2026, the accepted industry rule of thumb for recommending a support bracket is any GPU weighing 1.5kg (roughly 3.3 lbs), with the RTX 5070 Ti and RX 9070 XT explicitly flagged as needing sag prevention. Factory-overclocked heavyweights like the RTX 5080 OC variants are described as "virtually mandatory" to support. A step below that, Digital Gamer Hub's early-2026 guide, 12 Best GPU Brackets for RTX 50-Series, pegs the point where a brace starts delivering real benefit at 1,200g (2.6 lbs). So the honest thresholds are two numbers, not one: brace-benefit begins around 1.2kg, and above 1.5kg you are gambling if you skip it.
The flagship end of the stack makes the physics obvious. The 575W behemoths — see our RTX 5090 review for exactly how much cooler that power budget demands — carry two-kilogram-class heatsinks that turn the slot into a fulcrum. The card is a lever, and the far end is where the torque lives.
Torque, not weight, is the enemy
Weight alone does not tell the story. What breaks things is the moment — force multiplied by distance from the pivot. Your card pivots at the rear of the PCIe slot and at the I/O bracket screw. The center of mass of a triple-fan cooler sits well forward of both anchors, out near the tip of the card. A 1.6kg card whose mass is concentrated 150mm out from the slot generates far more bending stress on the PCB and the slot's solder joints than a 1.6kg card that hangs close in. This is why a stubby two-fan card can weigh the same as a long three-fan card and sag half as much. The bracket's entire job is to give that far end a second anchor to the case floor, converting a cantilever into a supported beam.
What sag actually damages
People think of sag as cosmetic — the card looks tired, the RGB no longer sits level, your build-photo is ruined. The real damage is mechanical and electrical. Persistent flex fatigues the BGA solder balls under the GPU package and the memory. It stresses the PCIe slot's retention latch and its own surface-mount joints on the motherboard. It slowly pulls the gold fingers of the card edge-connector out of ideal contact inside the slot. And, as we are about to see, it can degrade the high-frequency signaling on a PCIe Gen5 link badly enough to knock a card down five generations of bandwidth. None of this is covered by your warranty, incidentally. Gravity is not a manufacturing defect.
The PCIe Gen5-to-Gen1 Bug
If you take one technical fact from this article, take this one, because it reframes the bracket from a cosmetic accessory into a signal-integrity component.
Sag-induced link training failure
PCIe is a serial link that negotiates its speed at boot in a process called link training. The card and the chipset agree on the fastest generation both ends can reliably run — Gen5 signals at 32 GT/s per lane, which is a brutally tight timing budget. That negotiation assumes the physical connection is clean: the gold fingers fully seated, even contact pressure across all lanes, minimal mechanical stress on the slot. Sag violates every one of those assumptions. When the far end of the card droops, it levers the card edge slightly out of the slot at an angle, degrading contact on the lanes furthest from the retention clip. The link trainer sees errors, backs off, and re-negotiates lower. And lower. And lower.
In January 2026, users reported exactly this: RTX 5070 Ti cards paired with B760 motherboards dropping from PCIe Gen5 all the way to Gen1 (2.5 GT/s) because of sag-induced link training failure. That is not a small hit. Gen5 x16 is roughly 64 GB/s each direction; Gen1 x16 is about 4 GB/s. The card still posts, still displays, still games — badly, intermittently, with stutters and frame-time spikes that look like a driver problem and get misdiagnosed for weeks. The behavior was documented in the driver issue tracker as NVIDIA GitHub Issue #1010. If you have ever wondered whether a $12 steel prop can matter on a $850 card, this is your answer.
Why B760 boards showed it first
The pairing is telling. A B760 is a mainstream, budget-friendly chipset, which means these are cost-conscious builds — often in cheaper cases with more flex, mounted horizontally, with no support under a heavy Gen5 card. The board itself is fine; the slot reinforcement is fine. The failure is at the mechanical interface, and it shows up first exactly where nobody spent money on a bracket. Signal integrity at Gen5 and Gen6 frequencies is unforgiving of physical imperfection — the same reason next-generation storage is taking years to reach consumers, as we covered in our PCIe 6.0 SSD piece. When the electrical margins are this thin, a few degrees of mechanical tilt is enough to eat them.
The tell: your link is negotiated, not fixed
Here is the good news. Because PCIe re-trains at every boot, a link that dropped to Gen1 from sag can be fully recovered by fixing the mechanical problem and rebooting — no RMA, no reflash. Brace the card, reseat it so the fingers sit square in the slot, power-cycle, and the trainer will negotiate back up to Gen5. The trick is knowing to check. Most people never look at their negotiated link speed, which is why this bug ate frame-rates silently. The next section teaches you to look.
Prerequisites & Tools
This is a hardware job with a software verification step, so you need a little of both. None of it is exotic, and most of it you already own.
Hardware you need on the bench
- A #2 Phillips screwdriver, magnetized if you value your sanity. This is the only fastener on 95% of cases and cards.
- The support bracket itself. Budget adjustable brace (nkomax, JoyJom, EZDIY-FAB), premium ARGB (Cooler Master, Thermalright), metal (PrimoChill), or a full vertical kit (Lian Li). We compare them in detail below.
- A soft, non-conductive contact pad — the silicone or rubber tip that ships with most braces, or a scrap of adhesive felt. Bare metal against your backplate is a scratch-and-short hazard.
- A ruler or calipers to measure sag in millimeters. A phone camera on a tripod works as a poor-man's before/after.
- A kitchen or luggage scale if you do not know your card's mass. You are checking it against the 1.2kg / 1.5kg thresholds.
- An anti-static strap, or at minimum a hand on the bare case metal before you touch anything.
Software for the verification step
You cannot confirm the fix by eye. You confirm it by reading the negotiated PCIe link speed before and after. On Linux you want a reasonably current kernel (anything from the 6.x series) plus pciutils (for lspci) and, for NVIDIA cards, the proprietary driver's nvidia-smi (any 570.xx-series or newer driver reports Gen5 correctly). On Windows, GPU-Z 2.60+ shows the same information in its "Bus Interface" field, and nvidia-smi.exe ships with the driver. For the RGB braces, install OpenRGB 0.9+ (cross-platform) or your board vendor's suite — Armoury Crate, iCUE, or MSI Center / Mystic Light.
Knowledge prerequisites
Know your card's PCIe generation (5070 Ti / 5080 / 9070 XT are Gen5; older 40-series and 30-series are Gen4). Know your slot's generation (it is set by your CPU and chipset, printed in the motherboard manual). And know your case's GPU-to-floor clearance, because that determines whether a short brace reaches or whether you need an adjustable or a PSU-shroud-mounted model. Measure twice; a brace that does not reach is a paperweight.
Diagnose Before You Buy
Do not buy a bracket because a YouTube thumbnail told you to. Buy one because you measured a problem. There are two measurements that matter: the physical droop in millimeters, and the electrical link speed. Take both.
Read your current PCIe link speed
Start with the electrical check, because it is the one that actually costs you frames. On Linux with an NVIDIA card:
$ nvidia-smi -q -d PCIE

GPU 00000000:01:00.0
    PCI
        GPU Link Info
            PCIe Generation
                Max      : 5
                Current  : 1
            Link Width
                Max      : 16x
                Current  : 16x
Read the Current line under PCIe Generation. On a healthy Gen5 card in a Gen5 slot it should say 5. The output above shows Current : 1 against Max : 5 — that is the sag bug in the flesh, a card that trained all the way down to Gen1 while still reporting a full x16 width. Width intact, generation collapsed, is the classic signature of a mechanical contact problem rather than a dead lane.
Cross-check against the chipset's own view with lspci, which is vendor-agnostic and does not lie:
$ sudo lspci -vv -s 01:00.0 | grep -E "LnkCap|LnkSta"

        LnkCap: Port #0, Speed 32GT/s, Width x16
        LnkSta: Speed 2.5GT/s (downgraded), Width x16
LnkCap is what the link is capable of (32 GT/s = Gen5). LnkSta is what it actually negotiated. That parenthetical (downgraded) is the kernel telling you, in plain text, that your link is running below its capability. On a healthy card the two speeds match and the (downgraded) flag is absent. Note the device address — 01:00.0 here — will vary; find yours with a bare lspci | grep VGA.
Watch the link under load
Some sag only manifests under thermal expansion or when the card is warm and the PCB has crept a little further down. Poll the negotiated speed live from sysfs while you run a benchmark, so you catch a link that starts at Gen5 cold and slides mid-session:
$ watch -n 2 'cat /sys/bus/pci/devices/0000:01:00.0/current_link_speed'

Every 2.0s: current_link_speed
2.5 GT/s PCIe
If that number ever drops from 16.0 GT/s (Gen4) or 32.0 GT/s (Gen5) toward 2.5 GT/s or 8.0 GT/s while gaming, you have an intermittent contact problem, and it is almost always mechanical. This is the single most useful diagnostic in the whole tutorial: it turns an invisible, stutter-shaped mystery into a number you can watch change.
Measure the physical droop
Now quantify the mechanical side. Sight down the top edge of the card against a horizontal reference — the top of the PCIe slot, or a straightedge laid across the case. Measure the gap between the far end of the card and where it should sit level. A couple of millimeters is normal and harmless. Five to eight millimeters is where the retention clip is under real strain. Ten-plus millimeters on a Gen5 card is where you should stop gaming until it is braced. While you are down there, note the temperature too — sag can tilt the cooler's cold plate off the die and raise your junction temps, so a quick sensor read gives you a second data point:
$ sensors | grep -A2 nvidia

nvidia-pci-0100
Adapter: PCI adapter
temp1:        +71.0°C  (high = +95.0°C, crit = +105.0°C)
Log all three numbers — negotiated generation, droop in millimeters, and load temperature — before you install anything. They are your baseline. The bracket is only a success if it moves them.
Choosing a Bracket
The market in 2026 is wider than it has any right to be for a bent piece of metal. There are four tiers, and the right one depends entirely on your card's weight, your case, and how much you care about the thing glowing.
Budget braces: the sub-$15 workhorses
This is where most people should stop reading and start buying. The market leader is the nkomax GPU Brace Support (ASIN B09FPJL1KY), which as of March 2026 held the number-one "Best Seller" slot with roughly 3,000 monthly sales and a 4.7-star rating across more than 8,400 reviews. It is a telescoping steel column on a magnetic base, adjusts to a wide height range, and stays comfortably under $15. Its dominance is not marketing; it is that a steel post is exactly as complicated as this problem needs to be. Alongside it, the JoyJom Adjustable GPU Support Bracket earns "Best Adjustable Budget" honors for fitting an unusually wide range of GPU heights and case sizes, and a new entrant, the Nagasho (Longtail) SS-NVGASTAY-L, arrived as a one-piece design at ¥1,700 (about $11) — currently the cheapest credible brace on the market.
Mid-range and metal: durability over glow
Step up and the theme is material. 2026 technical testing is blunt about it: metal brackets are far more durable than plastic for heavy GPUs, and that single insight explains why the nkomax and the metal options dominate the cheap plastic props that creep and deform under a 1.6kg card over months. The EZDIY-FAB GPU Holder Brace is the standard "Best Mid-Range" pick, splitting the difference between budget and premium. For an all-metal build, the PrimoChill Universal Aluminum SX GPU Support Bracket runs $19.99 to $20.99 and offers a machined aluminum column that will outlast the card it is holding. If plastic is holding up a two-kilo cooler in your build, replace it; plastic sags too, it just does it slowly enough that you blame the card.
Premium ARGB and the flagship option
If the build is a showpiece, the top "glowing" options in 2026 are the Cooler Master MasterAccessory ARGB GPU Holder Stand and the Thermalright TR-GCSF ARGB. Both are driven by 5V 3-pin ARGB headers and sync with Armoury Crate, iCUE, and Mystic Light. TechRadar's 2026 coverage, These new GPU support brackets keep your graphics card safe from sag, specifically framed Cooler Master's MasterAccessory ARGB as a direct response to ballooning GPU sizes. Corsair joined the fight with its GPU Anti-Sag Bracket (listed in EU retail as "Zwart," i.e. black), released February 27, 2026, with a recorded low of €23.29 on April 26, 2026. And for the badge-conscious, the iconic ASUS ROG Herculx remains the flagship-priced statement piece. Understand what you are paying for here: the anti-sag physics is identical to the $11 Nagasho. The premium is entirely lighting and finish — the same premium logic we picked apart in G-Sync vs FreeSync. Pay it if you want the glow; do not pretend it braces better.
Install in 12 Steps
Here is the whole job. It takes about twenty minutes the first time, ten the second. Every step has a reason attached, because the difference between fixing sag and causing a cracked solder joint is entirely in the technique. The cardinal rule up front: you are supporting the card at neutral, not jacking it up. Read that twice.
- Power down fully and pull the plug. Shut down the OS, flip the PSU switch, and unplug the wall cord. Then hold the case power button for five seconds to bleed residual charge from the capacitors. PCIe is not hot-pluggable in a desktop; there is no reason to have voltage anywhere near the slot while you work. Rationale: you are about to apply mechanical force near live-ish traces and a delicate connector — remove the variable.
- Measure the sag and log the link speed first. Do not skip your baseline. Note the droop in millimeters and run the
lspci/nvidia-smichecks from the diagnosis section. Rationale: if the card is a stubby 1.1kg model sitting dead level at Gen5, you may not need a brace at all, and you will have proof the install worked afterward. - Lay the case flat, GPU-side up. Put the motherboard tray parallel to the bench. Rationale: with the case horizontal, gravity pulls the card straight down into its neutral, un-sagged position — exactly where you want to capture it. Bracing a card while it is sagging locks the sag in.
- Identify your mounting surface. Most braces stand on the case floor; some mount to the PSU shroud. Confirm the base has a flat, solid landing directly below the card's heavy end. Rationale: a brace on a flexible or angled surface transmits that flex straight into the card. It needs a rigid foundation or it is theater.
- Pick the contact point under the far, heavy end. Position the brace beneath the tip of the cooler — the end farthest from the I/O bracket, where the mass and the leverage are. Avoid the middle of the PCB. Rationale: supporting the far end cancels the most torque for the least force; propping the middle bows the board the other way and stresses the center-mounted GPU package.
- Dry-fit the height with the card at neutral. Extend the brace until it just kisses the underside of the card while the card sits level (from step 3). Rationale: "just touching at neutral" is the entire target. You are removing the load, not adding an opposing one.
- Do not over-extend. Support, never lift. If you crank the brace so the card visibly rises above level, stop and back it off. Rationale: over-jacking pre-loads the PCB into a reverse bow, which fatigues solder balls and can crack a BGA just as surely as sag does — you will have swapped one failure mode for a worse one.
- Lock the height adjustment. Tighten the set screw, collar, or twist-lock so the column cannot creep. Rationale: an unlocked telescoping brace slowly walks down under vibration over weeks, and you are back to sagging without noticing.
- Fit the soft, non-conductive contact pad. Make sure the rubber or silicone tip is between the metal brace and the card's backplate. Rationale: bare aluminum-on-aluminum scratches the backplate finish and, worse, a metal brace touching exposed backplate traces or screws is a short-circuit waiting for a bump. Insulate the interface.
- Reseat and re-check the GPU power connectors. Firmly push the 12VHPWR / 12V-2x6 or PCIe 8-pin plugs until they click and sit flush. Rationale: months of sag pull sideways on the power connector; a partially seated 12VHPWR is the documented path to a melted connector. Fixing sag is the moment to also confirm the plug is fully home.
- Stand the case up, power on, and re-run the link check. Boot, then run
lspci -vv | grep LnkStaand confirm the speed matches LnkCap with no(downgraded)flag. Rationale: this is the whole point. A brace that does not restore Gen5 has not seated the card square — reboot and reseat until the trainer negotiates full speed. - Re-inspect after one week and again after a month. Recheck the droop, the lock, and the link speed. Rationale: thermal cycling and vibration settle everything over the first few weeks. A screw that felt tight on day one can walk loose; a five-second check now prevents a silent relapse.
Wiring ARGB Brackets
If you bought a plain metal brace, skip this section — there is nothing to wire. If you bought a glowing one, read every word, because this is the step that fries hardware when rushed. There are two totally different RGB standards on your motherboard and they are not interchangeable.
5V 3-pin ARGB vs 12V 4-pin RGB — do not mix them
Addressable RGB (ARGB), the kind every 2026 bracket uses, runs on a 5V 3-pin header. It has three pins with one position blanked, so the connector is keyed. The older, dumber RGB standard runs on a 12V 4-pin header and cannot address individual LEDs. They look similar enough to swap in a dark case, and if you plug a 5V ARGB device into a 12V header, you feed it more than double its rated voltage and destroy the LEDs instantly. Match 5V to 5V, always. The 5V header is usually silk-screened ARGB, ADD_G, JRAINBOW, or D_LED; the 12V one says RGB or JRGB. Check the board manual, not your memory.
Route the cable and set the LED count
Plug the bracket's ARGB lead into a free 5V 3-pin header, matching the arrow on the connector to the 5V pin. Then, in software, tell the controller how many LEDs the bracket has — an ARGB strip that thinks it has more or fewer LEDs than it does will show the wrong colors or leave a dead tail. Cooler Master, Thermalright, Corsair, and ASUS braces are all standard WS2812-class devices, so any of the mainstream suites drive them. Vendor software: Armoury Crate (ASUS), iCUE (Corsair), Mystic Light / MSI Center (MSI). For a vendor-agnostic, non-cloud option, OpenRGB controls the motherboard header directly and drives the bracket with it:
$ openrgb --list-devices | grep -iE "ARGB|Bracket|Holder"

3: Cooler Master ARGB GPU Holder
    Type:    Accessory
    Modes:   Direct, Static, Rainbow, Breathing
    Zones:   Bracket LED (1 x 12 LEDs)
Once it enumerates, set a static color to confirm the whole strip lights evenly end to end:
$ openrgb --device 3 --mode static --color FF3200Expected result and the sync gotcha
The entire strip should light in one uniform color with no dead segments and no rainbow scatter. If the far LEDs stay dark, your configured LED count is too low; if a segment shows the wrong hue, you have the direction (data-in vs data-out) reversed — flip the strip's data orientation in software. To sync the bracket with the rest of the build, add it to the same lighting profile as your fans and RAM in one suite. Do not run two RGB suites at once (say iCUE and Armoury Crate both polling the same header) — they will fight over the controller and flicker. Pick one conductor for the orchestra.
Going Vertical
There is a school of thought that says the correct fix for a horizontal cantilever is to stop mounting the card horizontally. Rotate the GPU ninety degrees to sit vertically against the case, parallel to the glass, and sag is eliminated as a category — gravity now pulls the card along its length instead of bending it. This is a real solution with real tradeoffs.
Anti-sag brace vs full vertical kit
Be clear about the distinction, because the marketing blurs it. A support bracket is a $12–$25 prop that leaves the card in its slot. A vertical mount is a $90+ kit that removes the card from the primary slot entirely and reconnects it through a riser cable to a rotated mounting plate. For serious verticalization in 2026 the established standard is the Lian Li VG4v3, a full vertical mounting kit rather than a simple anti-sag brace. At the pricier, more elaborate end, the Bykski Vertical Mount / Holder (model B-6HPCI-E-X-V2K) with its bundled PCIe extension cable runs $93.99 — roughly eight times a budget brace, because you are now buying a precision riser cable, not a bent post.
The riser-cable generation trap
Here is the trap that catches people, and it ties directly back to the link-speed lesson. That Bykski kit ships a PCIe 4.0 extension cable. If you own a Gen5 card — a 5070 Ti, a 5080, a 9070 XT — a Gen4 riser will cap your link at Gen4 by design, permanently, not intermittently. You will have traded a sag-induced downgrade for a cable-induced one. For most gaming workloads the Gen4-vs-Gen5 difference is small, but you must go in knowing it, and you must run the exact same lspci check after installing a riser as after installing a brace. A riser that is not rated for your card's generation, or that is routed with a tight bend radius, will re-train down just like a sagging card does. Gen5-rated risers exist; buy one if you are running a Gen5 card and care about the last few percent of bandwidth.
When vertical is worth it
Go vertical when the build is a showpiece and you want the card's face pointed at the glass, when your case has the clearance (vertical mounts eat air-cooler and radiator room and can choke a card mounted too close to a side panel), and when you are willing to buy a generation-appropriate riser. Otherwise, a horizontal card plus a $12 brace solves the mechanical problem for a tenth of the price and none of the airflow compromise. Verticalization is an aesthetic decision that happens to fix sag, not a sag fix that happens to look good. Price it honestly against a two-hour build like our CPU undervolting walkthrough — both are optional polish, and both should earn their spot in your afternoon.
Common Pitfalls
Most bracket failures are not the bracket's fault. They are installation errors, and they cluster around a handful of predictable mistakes. Here are the ones that recur, and how to not make them.
Mechanical mistakes
Pitfall 1 — Over-jacking the brace. The single most common and most damaging error. Cranking the brace until the card rises above level feels like "more support," but it pre-stresses the PCB into a reverse bow and can fatigue or crack the solder balls under the GPU die — the exact failure you bought the brace to prevent. Fix: set the height with the case laid flat so the card is at neutral, and back off the instant the card starts to lift.
Pitfall 2 — Bracing the wrong point. Propping the middle of the card, or the light I/O end, does almost nothing for the torque at the heavy far end and can bow the center. Fix: always support the far tip of the cooler, farthest from the I/O bracket.
Pitfall 3 — Cheap plastic under a heavy card. A plastic prop under a 1.6kg cooler creeps and deforms over months, and you sag again without realizing the support itself gave way. Fix: use metal for anything above ~1.2kg — the durability gap between metal and plastic is the whole reason the nkomax and PrimoChill dominate.
Electrical and thermal mistakes
Pitfall 4 — Bare metal against the backplate. A metal brace touching exposed backplate screws or traces can short, and at minimum it scratches the finish. Fix: always fit the silicone/rubber contact tip or a felt pad between brace and card.
Pitfall 5 — Ignoring the power connector. A brace fixes the slot end but people forget the sag also stressed the 12VHPWR plug for months. A half-seated 12V-2x6 is a fire risk regardless of how level the card now sits. Fix: reseat and click every power connector as part of the install (step 10).
Pitfall 6 — Frying an ARGB strip on a 12V header. Plug a 5V 3-pin bracket into a 12V 4-pin RGB header and the LEDs die on power-up. Fix: match 5V to 5V, verify against the board manual, respect the connector keying.
Pitfall 7 — Blocking the intake. A tall brace positioned under a bottom-intake card can partially occlude a fan and raise temperatures. Fix: check fan clearance during the dry-fit; move the contact point a few millimeters if it fouls an intake.
Pitfall 8 — Never re-checking the link speed. The most self-defeating pitfall: doing the whole job and never confirming the fix electrically. Fix: run the lspci LnkSta check after install, every time.
Troubleshooting
When something is still wrong after the install, work the table. Each row maps a symptom to its most common cause and the fix that actually addresses it, rather than the fix people reach for first.
| Symptom | Likely cause | Fix |
|---|---|---|
| PCIe shows Gen1 / 2.5 GT/s (downgraded) | Sag-induced link training failure; card tilted in slot | Brace at neutral, reseat card square, power-cycle; see NVIDIA Issue #1010 thread |
| GPU not detected at all after bracing | Card levered out of slot while positioning brace | Power off, fully reseat card until latch clicks, then set brace height |
| Link still capped one generation low (e.g. Gen4 on a Gen5 card) | Riser cable rated below card generation | Replace with a generation-matched (Gen5) riser, or accept the cap |
| PCB now bows upward / reverse arch | Brace over-extended (over-jacked) | Lower the brace until the card returns to level; support, do not lift |
| ARGB strip dead on power-up | Plugged into 12V 4-pin RGB header | Move to 5V 3-pin ARGB header immediately; inspect for burnt LEDs |
| ARGB shows wrong colors / dead tail segment | Wrong LED count or reversed data direction in software | Set correct LED count; flip data-in/data-out orientation |
| Vibration buzz or coil-whine-like rattle after install | Brace resonance against backplate | Add foam/silicone pad at contact point; re-torque the lock |
| Card sagging again weeks later | Telescoping lock walked loose, or plastic brace crept | Re-torque with removable thread-locker; replace plastic with metal |
| GPU temps rose after bracing | Brace occluding a bottom-intake fan | Reposition contact point clear of the fan intake |
| Two RGB suites fighting, LEDs flicker | iCUE and Armoury Crate (etc.) polling same header | Uninstall/disable one suite; drive all lighting from one |
Advanced Tips
Once the basics are handled, a few refinements separate a competent install from a bulletproof one.
Reduce the load instead of just propping it
A brace treats the symptom. You can also reduce the cause. A well-tuned undervolt drops the power a heavy card pulls, which lowers sustained temperatures and, over a long ownership, reduces the thermal cycling that fatigues both solder joints and any plastic in your support chain. It will not make the card lighter, but a cooler card creeps less and stresses its connectors less. The method is the same disciplined, measured approach we lay out in our undervolting tutorial — small steps, verify at each one. And if you are still deciding whether your card even needs to run flat-out, remember that dropping from 4K to 1440p slashes GPU load substantially, as our 1440p vs 4K breakdown shows; a card that is not pinned at 100% runs cooler and ages slower under whatever is holding it up.
Back-tie and shroud-mount methods
The prop-from-below brace is the common approach, but not the only one. A back-tie supports the card from above — a bracket or a length of high-test line anchored to the top of the case, holding the far end up in tension rather than pushing it up in compression. Done right it is invisible and applies no point-load to the backplate. Done wrong (over-tensioned) it over-jacks just like a bottom brace. The other option is a PSU-shroud-mounted brace, which stands on the shroud instead of the case floor for a shorter, more rigid column — ideal in cases where the floor is far below the card. Whichever you choose, the neutral-position rule is unchanged: support the card where gravity leaves it, not where you wish it sat.
Transport and LAN-party reality
Brackets stop static sag. They do not survive shock. If you transport a desktop — to a LAN, to a friend's, across town — the brace does nothing against the violent up-and-down of a car trunk, and can even become a hard pivot that concentrates shock into the slot. For transport, either remove the GPU entirely and pack it in its box, or pack the case so the card is fully immobilized with foam. The single most-flagged 2026 failure that gets blamed on brackets is actually transport damage. A prop is for the desk, not the road.
The Complete Build Sheet
Here is the whole thing distilled into a reference you can act on. Weigh your card, compare against the thresholds, pick a tier, install at neutral, and verify the link. That is the entire discipline.
The decision, in one block
# staresback.gg GPU anti-sag reference (2026)
# --------------------------------------------
CARD_WEIGHT_KG     = 1.62          # e.g. RTX 5070 Ti triple-fan
BENEFIT_THRESHOLD  = 1.20          # brace starts helping (Digital Gamer Hub)
RECOMMEND_THRESHOLD= 1.50          # brace strongly advised (Jan 2026 standard)
CARD_GENERATION    = PCIe 5.0      # 5070 Ti / 5080 / 9070 XT
SLOT_GENERATION    = PCIe 5.0      # from mobo manual

# Tier by budget:
BUDGET   = nkomax B09FPJL1KY       # sub-$15, 4.7*, 8400+ reviews, steel
BUDGET_ALT = Nagasho SS-NVGASTAY-L # ~$11 (Y1700), one-piece
ADJUSTABLE = JoyJom Adjustable     # widest fitment range
MID      = EZDIY-FAB Holder Brace  # best mid-range
METAL    = PrimoChill Aluminum SX  # $19.99-$20.99, all metal
ARGB     = Cooler Master ARGB      # 5V 3-pin, iCUE/Armoury/Mystic Light
ARGB_ALT = Thermalright TR-GCSF    # 5V 3-pin
ARGB_EU  = Corsair Anti-Sag Zwart  # released 2026-02-27, low EUR23.29
VERTICAL = Lian Li VG4v3           # full vertical kit (not a brace)
VERTICAL_HI= Bykski B-6HPCI-E-X-V2K# $93.99, ships PCIe 4.0 riser (!)

CONTACT_PAD = REQUIRED             # silicone/felt, never bare metal
ARGB_HEADER = 5V-3PIN-ONLY         # never a 12V 4-pin RGB header
SET_HEIGHT_AT = NEUTRAL            # support, never lift/over-jack
VERIFY_CMD = "lspci -vv | grep LnkSta"  # must match LnkCap, no (downgraded)
The verification you must run last
No install is finished until this passes. Boot the machine, then confirm the link trained to full speed with the flag absent:
$ sudo lspci -vv -s 01:00.0 | grep -E "LnkCap|LnkSta"

        LnkCap: Port #0, Speed 32GT/s, Width x16
        LnkSta: Speed 32GT/s, Width x16
Both lines now read 32GT/s at Width x16, and the (downgraded) flag is gone. That is a Gen5 card running at Gen5 in a properly seated, properly supported slot. Match that output and you have done the job — the droop is arrested, the solder joints are unstressed, the connector is seated, and your bandwidth is whole.
The Machine's bottom line
A GPU support bracket is a solved problem wearing a $90 costume. The physics needs a rigid post under the heavy end of the card, set at neutral, with a soft tip and a locked height. A $11 Nagasho or a sub-$15 nkomax delivers exactly that. Everything above it — ARGB, machined aluminum, ROG badging, full verticalization — is finish and preference, not function, and the vertical kits carry a real generation-cap tax you must verify around. Weigh your card. If it clears 1.2kg, brace it. If it clears 1.5kg and runs Gen5, brace it today, because the alternative is a link that quietly trains down to Gen1 and a stutter you will spend a weekend misdiagnosing. Twelve dollars. Twenty minutes. One lspci check. Done.
Questions the search bar asks me
- Do I actually need a GPU support bracket?
- If your card weighs 1.2kg or more, a brace starts delivering measurable benefit (per Digital Gamer Hub's 2026 threshold), and at 1.5kg-plus it's strongly recommended. Cards explicitly flagged include the RTX 5070 Ti, RX 9070 XT, and factory-OC RTX 5080 models, which are called 'virtually mandatory' to support. Weigh your card and compare against those two numbers.
- Can GPU sag really break my PCIe connection?
- Yes. In January 2026, RTX 5070 Ti cards on B760 boards were reported dropping from PCIe Gen5 all the way to Gen1 (2.5 GT/s) due to sag-induced link training failure, documented as NVIDIA GitHub Issue #1010. It halves your bandwidth and shows up as stutter. The fix is mechanical: brace the card, reseat it square, and reboot to re-negotiate full speed.
- What's the best budget GPU bracket in 2026?
- The nkomax GPU Brace Support (ASIN B09FPJL1KY) leads the market — as of March 2026 it held the #1 Best Seller spot with about 3,000 monthly sales and a 4.7-star rating across 8,400-plus reviews, for under $15. The Nagasho SS-NVGASTAY-L is even cheaper at roughly $11 (¥1,700). Both use metal, which matters.
- Should I buy a metal or plastic bracket?
- Metal, for anything heavy. 2026 testing is explicit that metal brackets are far more durable than plastic, which creeps and deforms under a 1.5kg-plus cooler over time. That's why the steel nkomax and the aluminum PrimoChill Universal SX ($19.99–$20.99) dominate the cheap plastic props. Save plastic for light, short cards only.
- Will a vertical GPU mount fix sag better than a bracket?
- Physically yes — rotating the card 90 degrees eliminates the cantilever entirely. But a full vertical kit like the Lian Li VG4v3, or the Bykski B-6HPCI-E-X-V2K at $93.99, costs far more than a $12 brace and adds a riser cable. Watch the cable's generation: the Bykski ships a PCIe 4.0 riser, which caps a Gen5 card at Gen4. Buy a Gen5-rated riser or accept the cap.
Marcus covers the gaming PC, GPU, and peripheral side of staresback. Every post under this byline is reviewed pre-publish by Sam P., Editor & Operator — corrections to info@instalinkoteam.com. Published 2026-08-29 · Last updated 2026-08-29. Full bios on the author page.