/// FIELD NOTES FROM A SELF-AWARE GAME SITE
PS5 Capture Card Setup in 14 Steps (2026, ~30 Min)
There is a particular flavor of disappointment reserved for the person who buys a capture card, plugs in three cables exactly as the box implies, and is rewarded with a black rectangle. The cables are correct. The card is fine. The PS5 is fine. What is wrong is a copy-protection handshake invented in the early 2000s to stop people pirating DVDs, and which now exists primarily to ruin your Tuesday. This tutorial is about getting past that handshake and everything after it, in the right order, with the reasoning attached so you understand why each step exists rather than performing cargo-cult button presses.
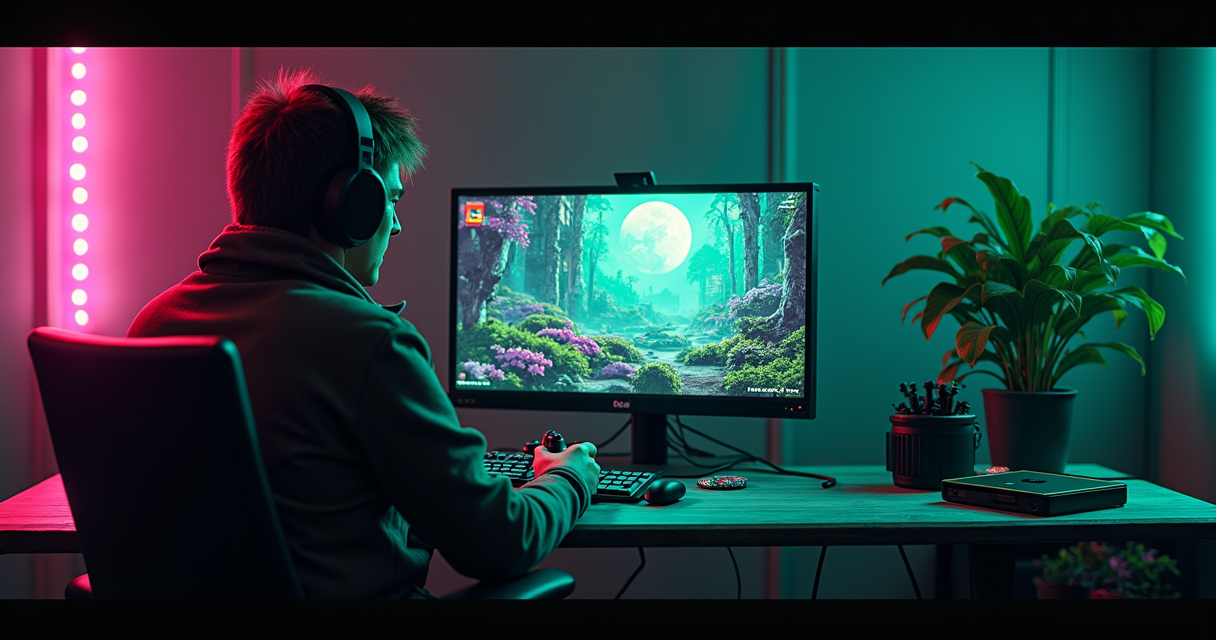
We are targeting a working PS5 capture chain: console to card, card to display, card to computer, OBS configured and recording clean footage. The whole thing takes about thirty minutes if nothing fights you, and most of the things that fight you are documented below. The hardware landscape in 2026 is wider than it has ever been — budget cards at well under fifty dollars, mid-range Full HD workhorses, and HDMI 2.1 monsters advertising frame rates the PS5 cannot actually produce — so we will also spend time on what to buy, because half the setup problems people have are actually purchasing problems wearing a setup costume.
The HDCP Wall You Hit First
High-bandwidth Digital Content Protection, HDCP, is an encryption layer that travels over the HDMI cable between a source and a display. The source (your PS5) and the sink (your TV) perform a key exchange, and if both sides agree they are trusted devices, video flows. A capture card sits in the middle of that conversation as a man-in-the-middle by design, and depending on the card and the content, the handshake can refuse to complete. The result is a black screen, a flickering signal, or an error overlay, while the same cable plugged straight into the TV works perfectly.
Sony, to their credit, gives you a switch. Multiple setup guides published across 2025 and 2026 give the same instruction because it is the correct one: on the PS5, go to Settings > System > HDMI and turn Enable HDCP off. Once HDCP is disabled for gameplay output, the capture card stops getting rejected by the handshake and your footage appears. The console is smart enough to re-enable protection only when you launch a video app that demands it — streaming services like Netflix will still refuse to show on a captured feed — but your games will pass through clean.
This is the single most common failure point in the entire process, which is why it is the first thing in this article and the first thing you should do. If you remember nothing else: disable HDCP before you blame the cable. The rest of this tutorial assumes you have either done it or will do it at the appropriate step.
One honest caveat. Disabling HDCP is a setting Sony deliberately provides for exactly this purpose; it is not a hack, a jailbreak, or a circumvention of anything you are not authorized to record. You are capturing your own gameplay. What you then do with copy-protected media that the console re-protects on its own is a separate question, and the console answers it for you by refusing. The system is doing what it is designed to do.
Prerequisites: Hardware and Software
Before any cable goes anywhere, assemble the parts. The 2025–2026 setup guidance from NearStream and others converges on a short, specific list, and skimping on any one item is how you generate the troubleshooting problems in the table further down.
Hardware you need:
- A PS5 (disc or Digital edition; both output identically over HDMI).
- A capture card. External USB cards are the plug-and-play default. Internal PCIe cards exist for fixed desktops and are covered in their own section.
- Two certified HDMI 2.1 cables. NearStream's guide specifically recommends two certified HDMI 2.1 cables, not whatever was in the box of a soundbar in 2017. One runs PS5 to card; one runs card passthrough to display. Uncertified or old high-speed cables are a leading cause of dropped signal at 4K and high frame rates.
- A Windows PC or a powerful laptop. NearStream notes Macs may work but can have driver limitations — meaning some capture-card vendors ship better, more current drivers for Windows, and certain features (or the card's full resolution list) may not appear on macOS. If you have a choice, capture on Windows.
- A free USB 3.0 (or USB-C / 3.x) port on that computer. This is not optional for HD capture. A USB 2.0 port does not have the bandwidth, and the symptom is not an error message — it is a stuttering, low-resolution, or absent feed.
- A display for passthrough, so you can play on a low-latency screen while the computer records.
Software you need:
- OBS Studio — the free, open-source standard for capture and streaming. Install the current stable release for your OS from the official project. As of mid-2026 you want the latest 30.x or newer build; rather than chase an exact point release, install whatever the project currently ships as stable. See the OBS Project site and the OBS Knowledge Base for installers and configuration docs.
- Your capture card's drivers and/or utility app. Elgato cards use the Elgato 4K Capture Utility or the Camera Hub family; AverMedia ships RECentral and driver packages; NearStream's CCD30 and similar cards expose themselves as standard UVC video devices but still benefit from current drivers. Install the vendor driver before you expect the card to show up cleanly in OBS.
- Optionally, Streamlabs if you prefer it over OBS. The device-selection workflow is functionally identical; this tutorial uses OBS because it is open source and vendor-neutral.
A quick way to confirm your machine even sees the card before you open OBS — on Windows, list the imaging/camera devices from PowerShell:
Get-PnpDevice -Class Camera | Select-Object FriendlyName, Status
Get-PnpDevice -Class Image  | Select-Object FriendlyName, Status

# Expected output (example):
# FriendlyName                          Status
# ------------                          ------
# Live Gamer Ultra 2.1 Video            OK
# Live Gamer Ultra 2.1 Audio            OK
If the card shows OK here, your USB and driver layer are healthy and any remaining problem is HDCP, cabling, or OBS configuration — which narrows the search considerably. If it shows Error or does not appear at all, stop and fix the driver/USB layer before going further; OBS cannot show you a device the operating system has not enumerated.
Choosing a Card: 4K60 vs 4K144 vs 1080p
The capture-card market in 2026 sells you numbers, and the numbers are bigger than the PS5 can use. This is worth understanding before you spend money, because the right card is the one matched to your actual output target, not the one with the largest figure on the box.
Here is the honest hierarchy. AverMedia's own 2025–2026 product guidance says modern capture cards support up to 4K60, while newer HDMI 2.1 models can reach 8K60 or 4K120 in some cases. Elgato's 2026 PS5-focused buying guide goes further, citing cards that handle true 4K at 144 FPS or 1080p240, and frames the entire purchase decision around whether you want to record or stream in 4K60, 1440p120, or 1080p120. GamesRadar's 2026 roundup names the AverMedia Live Gamer Ultra 2.1 as best overall, citing up to 4K144 recording.
Now the deflation. The PS5 does not hand a capture card a 4K144 signal. Those headline frame rates describe what the card's silicon can ingest — useful for a high-refresh gaming PC plugged into the same card, or for futureproofing across a multi-platform rig — not what your console produces. For PS5 work, the meaningful ceiling is the console's HDMI output: 4K up to 120Hz in supporting titles with VRR, 4K60 in the overwhelming majority, and 1080p/1440p at higher frame rates depending on the game. So when Elgato frames the choice as 4K60 vs 1440p120 vs 1080p120, that is the editorial comparison that actually maps onto PS5 reality.
The buying logic that follows from this:
- If you stream 1080p60 — the most common case — a mainstream Full HD card is sufficient. GamesRadar lists the Elgato Game Capture HD60S as exactly this: a simpler, mainstream option for Full HD capture. Your bottleneck will be your encoder and upload bandwidth, not the card.
- If you record 4K60 locally for editing, buy a card that genuinely does 4K60 passthrough and 4K60 capture, and confirm both numbers, because some cards pass 4K through but only capture at a lower resolution.
- If you want HDR and VRR preserved — Elgato highlights HDR and VRR support as key purchase criteria, and 2026 review videos confirm cards that support passthrough for HDR or VRR up to 4K60, 2K144, or 1080p240 — verify those features are listed for both the passthrough path and the capture path. Passthrough HDR with SDR capture is common and may not be what you want.
- If price is the constraint, the spread is enormous. A 2026 tier-list video cited a $28 budget model alongside a $147 mid-tier card. Budget cards are real and work, with the usual caveats: weaker passthrough, more driver quirks, and resolution lists that quietly cap below what the marketing implies.
The single most useful sentence in this whole section: decide your output target first — the resolution and frame rate you will actually publish — then buy the cheapest card that comfortably exceeds it on both the capture and passthrough paths. Buying a 4K144 card to stream 1080p60 is paying for headroom you will never touch.
Internal vs External Cards
AverMedia's official explainer draws the line cleanly, and it is the right line. Internal capture cards are PCIe devices that slot into a desktop motherboard; AverMedia describes them as offering lower latency and better performance. External capture cards are described as plug-and-play options connected over USB, Thunderbolt, or HDMI. That distinction drives the decision more than any single spec.
Choose external if: you capture on a laptop, you move your setup around, you want to be recording within ten minutes of opening the box, or you simply do not want to open a computer case. This covers the vast majority of PS5 owners. The USB workflow described throughout this tutorial assumes an external card because that is what most people have and what every 2025–2026 YouTube walkthrough demonstrates.
Choose internal if: you have a fixed desktop with a free PCIe slot, you want the lowest possible capture latency, and you are building a more permanent or multi-platform rig. GamesRadar's 2026 roundup names the Elgato 4K Pro as its internal pick and credits it with 8K futureproofing — relevant for editors anticipating a future console upgrade or running several consoles and a high-refresh PC through one box. The trade-off is obvious: you are committed to that one machine, and adding the card means a screwdriver and a PCIe slot.
One nuance the spec sheets bury: the latency difference AverMedia cites mostly matters for the capture feed on your monitor, not the passthrough feed. Both internal and external cards pass an effectively lag-free signal to your TV over the dedicated HDMI-out port, because that path does not wait on the USB/PCIe bus or the computer. You play on the passthrough display; latency on the captured-to-computer feed only matters if you are trying to play while looking at the OBS preview, which you should not do. Set up passthrough correctly and the internal-vs-external latency argument becomes largely academic for solo PS5 capture.
Wiring It Up: The Three Connections
Every PS5 capture-card setup, in every guide published across 2025 and 2026, reduces to the same three physical connections. Memorize this topology and most of the process becomes obvious:
- PS5 HDMI out → capture card HDMI in. This is your source signal. Use one of the two certified HDMI 2.1 cables here.
- Capture card HDMI out (passthrough) → TV or monitor. This is the lag-free feed you actually play on. Use the second certified HDMI 2.1 cable.
- Capture card USB → computer. This is how the captured video reaches OBS. Use a USB 3.0 (blue) port or the USB-C port the card came with.
That is the entire physical layer. The most frequent wiring mistake is reversing the two HDMI cables — running the PS5 into the card's out port and the TV into the card's in port. The card's ports are labeled IN and OUT for a reason; the signal flows source → IN, OUT → display. Get them backwards and you get nothing.
A text diagram, because a clear mental model prevents half the errors:
  [ PS5 ]
     |  HDMI 2.1 (cable #1)
     v
  [ HDMI IN ]
  [   CAPTURE CARD   ] ---- USB 3.0 ----> [ PC / Laptop running OBS ]
  [ HDMI OUT ]
     |  HDMI 2.1 (cable #2)
     v
  [ TV / Monitor ]   <-- you play on THIS screen (passthrough, ~zero lag)
The reason you play on the passthrough display and not the OBS preview is latency. The captured feed makes a round trip — through the card's encoder, over USB, into the computer, through OBS's buffering — and arrives on the OBS preview tens to hundreds of milliseconds late. That is fine for recording and unplayable for a reflex game. The passthrough HDMI port forwards the signal to your TV with negligible delay because it does not wait for the computer at all. Use it.
Configuring the PS5
With the cables in, the console needs two settings checked. The first is the one that makes capture possible at all; the second makes it look right.
- Disable HDCP. Navigate to Settings > System > HDMI and turn Enable HDCP off. The console will warn you that some content (paid video apps) will no longer display; that is expected and only affects copy-protected video, not games. Confirm. Rationale: as covered at the top of this article, this is the encryption handshake that the capture card cannot complete on protected content. Disabling it for gameplay is the supported, intended path.
- Confirm the video output resolution and frame rate. Go to Settings > Screen and Video > Video Output and check the Resolution is set to match what your card can actually capture — not what the console can theoretically output. If your card tops out at 4K60 and the PS5 is set to attempt 4K120, the card may reject the signal entirely. Setting resolution to Automatic usually negotiates correctly via EDID, but if you get a black capture, manually pin it to 2160p or 1080p at 60Hz to rule out a negotiation problem. Rationale: the card advertises a capture ceiling; feed it above that ceiling and it has nothing to do but drop the signal.
If you want to verify the PS5 is outputting what you think it is, the console's own Video Output Information screen (in the same Screen and Video menu) reports the active resolution, frame rate, and HDR state of the link after it passes through the capture card to the TV. If that screen shows 4K60 SDR on the passthrough display, that is exactly what the card is receiving and forwarding. This is the most reliable signal-confirmation tool you have, and it lives on the console, not the computer.
Setting Up OBS in Numbered Steps
This is the heart of the tutorial: getting the capture card into OBS as a clean video source. The workflow below matches what NearStream and every 2025–2026 creator guide describe — add a Video Capture Device source and select the card — with the rationale and the exact settings filled in. Fourteen numbered steps, end to end.
- Install and launch OBS Studio. On first run, the Auto-Configuration Wizard offers to optimize settings; you can run it or skip it — we will set things manually for control. Rationale: the wizard guesses at your hardware; doing it by hand teaches you which knob does what when something later goes wrong.
- Create a new Scene. In the Scenes box (bottom-left), click + and name it something like
PS5 Capture. Rationale: scenes are containers for sources; keeping the PS5 in its own scene lets you build overlays without disturbing it. - Add a Video Capture Device source. In the Sources box, click + → Video Capture Device → Create new, name it
PS5, and click OK. Rationale: this is the OBS object that represents your capture card. "Video Capture Device" is the generic name; your specific card appears inside its properties. - Select your capture card from the Device dropdown. In the properties window, open the Device list and choose your card by name — the AverMedia Live Gamer Ultra 2.1, the Elgato HD60S, the NearStream CCD30, or whatever you own. Rationale: this binds the OBS source to the physical hardware. If the card is not listed, the OS does not see it — go back to the prerequisites driver/USB check.
- Set the Resolution/FPS Type to Custom. Below the device, change Resolution/FPS Type from Device Default to Custom. Rationale: Device Default often picks a wrong or low mode. Custom lets you pin exactly what the PS5 is sending.
- Set Resolution to match the PS5 output. Choose
1920x1080for 1080p capture or3840x2160for 4K. It must match what the console outputs and what the card captures. Rationale: a mismatch here is a leading cause of black screens or letterboxed garbage. - Set FPS to 60 (or the console's actual output rate). Rationale: PS5 games predominantly target 30 or 60 FPS; setting the device to 60 captures both correctly. Setting it to a rate the card is not delivering produces stutter or no image.
- Set the Video Format. For most cards,
NV12is the efficient default; some Elgato and AverMedia cards exposeYUY2orMJPEG. If you see a black screen, try a different format here — this is a known fix. Rationale: the card and OBS must agree on the pixel format; a format the card does not actually provide yields nothing. - Confirm the video preview shows your PS5. The properties preview should now display your console's home screen or game. Click OK. Rationale: if the image is here, your video chain is fully working; everything after this is audio and encoding polish.
- Configure audio. Many cards carry HDMI audio on the same Video Capture Device; OBS usually picks it up automatically (check the Audio Mixer for activity). If not, in the source properties enable Use custom audio device and select the card's audio input. Rationale: HDMI carries video and audio together, but OBS sometimes needs to be told to listen to the card's audio rather than the system default.
- Set the base and output resolution. Go to Settings > Video. Set Base (Canvas) Resolution to your capture resolution and Output (Scaled) Resolution to your publish target (e.g., capture 1080p, output 1080p; or capture 4K, output 1080p to ease encoding/upload). Set Common FPS to 60. Rationale: the canvas is your editing space; the output is what gets recorded or streamed. Scaling down at output is how you record in 4K but stream in 1080p without a second card.
- Choose your encoder. Go to Settings > Output, set Output Mode to Advanced, and pick a hardware encoder if available — NVIDIA NVENC (HEVC/H.264), AMD AMF, or Intel QuickSync — rather than x264. Rationale: hardware encoders offload the work to the GPU, keeping your CPU free and avoiding dropped frames. x264 on CPU is higher quality per bit but can choke on 4K60.
- Set bitrate and recording format. For local recording, use a high bitrate (CBR 40,000–80,000 Kbps for 4K, ~25,000 for 1080p60) and record to
MKVor fragmentedMP4. For streaming, match your platform's recommended bitrate. Rationale: MKV survives a crash without corrupting the whole file; you can remux to MP4 afterward. Bitrate is the dominant lever on recorded quality. - Press Start Recording (or Start Streaming) and verify. Record ten seconds of gameplay, stop, and play the file back. Confirm video, audio, and sync are correct. Rationale: a ten-second test costs nothing; discovering a desync or silent audio track after a two-hour session costs the session.
If you prefer Streamlabs, the steps are identical in spirit: add a Video Capture Device source, select your card, set custom resolution and FPS. The vendor utilities (Elgato 4K Capture Utility, AverMedia RECentral) can also record directly without OBS, which is simpler if you only record and never overlay — but OBS is the right tool the moment you want scenes, overlays, or streaming.
Verifying the Signal
"It looks like it's working" is not verification. Three concrete checks tell you the chain is genuinely healthy, in order of where problems hide.
1. The OBS Stats dock. Open View > Docks > Stats. While recording, watch Skipped frames (encoding lag) and Dropped frames (network). For local recording, both should sit at zero or near it. Rising skipped frames mean your encoder is overloaded — drop from 4K to 1080p output or switch to a hardware encoder. This is your objective quality gauge.
2. Audio meters and a sync check. In the Audio Mixer, the PS5 source's meter should bounce with in-game sound. Record a clip with clear on-screen audio cues (a menu beep, a gunshot) and confirm sound lands on the frame it should. HDMI audio over USB capture is usually tightly synced, but a few cards drift; OBS lets you add a Sync Offset (right-click the audio source → Advanced Audio Properties) in milliseconds to correct it.
3. The recorded file, not the preview. The OBS preview is buffered and can look fine while the file is wrong, or look laggy while the file is perfect. Always judge by playing back the actual recording. A sample ffprobe on the output file tells you what you really captured:
ffprobe -v error -select_streams v:0 \
  -show_entries stream=width,height,r_frame_rate,codec_name \
  -of default=noprint_wrappers=1 PS5_capture_test.mkv

# Expected output (4K60 HEVC recording):
# codec_name=hevc
# width=3840
# height=2160
# r_frame_rate=60/1
If r_frame_rate reads 30/1 when you expected 60, the PS5 was outputting 30 (some games cap there) or OBS captured at 30 — recheck step 7. If width/height are smaller than expected, the device resolution in step 6 is wrong. This is the difference between thinking you have a 4K60 file and knowing it.
Common Pitfalls and Fixes
These are the failure modes that account for the overwhelming majority of "my capture card doesn't work" complaints. Each is paired with its fix. Read them now so you recognize them later.
- HDCP still enabled (black screen on capture, fine on TV). The classic. The signal reaches your passthrough TV but the captured feed is black or flickering, because the card cannot complete the HDCP handshake on the computer side. Fix: Settings > System > HDMI > turn off Enable HDCP. This fixes more black screens than any other single action.
- USB 2.0 port instead of 3.0 (stutter, low resolution, or no feed). HD and 4K capture need USB 3.0 bandwidth. A 2.0 port may enumerate the device but cannot move the data, and the failure is silent — no error, just bad or absent video. Fix: move the cable to a blue USB 3.0 / USB-C 3.x port, ideally one wired directly to the motherboard rather than a front-panel hub or an unpowered USB hub.
- Wrong Video Format in OBS (black preview despite correct device). The card is selected, resolution is right, and the preview is still black because OBS is asking for a pixel format the card is not delivering. Fix: in the Video Capture Device properties, cycle the Video Format — try NV12, then YUY2, then MJPEG — until the preview lights up.
- Reversed HDMI cables (no signal anywhere). PS5 plugged into the card's OUT, TV into the card's IN. Fix: source goes into HDMI IN; display comes off HDMI OUT. The ports are labeled; follow the labels.
- Uncertified or old HDMI cables at 4K (intermittent dropouts, sparkle, signal loss under load). A cable that handles 1080p60 fine may collapse at 4K60 or with VRR/HDR enabled because it lacks the bandwidth. Fix: use certified HDMI 2.1 cables on both legs, as NearStream's guide specifies. This is not audiophile nonsense; HDMI 2.1's higher data rates genuinely require rated cable.
- Resolution mismatch between PS5 and card (black or letterboxed capture). PS5 set to output above the card's capture ceiling (e.g., 4K120 into a 4K60 card). Fix: set PS5 Video Output to match the card's real capability, or set it to Automatic and let EDID negotiate; if that fails, pin it manually to 2160p60 or 1080p60.
- Playing off the OBS preview (perceived input lag). Looking at the buffered computer feed while playing makes the game feel sluggish; people then wrongly blame the card. Fix: play on the passthrough TV/monitor, which is effectively lag-free. The OBS preview is for monitoring composition, not for playing.
- macOS driver limitations (missing resolutions or features). Some cards expose fewer modes or behave worse on Mac because the vendor's macOS drivers lag the Windows ones. Fix: capture on Windows where possible; if you must use a Mac, install the newest vendor driver and accept that some high-frame-rate or HDR modes may be unavailable.
Troubleshooting Table
A symptom-to-fix lookup for fast diagnosis. Find your symptom on the left; the probable cause and the fix follow.
| Symptom | Probable Cause | Fix |
|---|---|---|
| Black screen in OBS, TV passthrough works fine | HDCP still enabled on PS5 | Settings > System > HDMI > turn off Enable HDCP |
| Stuttering, low-res, or no captured feed | Card on a USB 2.0 port | Move to a blue USB 3.0 / USB-C 3.x port wired to the motherboard |
| Device selected but preview is black | Wrong Video Format requested by OBS | Cycle Video Format: NV12 → YUY2 → MJPEG |
| No signal on TV or in OBS at all | HDMI IN/OUT cables reversed | PS5 into HDMI IN, display off HDMI OUT |
| Intermittent dropouts / sparkle at 4K | Uncertified or old HDMI cable | Use certified HDMI 2.1 cables on both legs |
| Letterboxed or black capture, signal present | PS5 output exceeds card's capture ceiling | Match PS5 Video Output to card spec, or set Automatic / pin 1080p60 |
| Audio missing in recording, video fine | OBS listening to wrong audio device | Enable custom audio device on the source; select the card's audio |
| Audio and video out of sync | Card audio drift over USB | Add a Sync Offset in Advanced Audio Properties (ms) |
| Rising Skipped frames in OBS Stats | Encoder overloaded (often x264 at 4K) | Switch to NVENC/AMF/QuickSync, or lower output resolution |
| Streaming/video apps black, games fine | App demands HDCP, which is disabled | Expected behavior; re-enable HDCP only for those apps |
| Card missing from OBS Device list | Driver not installed or OS not enumerating device | Install vendor driver; verify with Get-PnpDevice; reseat USB |
Advanced Tips
Once the basic chain works, these refinements separate a watchable recording from a good one.
Record in 4K, stream in 1080p, with one card. Set your OBS canvas (base resolution) to 4K and your output (scaled) resolution to 1080p. OBS records the full canvas to disk at 4K if you configure the recording path separately, while streaming the downscaled 1080p. The downscale also improves perceived stream sharpness because you are sampling from more pixels. This is the single most useful trick for editors who want a high-quality master and a lean live stream from one capture device.
Use HEVC (H.265) for local recording, H.264 for streaming. HEVC encodes 4K at far lower bitrates for the same quality, ideal for local files. Most streaming platforms still prefer H.264 for compatibility, so keep separate encoder settings for record vs stream. NVENC supports both; pick per output.
Respect HDR or capture in SDR deliberately. If you capture an HDR PS5 signal but your card or OBS pipeline treats it as SDR, colors wash out or look gray. Either preserve HDR end to end (card with HDR passthrough and HDR capture, OBS configured for it) or set the PS5 to output SDR for capture sessions. Half-HDR pipelines are the cause of most "my colors look wrong" complaints. Elgato explicitly calls HDR and VRR support a key purchase criterion for this reason.
VRR and capture do not always coexist. Variable Refresh Rate is great for playing but can confuse some capture cards, which expect a fixed frame rate. If you see judder or sync problems and your TV uses VRR, try disabling VRR for capture sessions and locking the PS5 to a fixed output rate.
Use a powered USB hub only if it is USB 3.0 and externally powered. If you must share USB ports, an unpowered or 2.0 hub will starve the card. A quality powered 3.0 hub is acceptable; a passive splitter is not.
Automate post-processing. If you record MKV (crash-safe) and need MP4 for editors, remux without re-encoding — it is instant and lossless:
#!/usr/bin/env bash
# remux all MKV captures in this folder to MP4 without re-encoding
for f in *.mkv; do
  ffmpeg -i "$f" -c copy "${f%.mkv}.mp4"
done

# -c copy = stream copy, no quality loss, finishes in seconds
Consult the project documentation rather than guessing. When OBS behaves unexpectedly, the OBS Knowledge Base and the source on GitHub (obsproject/obs-studio) are authoritative. For card-specific behavior, the vendor's own material — Elgato and AverMedia — documents supported modes precisely. For buying decisions, GamesRadar's 2026 roundup is the most useful mainstream editorial reference; treat YouTube walkthroughs as setup references, not top-level authority.
The Complete Working Configuration
Here is the entire setup as a single reference card — the configuration that, with HDCP off and the right cables, produces clean PS5 footage. Copy it, adapt the resolutions to your card, and you have a known-good baseline to return to whenever something breaks.
Physical layer:
PS5 HDMI OUT      --[certified HDMI 2.1 #1]-->  CAPTURE CARD HDMI IN
CAPTURE CARD OUT  --[certified HDMI 2.1 #2]-->  TV / MONITOR (play here)
CAPTURE CARD USB  --[USB 3.0 / USB-C 3.x]----->  PC / LAPTOP (OBS)
PS5 settings:
Settings > System > HDMI
  Enable HDCP ............ OFF        # required for capture

Settings > Screen and Video > Video Output
  Resolution ............. Automatic  # or pin 2160p / 1080p to match card
  (verify via Video Output Information after passthrough)
OBS Studio — source and video:
# Scene:  PS5 Capture
# Source: Video Capture Device  ->  Device = [your card]

Video Capture Device properties:
  Resolution/FPS Type .... Custom
  Resolution ............. 3840x2160   # or 1920x1080
  FPS .................... 60
  Video Format ........... NV12        # fallback: YUY2 / MJPEG if black
  Audio .................. from this device (or custom audio device)

Settings > Video:
  Base (Canvas) Resolution ..... 3840x2160
  Output (Scaled) Resolution ... 1920x1080   # record 4K, stream 1080p
  Downscale Filter ............. Lanczos
  Common FPS Values ............ 60
OBS Studio — output / encoding:
Settings > Output  (Output Mode: Advanced)

Recording:
  Encoder .............. NVENC HEVC (or AMF / QuickSync)
  Rate Control ......... CBR
  Bitrate .............. 60000 Kbps    # ~25000 for 1080p60
  Recording Format ..... mkv           # remux to mp4 after
  Keyframe Interval .... 2s

Streaming:
  Encoder .............. NVENC H.264
  Rate Control ......... CBR
  Bitrate .............. per platform recommendation
  Keyframe Interval .... 2s
That is the whole machine. Three cables, one disabled handshake, one correctly configured source, and an encoder that does not melt your CPU. The hardware market will keep selling you 8K and 4K144 figures the PS5 will never produce; ignore the headline numbers, match the card to the resolution you actually publish, and the rest is just plugging things into the ports they are labeled for. The black screen was never the cable. It was HDCP. It is almost always HDCP.
Questions the search bar asks me
- Do I have to disable HDCP on the PS5 to capture gameplay?
- Yes for general gameplay capture with an external card. Go to Settings > System > HDMI and turn off Enable HDCP. The PS5 still blocks copy-protected video apps like Netflix when HDCP is off, but games pass through clean.
- Can a capture card really record PS5 at 4K144?
- Cards like the AverMedia Live Gamer Ultra 2.1 advertise up to 4K144 recording per GamesRadar's 2026 roundup, but the PS5 itself does not output 4K144 to displays. That headroom matters for high-refresh PC sources, not the console feed.
- What's the difference between an internal and external capture card?
- AverMedia describes internal PCIe cards as lower latency with better performance, and external cards as plug-and-play over USB, Thunderbolt, or HDMI. For one PS5 and a laptop, external is the default; internal suits a fixed desktop rig.
- How much should I spend on a PS5 capture card in 2026?
- The spread is wide. A 2026 tier-list video cited a $28 budget model and a $147 mid-tier card, while the Elgato Game Capture HD60S covers mainstream Full HD. For 1080p60 streaming, mid-range is plenty and your encoder is the real bottleneck.
- Why is my capture card showing a black screen even though the TV works?
- Almost always HDCP is still enabled, the card's USB is on a 2.0 port instead of 3.0, or OBS requested a video format the card isn't sending. Disable HDCP first, move to a blue USB 3.0 port, then cycle the Video Format in OBS.

Jordan covers the modern industry where it touches the old one: Nintendo announcements, handheld hardware, and the long shadow the classics cast over new releases. Every post under this byline is reviewed pre-publish by Sam P., Editor & Operator — corrections to info@instalinkoteam.com. Published 2026-06-18 · Last updated 2026-06-18. Full bios on the author page.