/// FIELD NOTES FROM A SELF-AWARE GAME SITE
GPU Sag Bracket Install in 12 Steps (2026, 30 Min)
There is a particular sound a modern graphics card makes about eighteen months into its life inside a tower case. It is not a sound, actually. It is the absence of one: the silence of a PCB that has stopped being flat. You notice it the way you notice a bookshelf that has started to bow — not at the moment of failure, but at the slow moment you realize the geometry was never going to hold. The card droops. The rear I/O bracket pulls away from the screw. The PCIe fingers torque against the slot at an angle the slot was never specified to enjoy. This is GPU sag, and in 2026 it is no longer an edge case for water-cooled show builds. It is the default condition of any air-cooled flagship card left to hang off a horizontal motherboard for a year.
This is a tutorial for fixing that. It is also, unavoidably, a tutorial for a category of product that exists because the graphics card industry collectively decided that a 30-centimeter triple-slot cooler weighing more than two kilograms is a reasonable thing to cantilever off a single retention clip and two case screws. We are going to install a support bracket, yes. But we are going to do it like people who understand why the part is necessary, what it is actually loading, and how to avoid the four or five ways a bracket can make the situation worse instead of better. Deadpan, precise, no marketing. The bracket costs less than a single AAA game. The card it is protecting costs more than a used motorcycle. Act accordingly.
Why Modern GPUs Sag
Start with the physics, because every decision downstream depends on it. A graphics card in a conventional tower is mounted horizontally and supported at exactly two points: the PCIe x16 slot near the front edge of the card, and the rear I/O bracket screwed to the back of the chassis. Everything past the slot — the bulk of the heatsink fin stack, the second and third fans, the backplate, the far end of the PCB — is a cantilever. It is a diving board. The further the mass sits from the slot, and the heavier that mass, the larger the bending moment applied to the slot and to the solder joints where the slot meets the motherboard.
Corsair's support documentation puts it plainly: GPU sag happens because of the video card's size and weight combined with the motherboard slot it sits in, and the company recommends a dedicated GPU support bracket as an effective fix (Corsair Support). That is not a controversial claim. It is statics. The interesting part is what Corsair adds next: some motherboards ship with reinforced PCIe slots — the steel-shrouded "SafeSlot" or "Steel Armor" type connectors marketed since the late 2010s — but those reinforced slots do not always prevent sagging, which is why an external support is still recommended for many builds. The reinforcement protects the slot's own solder anchoring; it does very little to stop a 2-kilogram card from rotating around the slot axis under gravity.
Why has this gotten worse? Cooling assemblies. The trend across the current generation is unambiguous: heavier coolers, taller fin stacks, thicker vapor chambers, and backplates that are themselves structural metal rather than decorative plastic. The 2026 buyer's-guide roundups frame GPU brackets explicitly as a way to protect both the card and the motherboard while accommodating larger modern GPUs, a direct reflection of the trend toward heavier cooling assemblies (5 Best GPU Support Bracket 2026). Evetech's retail listings for GPU support brackets target high-end gaming and desktop PCs specifically, which tells you the accessory has finished its migration from enthusiast oddity to mainstream add-on (Evetech).
The failure modes, in rough order of how often they actually bite people:
- Cosmetic droop. The card visibly tilts. In a tempered-glass case this looks bad, and looking bad is, for a non-trivial fraction of this hobby, a genuine functional defect.
- Slot fretting. The gold PCIe fingers ride at an angle, contact pressure becomes uneven, and over months of thermal cycling you get intermittent connection — a card that drops to PCIe 3.0 link speed, or vanishes from the device tree entirely until reseated.
- Backplate and PCB stress. The board is bending. Modern PCBs are stiff multilayer sandwiches, but they are not infinitely fatigue-resistant, and a card under permanent flex is a card with permanent tensile load on its trace layers and BGA solder balls.
- Slot solder failure. The worst case and the rarest: the moment applied to the slot eventually fatigues the slot's own solder joints on the motherboard, and now you have a dead board, not a dead card.
A bracket does one job: it adds a third support point under the cantilevered end, converting a long lever into a short, supported span. That is the entire mechanism. Everything else in this guide is about doing that without introducing new problems — airflow blockage, point-loading the backplate, or pushing the card up until you have un-seated it from the slot in the opposite direction.
Prerequisites and Parts
This is a hardware procedure, but it benefits enormously from software instrumentation. You want to measure the problem before and after, both physically and electrically, so you can prove the fix did something. Here is the full kit.
Hardware you must have:
- The graphics card, already installed, or about to be.
- A GPU support bracket. Type selection is the next section; do not buy yet.
- A small Phillips #2 screwdriver, magnetized. The rear I/O screws and most expansion-slot brackets use these.
- A steel ruler or, better, a digital caliper with a depth rod. You are going to measure millimeters of droop. A tape measure is not adequate resolution.
- A spirit level — a real one, or a phone app, accepting that the phone app is good to maybe half a degree.
- EVA foam or rubber shim stock, 1 mm and 2 mm, for protecting the backplate contact point. A strip of weatherstripping works.
- An anti-static wrist strap. Yes, still. The card is powered down and unplugged but you are working near exposed connectors.
Hardware you should know the numbers for, before buying a bracket:
- Card length in millimeters. An RTX 4090 Founders Edition is 313 mm; partner cards run longer.
- Card weight. Flagship air coolers in this era routinely clear 2 kg.
- Internal case clearance from the bottom of the card to the PSU shroud or case floor. This determines which bracket type fits.
- Your motherboard form factor. Lian Li markets its GB-001 anti-sag bracket as compatible with ATX and E-ATX boards, and form factor governs how much horizontal room the bracket base has to work with (Lian Li).
Software (optional but recommended), with versions:
- On Linux:
lm-sensors3.6 or newer, for reading GPU and slot-adjacent temperatures. Source and install docs at the lm-sensors GitHub repository. - NVIDIA cards: the
nvidia-smiutility shipped with driver branch 550 or later (any modern 2025-2026 driver is fine). It reports link width and link speed, which is your electrical proof that the slot connection is healthy. - AMD cards:
amdgpuvia the kernel, queried throughsysfsor theradeontoputility. - On Windows: HWiNFO64 (latest release) reports PCIe link width and speed in the same way; the principle is identical, the tool differs.
Why instrument a mechanical fix with software? Because the most insidious symptom of sag — the intermittent PCIe link drop — is invisible to the eye and obvious to nvidia-smi. If your card has quietly negotiated down to a narrower or slower link because the fingers are riding at an angle, you want to catch that, and you want to confirm the bracket restored full link width. Here is the baseline query you run before touching anything:
$ nvidia-smi --query-gpu=name,temperature.gpu,power.draw --format=csv
name, temperature.gpu [C], power.draw [W]
NVIDIA GeForce RTX 4090, 71, 412.33 W

$ nvidia-smi -q | grep -A2 "Link Width"
        Link Width
            Max                       : 16x
            Current                   : 16x
If "Current" reads anything below "Max" while the card is under load, you do not have a cosmetic problem, you have an electrical one, and the bracket is no longer optional.
The Three Bracket Archetypes
There are exactly three mechanical designs worth discussing, and a fourth strategy that avoids the question entirely. Buying the wrong one for your case is the single most common way this project ends in a return label, so spend the five minutes.
1. The horizontal support bracket (the stand). DarkFlash's hardware guide describes this as the most common style: an adjustable support point on top of a base that rests on the bottom of the case for stability (DarkFlash). The base sits on the PSU shroud or case floor, a column rises from it, and the top of the column carries a pad or a small cradle that the GPU's bottom edge rests on. These are the most foolproof to install because they do not interface with the card's mounting hardware at all — gravity and a flat base do the work. They are also the easiest to get wrong on airflow, because a wide base sitting on a shroud can block a bottom-mounted intake fan.
The jack-style bracket is a sub-species of the stand. DarkFlash notes that jack-style GPU brackets use a screw mechanism to raise the support point, which makes them more compact and visually minimal than larger stand-style brackets. Think of a tiny scissor jack or a threaded post: you place it, then turn the screw to raise the pad until it kisses the backplate. The compactness is the selling point — a jack footprint is a fraction of a wide stand's — and for tight builds it is often the only stand that fits.
2. The expansion-slot bracket. DarkFlash identifies this as a distinct design that mounts to the case's PCIe expansion slots and supports the GPU from below. Instead of standing on the case floor, it bolts into one or two of the unused expansion-slot positions behind the card and extends an arm inward and upward to cradle the GPU's far end. The advantage is that it references the chassis at the same rigid plane the card's own I/O bracket uses, so the geometry is clean and it touches the case floor not at all — excellent for builds with bottom intake fans. The disadvantage is that it consumes expansion slots, which is a problem if your card is already triple-slot and your case only has seven.
3. The vertical-mount conversion. Not a bracket per se. Corsair lists vertical GPU mounting as another way to minimize sag, using a PCIe riser cable to reposition the graphics card vertically. Rotate the card 90 degrees so its long axis is vertical, and gravity now pulls along the card's length rather than across it. The cantilever vanishes because there is no longer a long horizontal lever. We cover this as a real alternative in its own section, because it is the correct answer for some builds and a thermal trap for others.
Material and lighting are the last axis. The 2026 roundup tells buyers to evaluate adjustability, case compatibility, ARGB versus non-RGB, and build material when choosing a bracket. The roundup's budget pick, the nkomax GPU Brace Support, is described as an aluminum-alloy build with a height range of 72 to 128 mm — a useful concrete reference point for what "adjustable stand" actually means in millimeters. Aluminum is stiffer and does not creep under sustained load the way some cheap injection-molded plastic posts do; if you are choosing between a $9 plastic stand and a $15 aluminum one, the metal is the correct miserly choice precisely because it is the one you never have to think about again. ARGB is orthogonal to function. A lit bracket supports a card exactly as well as an unlit one and adds one more cable to route.
One more selection factor that the marketing rarely foregrounds: case material and mounting method. A 2026 JOYJOM short positions a GPU sag bracket specifically as a fix for non-magnetic cases — a reminder that some brackets rely on magnetic bases to grab the steel case floor, and those are useless in an aluminum or tempered-glass-floor chassis. Check what your bracket's base actually grips before you assume it will stay put.
Measuring Your Sag First
You cannot fix what you have not measured, and you cannot prove a fix that you did not baseline. This section is three steps of measurement before the wrench comes out. Skipping it is the amateur move; it is also how people over-tighten a bracket and bow the card upward into the slot.
Measurement step A — physical droop. Power down, unplug the PSU, flip the switch off, and wait thirty seconds. With the case on its side or open, find the bottom edge of the card at its far end (the end away from the I/O bracket). Measure the vertical distance from that edge to a fixed reference — the top of the PSU shroud, or a horizontal slot line on the case. Then measure the same gap at the slot end of the card. The difference between the two is your droop. On a healthy mounted card it should be under 1 mm. On a sagging flagship left for a year it is routinely 4-8 mm, and at the extreme, visibly more.
If you want an angle rather than a raw drop, the trigonometry is trivial, and here is a script that does it so you stop eyeballing it:
#!/usr/bin/env python3
# sag.py - estimate droop angle from two edge-height measurements
import math

slot_end_mm = 12.0   # gap under card at the slot end, mm
tip_end_mm  = 5.5    # gap under card at the far end, mm
card_len_mm = 313.0  # RTX 4090 FE; use your card's real length

drop = slot_end_mm - tip_end_mm           # positive = far end is lower
angle = math.degrees(math.atan2(abs(drop), card_len_mm))
print(f"droop: {abs(drop):.1f} mm over {card_len_mm:.0f} mm = {angle:.2f} deg")
Run it and you get something like:
$ python3 sag.py
droop: 6.5 mm over 313 mm = 1.19 deg
A degree and change does not sound like much. Across a 313 mm lever loaded with 2 kg, it is plenty to ride the PCIe fingers off their happy contact angle.
Measurement step B — electrical baseline. Boot the machine, load the GPU (any game or a stress tool will do), and re-run the link-width query from the prerequisites. Record the result. You want "Current: 16x" at the card's rated PCIe generation. Anything narrower or slower under load is a flag. On Linux you can watch it live:
$ watch -n 2 'nvidia-smi --query-gpu=pcie.link.width.current,pcie.link.gen.current --format=csv,noheader'
16, 4
16, 4
16, 4
Measurement step C — thermal baseline. Sag occasionally changes contact between the cooler and parts of the board, but more practically you want a thermal baseline so that after you install a bracket — especially a wide-base stand that might choke a bottom fan — you can confirm you did not make cooling worse. Read it through lm-sensors:
$ sensors | grep -A3 -i nvidia
nvidia-pci-0100
Adapter: PCI adapter
temp1:        +71.0 C  (high = +90.0 C)
Write all three baselines down. Physical droop in millimeters, link width and gen under load, and load temperature. A weekly habit of re-logging the physical number is the cheapest fatigue-monitoring you will ever do, and a five-line shell script makes it painless:
#!/usr/bin/env bash
# log-sag.sh - record GPU tip height over time to watch for creep
LOG="$HOME/sag.log"
read -rp "far-end gap (mm): " H
printf '%s  %s mm\n' "$(date +%F)" "$H" >> "$LOG"
echo "--- last 5 readings ---"
tail -n 5 "$LOG"
Expected output after a few weeks of discipline:
$ ./log-sag.sh
far-end gap (mm): 11.8
--- last 5 readings ---
2026-05-21  6.0 mm
2026-05-28  6.0 mm
2026-06-04  11.5 mm
2026-06-11  11.8 mm
2026-06-18  11.8 mm
The jump on 2026-06-04 is the day the bracket went in. The flat line afterward is the entire point of this article.
Installation in 12 Steps
This is the core procedure for a horizontal stand or jack-style bracket, which is what most people buy. Expansion-slot brackets differ only at the mounting step, noted inline. Budget thirty minutes the first time, ten the second. Each step has a rationale, because a step you do not understand is a step you will do wrong.
- Power down completely and unplug. Shut down the OS, flip the PSU switch to off, and pull the wall plug. Rationale: you will be touching the area around the PCIe connector and the card's power connectors. A live system here is how you turn a $15 project into a four-figure one. Wait thirty seconds for capacitors to bleed down and put on the anti-static strap.
- Lay the case flat, motherboard side up. Remove the side panel. Rationale: with the case horizontal, gravity is pulling the card straight down toward your work surface, which is exactly the direction the bracket will support it. It also means nothing falls into the board if you drop a screw, and it gives you a true horizontal reference for the level later.
- Re-measure the droop in this orientation. The numbers you took standing up will differ slightly lying down because the load direction relative to the chassis changed. Rationale: you want your reference measurement taken in the same orientation you will install in, or your "after" comparison is meaningless.
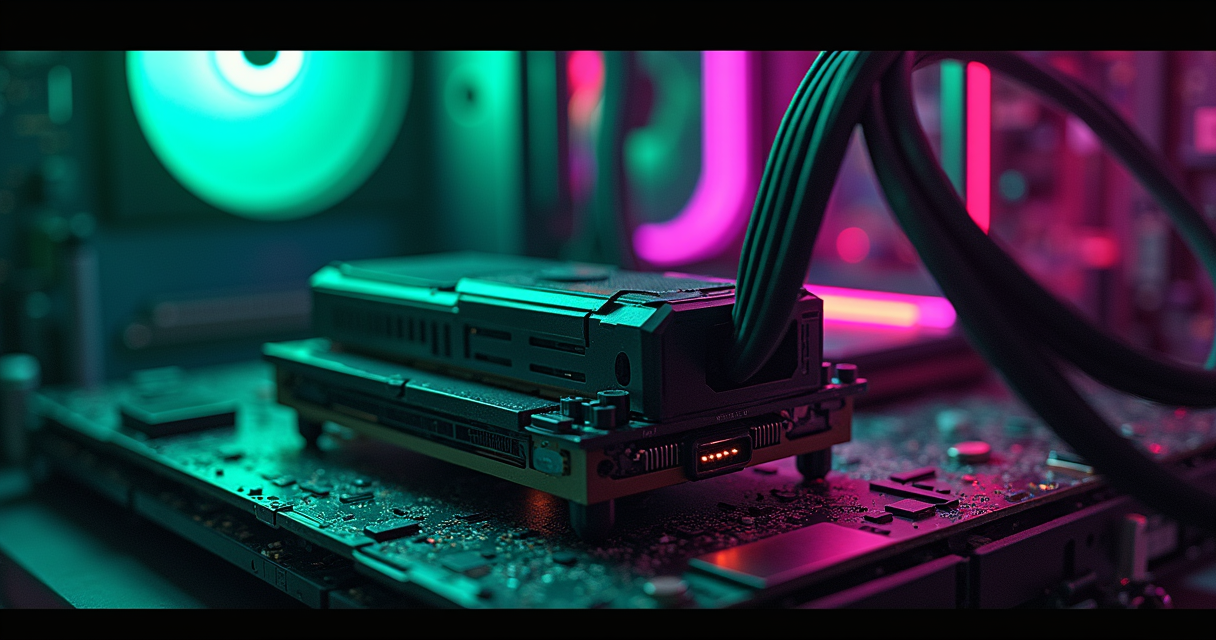
- Identify the support contact point on the card. Look at the bottom edge of the card's far end. You want a flat, rigid section of the metal backplate or shroud — not a fan, not a plastic fin shroud, not a heat-pipe end, and ideally not directly over a fragile component. Rationale: the bracket transmits the card's entire cantilevered weight through this one contact patch. Put it under structure, not under a fan blade.
- Cut and apply a foam shim to the contact point. Stick a 1-2 mm strip of EVA foam or rubber to the top pad of the bracket, or to the card's backplate where the pad will touch. Rationale: bare metal-on-metal can scratch an anodized backplate, can conduct in ways you do not want, and concentrates load on a hard edge. The shim spreads the contact patch and protects the finish. This is the step everyone skips and regrets.
- Position the bracket base. For a stand, set the base on the PSU shroud or case floor directly below your chosen contact point. For a jack, the same. For an expansion-slot bracket, instead bolt the bracket into the appropriate empty expansion slot(s) behind the card now, and skip to step 8. Rationale: the base must sit on a flat, load-bearing surface and must be directly under the support point so the force vector is vertical, not skewed.
- Confirm the base does not block airflow. Look at what is under and around the base. If your case has a bottom intake fan, the base must not sit over it. Lian Li markets the GB-001 on exactly this point — the company states the bracket "doesn't restrict airflow," which matters when bottom-mounted fans or open airflow paths feed the GPU. Rationale: a bracket that fixes sag and raises your load temps by 6 degrees is a bad trade. If the base blocks a fan, switch to a jack-style or expansion-slot design.
- Raise the support to first contact only. Extend the stand's column, or turn the jack screw, or adjust the expansion-slot arm, until the pad just touches the shimmed contact point. The nkomax-class adjustable stands cover roughly 72-128 mm of height range, so there is plenty of travel — use the minimum that reaches. Rationale: "first contact" means the pad is touching but not yet lifting. This is your zero. Everything past here is correction, and you want to apply it deliberately.
- Lift to remove the droop, and stop. Raise the support further in small increments, watching the card's far edge rise back toward level. Use the spirit level on the top edge of the card or on a flat part of the backplate. Stop the instant the card reads level — typically a fraction of a millimeter to a millimeter of lift past first contact. Rationale: this is the critical step and the one with the most failure potential. You are not trying to push the card up; you are trying to return it to flat. Over-lifting bows the card the other way and pries the slot-end fingers up against the top of the slot, which is the same fretting problem inverted. Level is the target, not "as high as it goes."
- Verify with the level and the caliper. Re-measure the slot-end gap and the far-end gap. They should now be within a millimeter of each other. The spirit level should read flat or within half a degree. Rationale: trust the numbers, not your eye. A tempered-glass case and ambient lighting will fool your eye into thinking a tilted card is straight.
- Lock the adjustment. Tighten the stand's locking collar, the jack's lock nut, or the expansion-slot bracket's screws. Then re-check the level, because tightening often nudges the height. Rationale: an unlocked adjustable support will creep back down under sustained load over weeks, and you will be back where you started without noticing. Lock it, then verify the lock did not change the geometry.
- Reassemble, boot, and re-instrument. Panel back on, plug in, power up, load the GPU, and re-run the link-width and temperature queries. Rationale: you measured a baseline for a reason. Confirm the link is full width at full gen and that load temps did not regress. Then, and only then, is the job done.
That is the whole procedure. The two steps people botch are 9 (over-lifting) and 7 (blocking a fan). Everything else is mechanical hygiene.
The Vertical Mount Alternative
Sometimes the right move is to delete the cantilever instead of propping it up. Corsair explicitly lists vertical GPU mounting — rotating the card to a vertical orientation using a PCIe riser cable — as another way to minimize sag. The logic is sound: when the card's long axis runs vertically, gravity pulls along the length of the PCB and the I/O bracket rather than across a horizontal lever. There is no long diving board to droop. The slot still bears weight, but the bending moment that causes sag is largely gone.
It is not a free win, and the deadpan truth is that vertical mounting trades a mechanical problem for a thermal one. Here is the honest ledger.
In favor of vertical mounting:
- The sag problem genuinely disappears at the source, not as a patched symptom.
- In a tempered-glass case, a vertical card shows its cooler face to the window, which is the entire aesthetic argument and, again, aesthetics are a real requirement for many builders.
- It frees up the bottom of the case for whatever else you wanted down there.
Against vertical mounting:
- Airflow. A vertically mounted card in a case without enough side clearance has its intake fans pressed close to the glass panel, and the card starves for air. Many cases that support vertical mounting only do so with a few millimeters of glass clearance, which is the difference between fine and 10 degrees hotter under load. Check the case's documented vertical clearance before committing.
- Riser quality. You need a PCIe 4.0 or 5.0 rated riser cable. A cheap or out-of-spec riser will cause exactly the intermittent link-down symptoms we are trying to eliminate — you can trade gravity-induced fretting for signal-integrity flakiness and end up no better off. Match the riser's rated generation to your card and board.
- Cost and slots. A good riser plus a vertical mounting bracket costs several times what a sag bracket costs, and some vertical mounts still occupy expansion-slot real estate.
My recommendation, since you asked by reading this far: vertical mounting is the correct choice when your case explicitly supports it with generous glass clearance and you were going to buy a quality riser anyway for looks. For everyone else — most builds, most cases — a $15 support bracket is the better-engineered answer to a $1,600 card's drooping, and it does not put a signal-integrity question mark on your PCIe link. Reach for the riser when the case was designed for it; reach for the bracket otherwise.
Verifying the Fix
A bracket you installed and did not verify is a bracket you hope is working. Hope is not a quality-assurance methodology. Run the same three checks you baselined, now as an after-action confirmation, and compare line by line.
Physical confirmation. The slot-end and far-end gaps should now be within a millimeter of each other, and the spirit level should read flat. If you ran the Python script earlier, run it again with the new measurements:
$ python3 sag.py
droop: 0.4 mm over 313 mm = 0.07 deg
From 1.19 degrees to 0.07 is the bracket doing its single job. Anything under about 0.5 mm of residual droop is a success; chasing zero is the over-lifting trap.
Electrical confirmation. Load the GPU and confirm full link width and full generation. This is the check that matters most, because it is the one that catches the invisible failure mode:
$ nvidia-smi -q | grep -A2 "Link Width"
        Link Width
            Max                       : 16x
            Current                   : 16x

$ nvidia-smi --query-gpu=pcie.link.gen.current --format=csv,noheader
4
If the link was riding at 8x before and reads 16x now, the bracket did not just fix the cosmetics — it restored the contact angle of the PCIe fingers, and you have measurable proof. That is the difference between this tutorial and a forum post that says "looks better."
Thermal confirmation. Run the load test for ten minutes and re-read the temperature. You are confirming a non-regression — that the bracket did not block a fan and cook the card:
$ sensors | grep -A3 -i nvidia
nvidia-pci-0100
Adapter: PCI adapter
temp1:        +71.0 C  (high = +90.0 C)
Same temperature as baseline, within a degree or two of run-to-run variance, means you did not choke the airflow. If load temps jumped 5-plus degrees, your bracket base is blocking an intake fan and you need to revisit step 7 — switch to a jack or expansion-slot design that does not sit over the fan.
Three green checks — flat, full-width link, unchanged temps — and the job is genuinely, verifiably done. File the numbers. The next time you open the case, you will want the comparison.
Common Pitfalls and Fixes
The category is simple enough that people get cocky and then make the same handful of mistakes. Here are the ones worth naming.
Pitfall 1 — Over-lifting the card. The single most common error. People treat "more support" as strictly better and crank the stand until the card is visibly pushed up. This bows the PCB upward and forces the slot-end fingers against the top of the slot at exactly the bad angle you were trying to escape, just inverted. Fix: the target is level, confirmed with a spirit level and a caliper, not maximum height. Raise to first contact, then lift only enough to bring the card back to flat — usually well under a millimeter of travel past contact. Re-check after locking.
Pitfall 2 — Blocking a bottom intake fan. A wide-base stand parked on the PSU shroud over a bottom intake fan trades sag for thermals and quietly adds several degrees under load. Fix: measure where your bottom fans are before buying. If the only flat support surface is over a fan, use a jack-style or expansion-slot bracket instead. Lian Li sells the GB-001 specifically on its claim that it "doesn't restrict airflow" — that property is a feature you should actively shop for, not an afterthought.
Pitfall 3 — Metal-on-metal contact. A bare bracket pad against an anodized backplate scratches the finish, concentrates load on a hard edge, and in rare layouts creates a conductive path you did not plan for. Fix: a 1-2 mm foam or rubber shim on the contact point. Costs nothing, prevents three problems, and spreads the load over a larger patch.
Pitfall 4 — Supporting under a fan or fragile component. Some people place the support pad under the nearest convenient point, which turns out to be a fan shroud or directly beneath a delicate part of the PCB. The card's full weight then loads a structure not designed to carry it. Fix: support under the rigid backplate or a structural section of the metal shroud at the card's far end. If the card has no good contact point at the far end, move the support inboard to the nearest rigid structure — partial support near the middle still cuts the lever arm dramatically.
Pitfall 5 — Trusting the magnet in a non-magnetic case. Some budget brackets use a magnetic base to grip the case floor. In an aluminum case, a tempered-glass-floor case, or any non-ferrous chassis, that magnet grips nothing and the bracket slides. A 2026 JOYJOM short flags GPU sag brackets specifically as a fix for non-magnetic cases — meaning the mounting method is a real selection factor, not a detail. Fix: verify your case floor is steel before buying a magnetic-base bracket, or buy a stand with a flat weighted base or an expansion-slot bracket that bolts to the chassis.
Pitfall 6 — Not locking the adjustment. An adjustable stand left unlocked will creep down under sustained load and thermal cycling over weeks, and you will silently return to a sagging card. Fix: tighten the locking collar or lock nut after setting height, then re-verify the level — and adopt the weekly logging script so any creep shows up as a number before it shows up as damage.
Troubleshooting Table
Symptom-to-cause-to-fix, for the problems that actually recur. Read the symptom column, find yours, apply the fix.
| Symptom | Likely cause | Fix |
|---|---|---|
| Card still visibly tilts after install | Support set to first contact only, not lifted to level | Raise the support in small steps until the spirit level reads flat, then lock |
| Card now bows upward; slot creaks | Over-lifted past level (Pitfall 1) | Lower the support until the card returns to flat; target level, not max height |
| Load temps rose 5+ C after install | Bracket base blocking a bottom intake fan | Reposition off the fan, or switch to a jack-style or expansion-slot bracket |
| PCIe link reads 8x or PCIe 3.0 under load | Fingers riding at an angle, or a bad riser if vertical | Reseat card, level it with the bracket; replace out-of-spec riser cables |
| Bracket slides out of position | Magnetic base on a non-magnetic case floor (Pitfall 5) | Use a weighted flat-base stand or an expansion-slot bracket that bolts in |
| Backplate scratched at contact point | Metal-on-metal, no shim (Pitfall 3) | Add a 1-2 mm foam/rubber shim; touch up only cosmetic, not structural |
| Sag returned weeks later | Adjustment not locked; stand crept down (Pitfall 6) | Lock the collar/nut and re-verify; log far-end height weekly |
| Bracket too short or too tall to reach | Height range mismatch for the build (e.g. needed 72-128 mm) | Buy an adjustable stand whose range brackets your gap; verify before purchase |
| Card detected intermittently / vanishes from device tree | Severe fretting from prolonged sag, or failing slot solder | Reseat and support; if it persists, the slot may be damaged - test the card in another slot/board |
| Reinforced (SteelArmor) slot but card still sags | Reinforcement protects slot solder, not card weight (per Corsair) | Add an external support bracket; the steel slot alone does not stop sag |
Advanced Tips
For people who have done this once and want to do it well, or who have an unusual build that the standard procedure does not quite cover.
Support the rigid axis, not the cosmetic edge. On many flagship cards the most rigid structure at the far end is not the bottom edge of the backplate but the heat-pipe block or the metal frame the cooler bolts to. If you can identify a rigid frame member and place the support directly under it, you transmit load into structure rather than into a backplate panel that is, on some cards, just a stamped cosmetic cover. Read your card's teardown photos — the enthusiast disassembly community has photographed essentially every flagship — and support the metal that matters.
Use two support points for very long partner cards. Cards north of 340 mm with quad-slot coolers are heavy enough that a single point near the tip still leaves a span between the slot and the support that can flex. There is nothing stopping you from running an expansion-slot bracket near the tip and a small jack mid-span. Two short supported spans beat one long one. This is overkill for a 313 mm card and entirely reasonable for a 360 mm one.
Automate the link-width watchdog. If you have ever lost a card to intermittent fretting, set up a cron job that logs link width hourly so a degradation shows up as a timestamped trend rather than a surprise:
# /etc/cron.hourly/pcie-watch  (chmod +x)
#!/usr/bin/env bash
W=$(nvidia-smi --query-gpu=pcie.link.width.current --format=csv,noheader)
if [ "$W" -lt 16 ]; then
  logger -t pcie-watch "PCIe link degraded to ${W}x"
fi
Now journalctl -t pcie-watch tells you the day the link first dropped — which, correlated with your sag log, tells you whether mechanical creep is the cause.
Mind the form factor when buying. Lian Li markets the GB-001 as compatible with ATX and E-ATX boards. On a smaller mATX or ITX build the geometry changes — there is less horizontal real estate for a base, the PSU shroud may sit differently, and an expansion-slot bracket may be the only option that fits. Do not assume a bracket sized around full ATX clearances drops cleanly into a small-form-factor case.
Re-torque after the first heat cycle. Materials move when they get warm. After the first heavy gaming session post-install, power down, let it cool, and re-check the level and the lock. A bracket that was perfect at room temperature can shift a hair after the first thermal cycle, and catching it once means it stays put thereafter.
Aluminum over plastic for sustained load. The 2026 roundup's note that the nkomax budget pick is an aluminum-alloy build is not incidental. Plastic posts under permanent compressive load can cold-flow (creep) over months in a way aluminum simply does not. If the bracket is going to carry two kilograms continuously for the three-year life of the card, the few extra dollars for metal is the engineering-correct miserly choice.
The Complete Build Spec
Here is the whole thing as a single configuration of record — the kind of file you keep so that future-you, opening the case in two years, knows exactly what was done and why. Treat it as both a checklist and an as-built record. Fill in your card's real numbers.
# build.yml - anti-sag configuration of record
gpu:
  model: RTX 4090 Founders Edition   # use your actual card
  length_mm: 313
  weight_g: 2186
  rated_pcie_gen: 4
  rated_link_width: 16x

bracket:
  type: horizontal-stand        # horizontal-stand | jack | expansion-slot | vertical-riser
  model: Lian Li GB-001         # or nkomax (aluminum, 72-128 mm range)
  material: aluminum-alloy
  mobo_compat: [ATX, E-ATX]
  airflow_safe: true            # confirmed not over a bottom intake fan
  argb: false

support_point:
  contact: backplate-far-end-rigid-section
  shim: 1mm-EVA-foam
  target_state: level           # NOT maximum height
  locked: true

baseline:
  droop_mm_before: 6.5
  droop_deg_before: 1.19
  link_width_before: 16x        # check under load
  load_temp_c_before: 71

after:
  droop_mm_after: 0.4
  droop_deg_after: 0.07
  link_width_after: 16x
  load_temp_c_after: 71         # non-regression confirmed

verification:
  spirit_level_flat: true
  caliper_within_1mm: true
  link_full_width_full_gen: true
  temps_unchanged: true
  recheck_after_first_heat_cycle: true
  recheck_interval_days: 90

monitoring:
  physical_log: ~/sag.log              # weekly far-end gap, log-sag.sh
  pcie_watchdog: /etc/cron.hourly/pcie-watch
That is the entire job, captured. The bracket is a fifteen-dollar part doing a statics job that the graphics-card industry created and then declined to solve at the source. Corsair recommends it, DarkFlash catalogs three ways to build it, Lian Li sells one that does not choke your fans, and the 2026 buyer's guides have promoted it from niche to mainstream because the coolers keep getting heavier. None of that is marketing once you have measured your own card drooping a degree and change off level. Support it under the rigid structure, lift it to flat and no further, lock it, verify the link width, and log the number. Then close the case and go back to the games, which is, after all, the only reason the absurd heavy thing is in there at all.
Questions the search bar asks me
- Do I really need a sag bracket if my motherboard has a reinforced PCIe slot?
- Usually yes. Corsair states that reinforced PCIe slots do not always prevent sagging, because the steel reinforcement protects the slot's own solder anchoring rather than stopping a heavy card from rotating around the slot under gravity. An external support bracket is still recommended for many builds, especially flagship cards over 2 kg.
- What is the difference between a horizontal stand and an expansion-slot bracket?
- Per DarkFlash, a horizontal stand has a base that rests on the case floor or PSU shroud with an adjustable support point on top — the most common style. An expansion-slot bracket instead bolts into the case's unused PCIe expansion slots and supports the GPU from below, which avoids the case floor entirely and is better when you have a bottom intake fan.
- How high should I lift the card with the bracket?
- Only enough to bring the card back to level — typically under 1 mm of travel past first contact. The target is flat, confirmed with a spirit level and caliper, not maximum height. Over-lifting bows the PCB upward and forces the slot-end fingers against the top of the slot, recreating the fretting problem in reverse.
- Will a GPU bracket hurt my airflow?
- It can, if a wide base sits over a bottom intake fan, which can raise load temps several degrees. Lian Li markets the GB-001 specifically on the claim that it 'doesn't restrict airflow.' If your only flat support surface is over a fan, use a jack-style or expansion-slot bracket and confirm temps are unchanged with a tool like lm-sensors or HWiNFO after install.
- Is vertical GPU mounting better than a sag bracket?
- It depends on your case. Corsair lists vertical mounting via a PCIe riser cable as a valid way to minimize sag because it removes the horizontal cantilever. But it costs several times more than a bracket, needs a riser rated for your PCIe generation (4.0 or 5.0), and can starve the card for air if the case lacks side clearance. Use it when the case is designed for it; otherwise a $15 bracket is the better-engineered fix.

Ben covers the hardware end of retro gaming: FPGA cores, real-cartridge dumping, capture setups, CRT vs scaler workflows, and the legal and physical preservation infrastructure that keeps old games playable. Every post under this byline is reviewed pre-publish by Sam P., Editor & Operator — corrections to info@instalinkoteam.com. Published 2026-06-18 · Last updated 2026-06-18. Full bios on the author page.